Wooden Spoon Kitchen & ClemenGold Gin | Product & Food
A product and food shoot I did for Wooden Spoon Kitchen featuring ClemenGold Gin and their tasty mandarins!

Wooden Spoon Kitchen & ClemenGold Gin | Product & Food
I have always wanted to do Food Photography. I love food, I love photos about food, and I regularly page through SARIE KOS and Woolworths TASTE magazine. I have mentioned a while ago to Karen from Lovilee that I want to try and do some Food Photography projects and she referred me to Ankie from the Wooden Spoon Kitchen. She is a food blogger, food stylist and hosts cooking classes (Supper Club) at her home. We made contact and she invited me to her Supper Club this past weekend, and it was amazing.
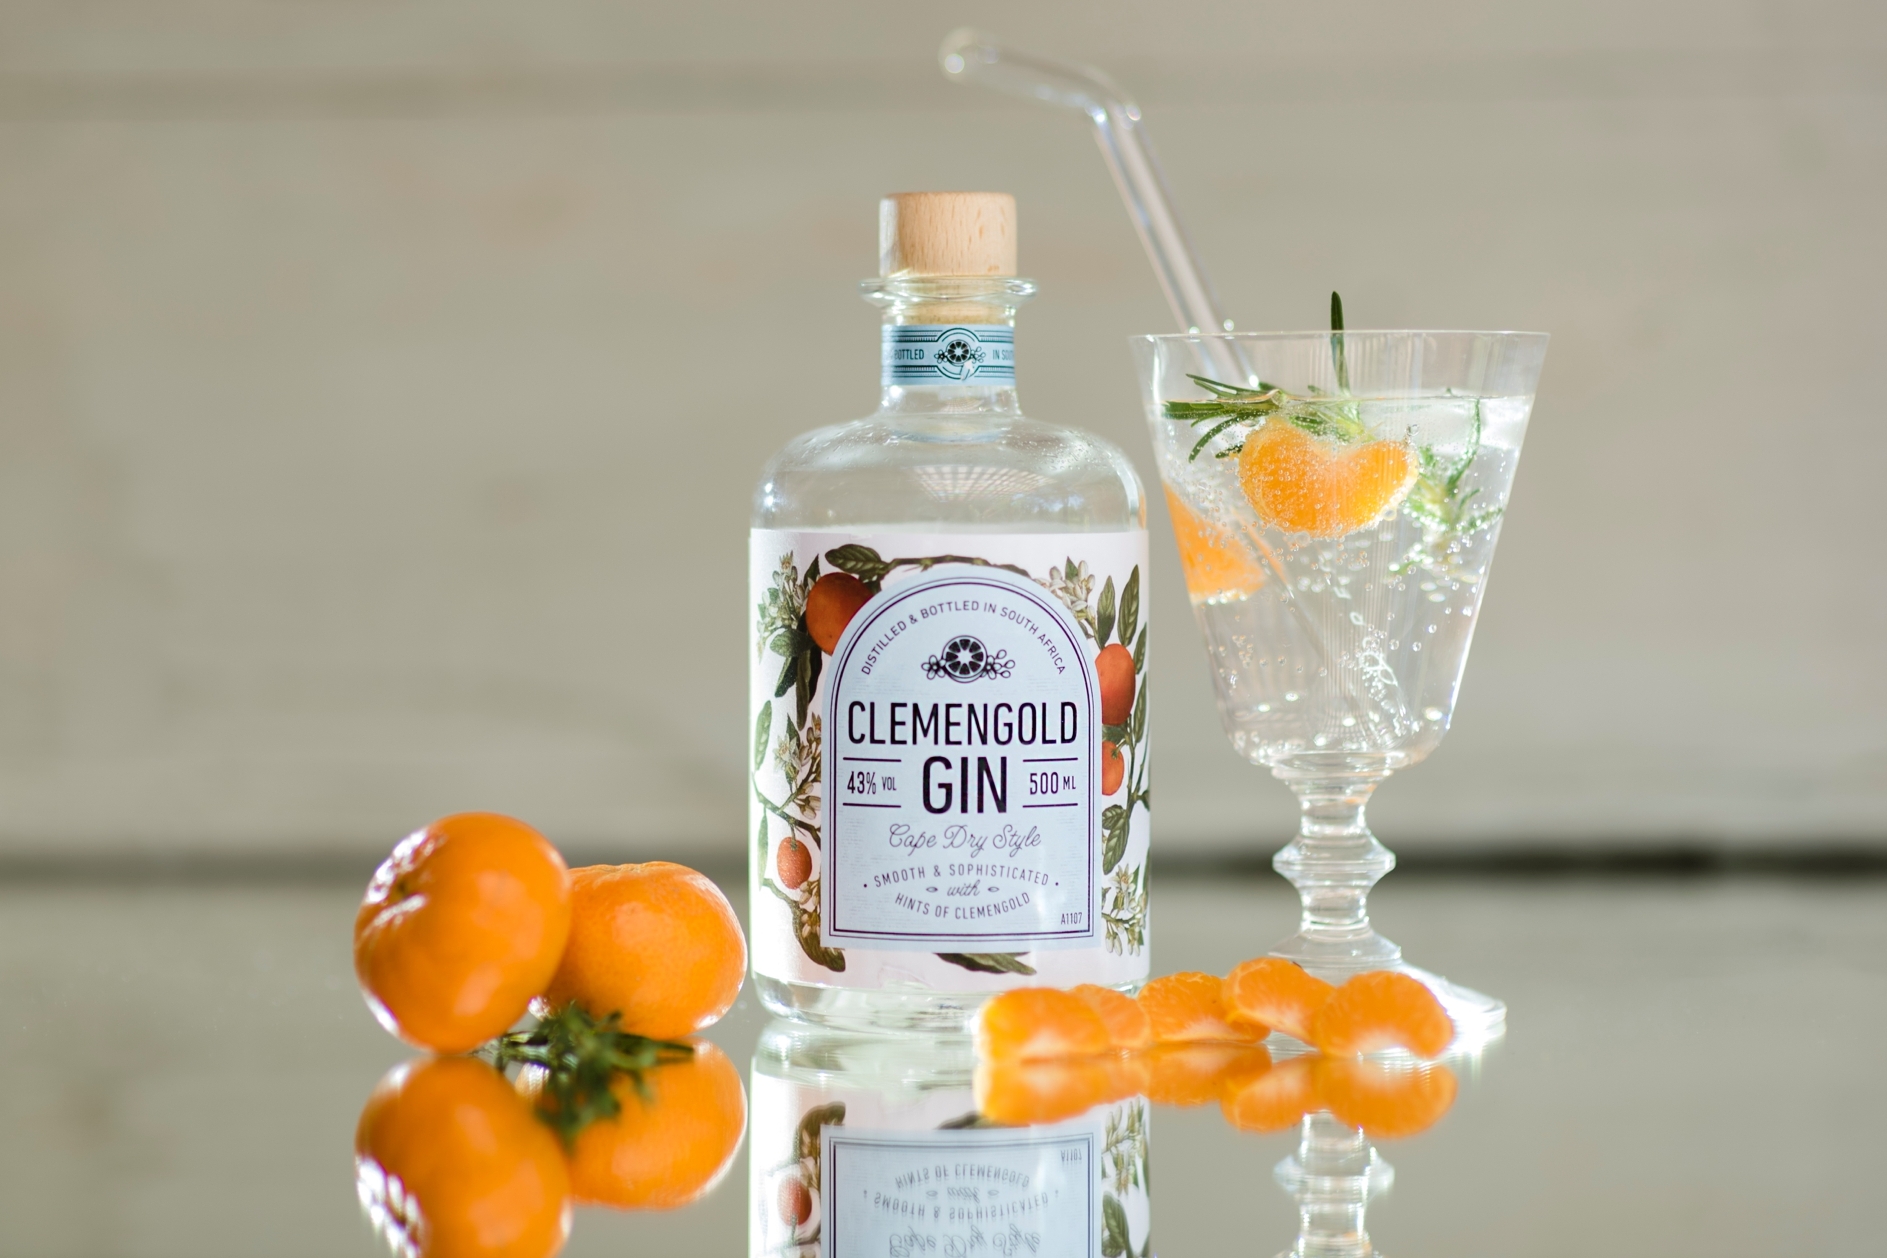
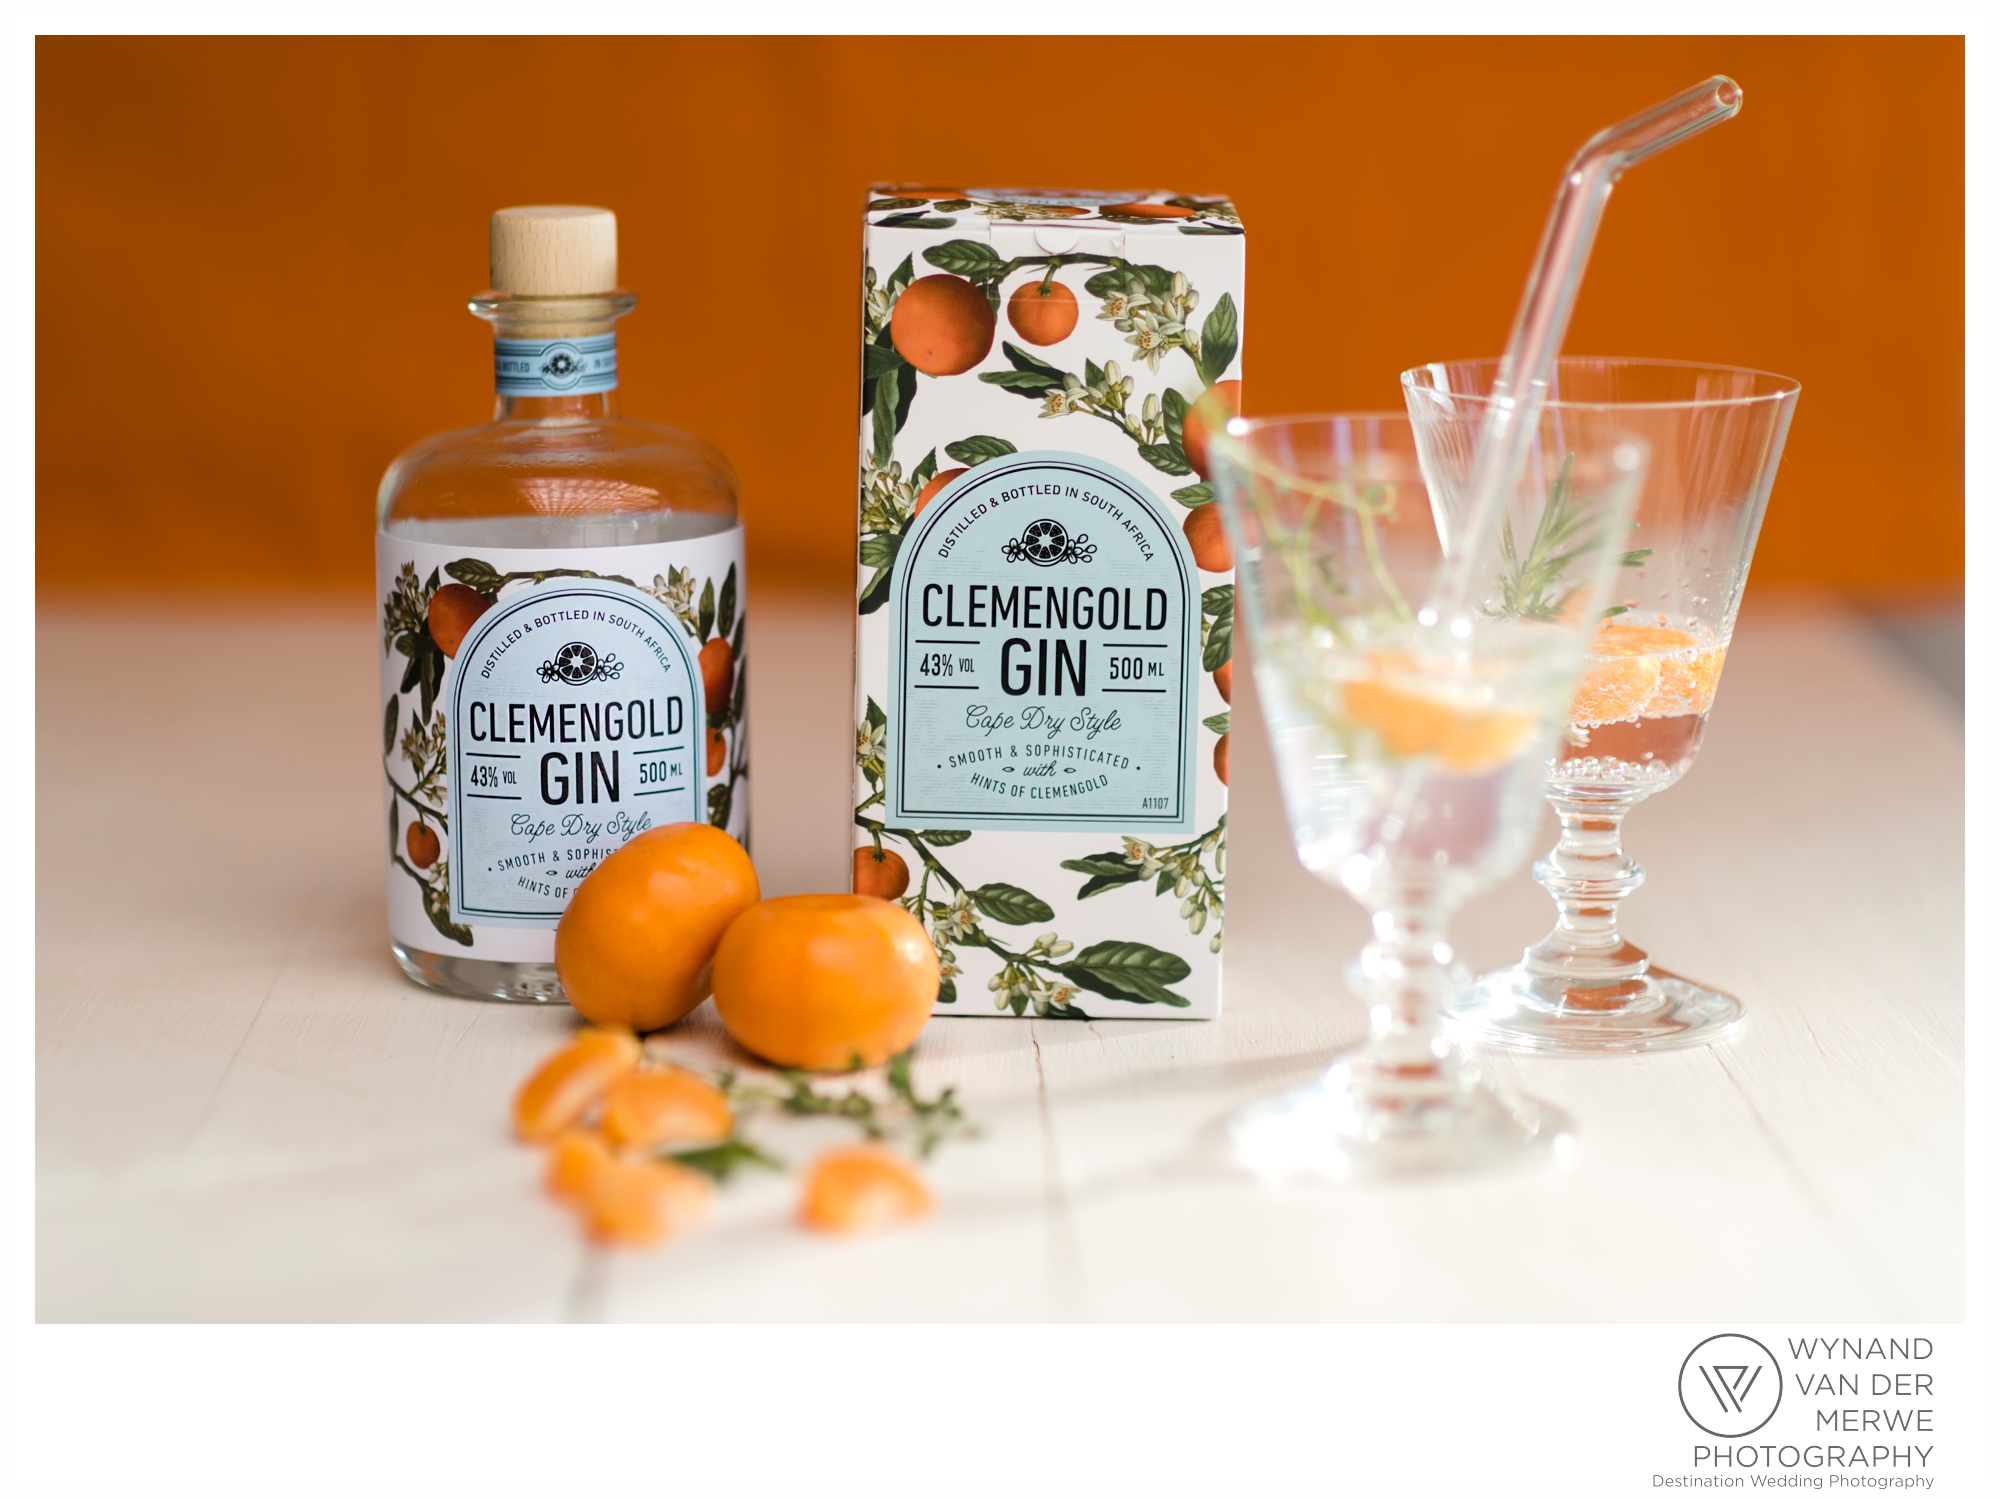
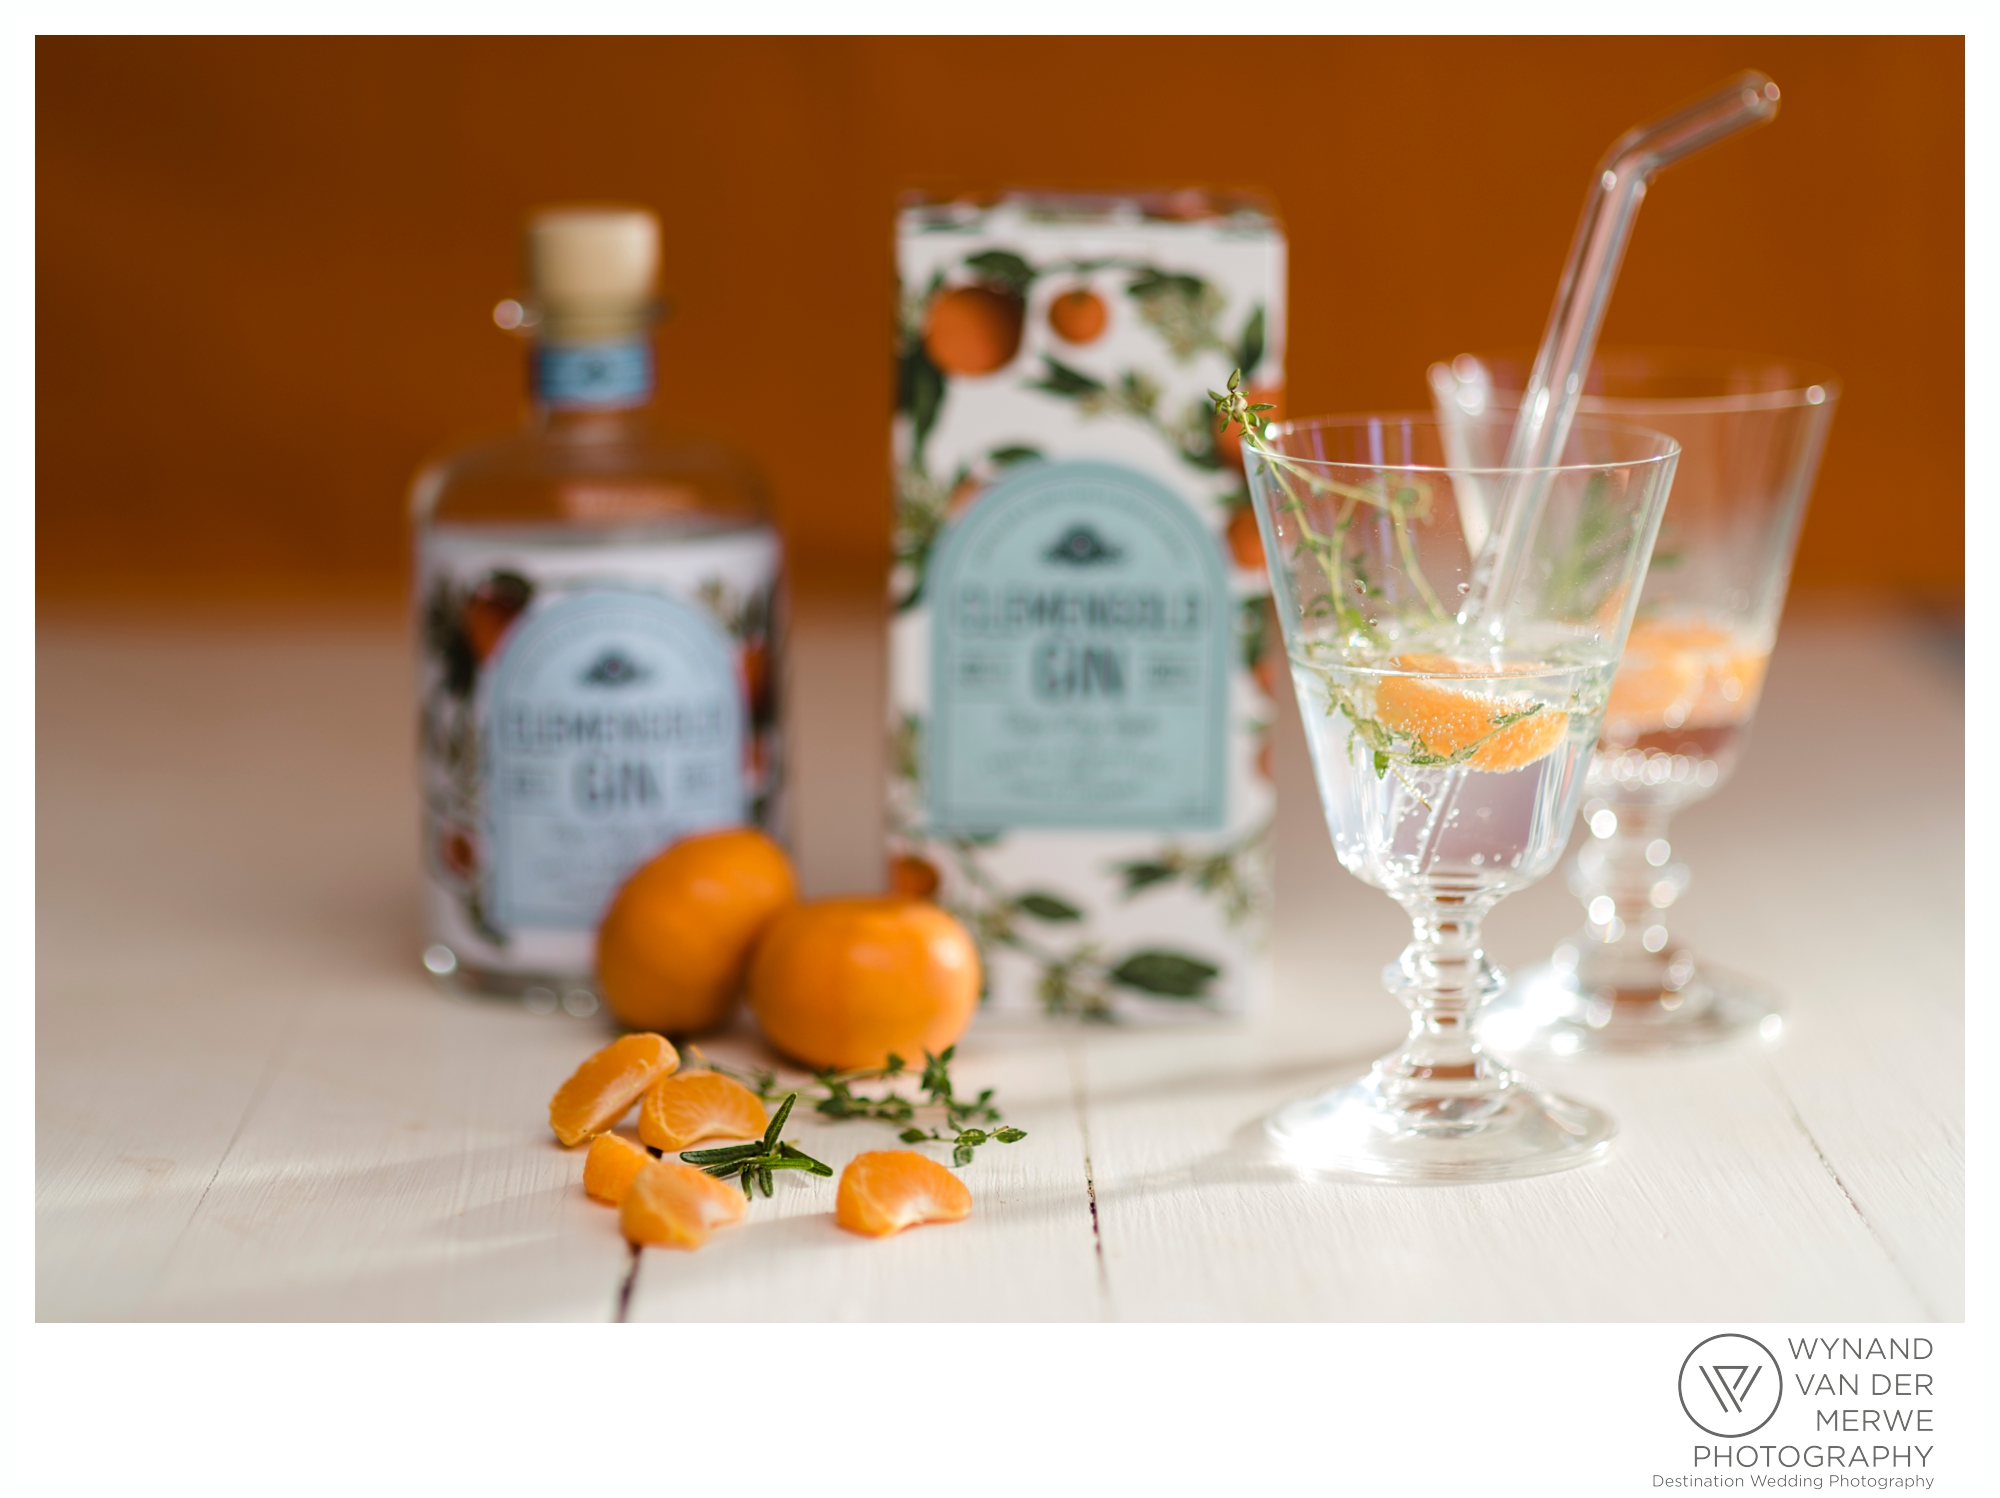
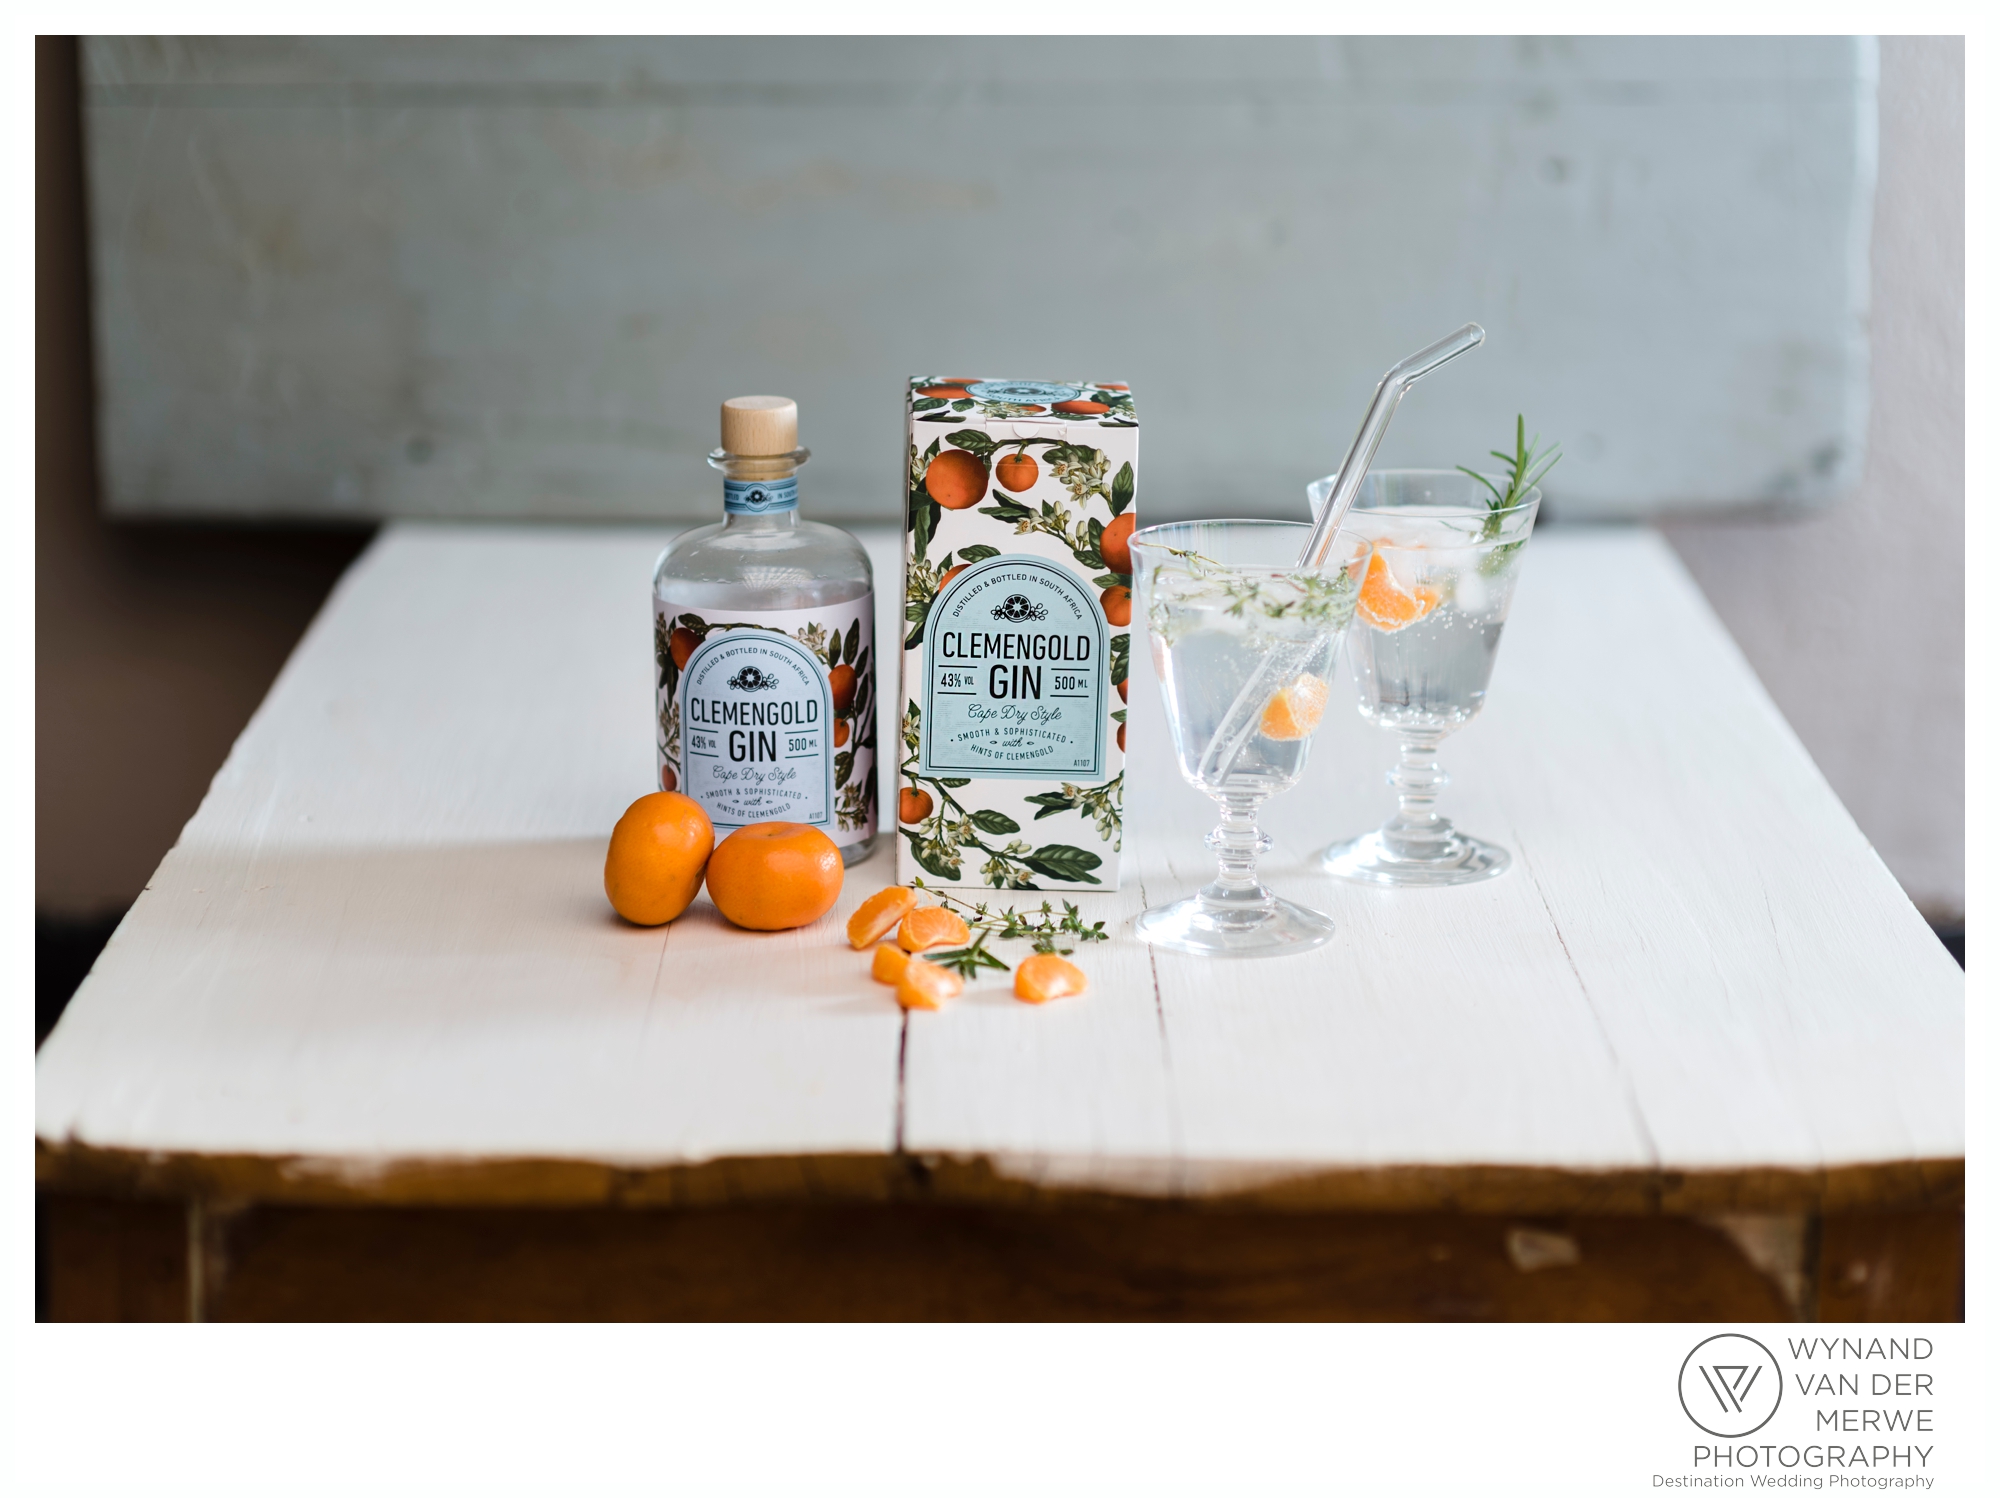
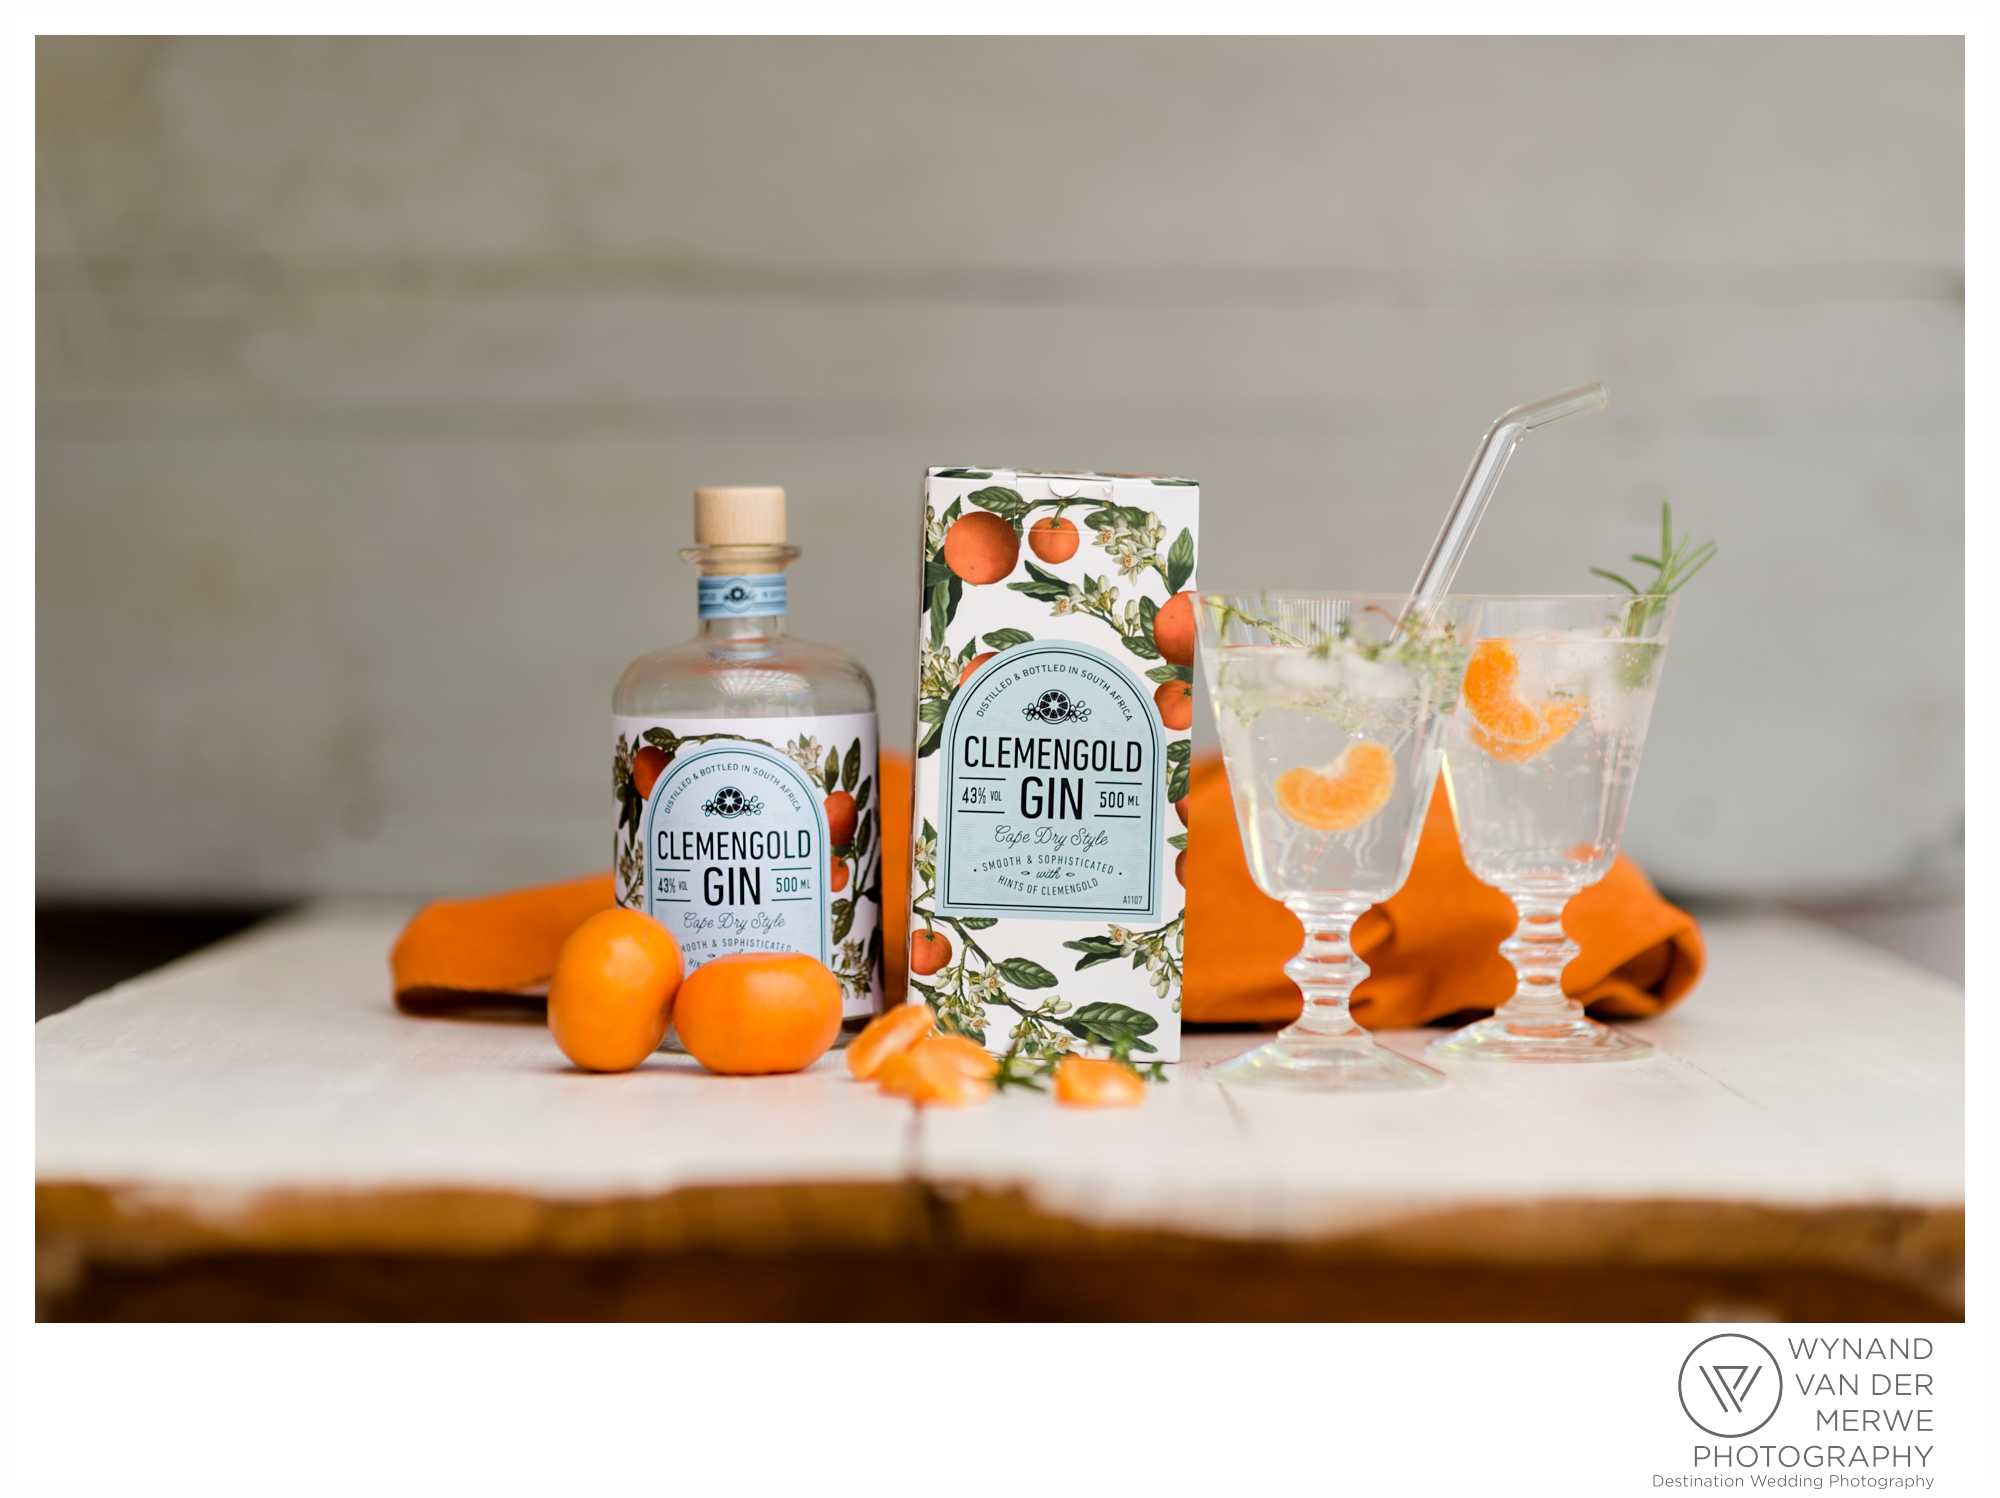
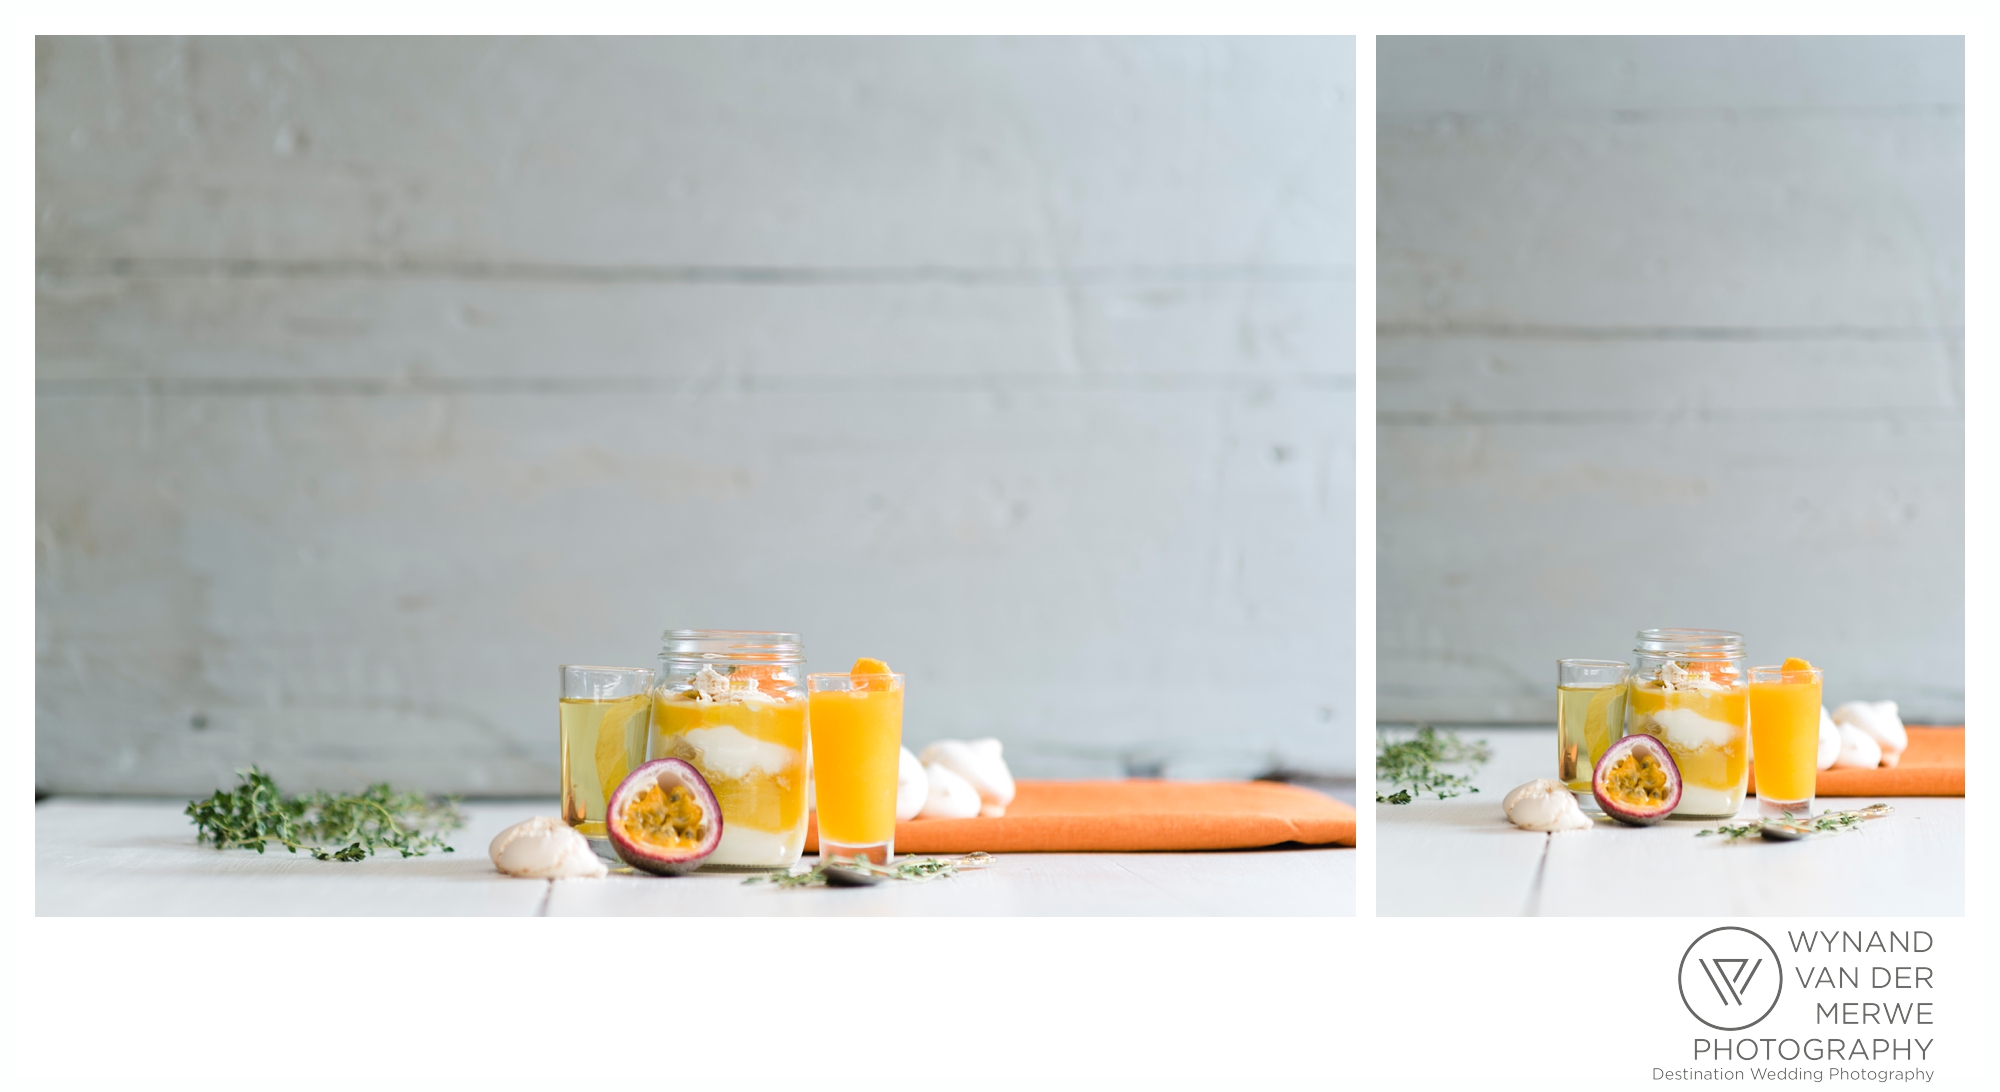
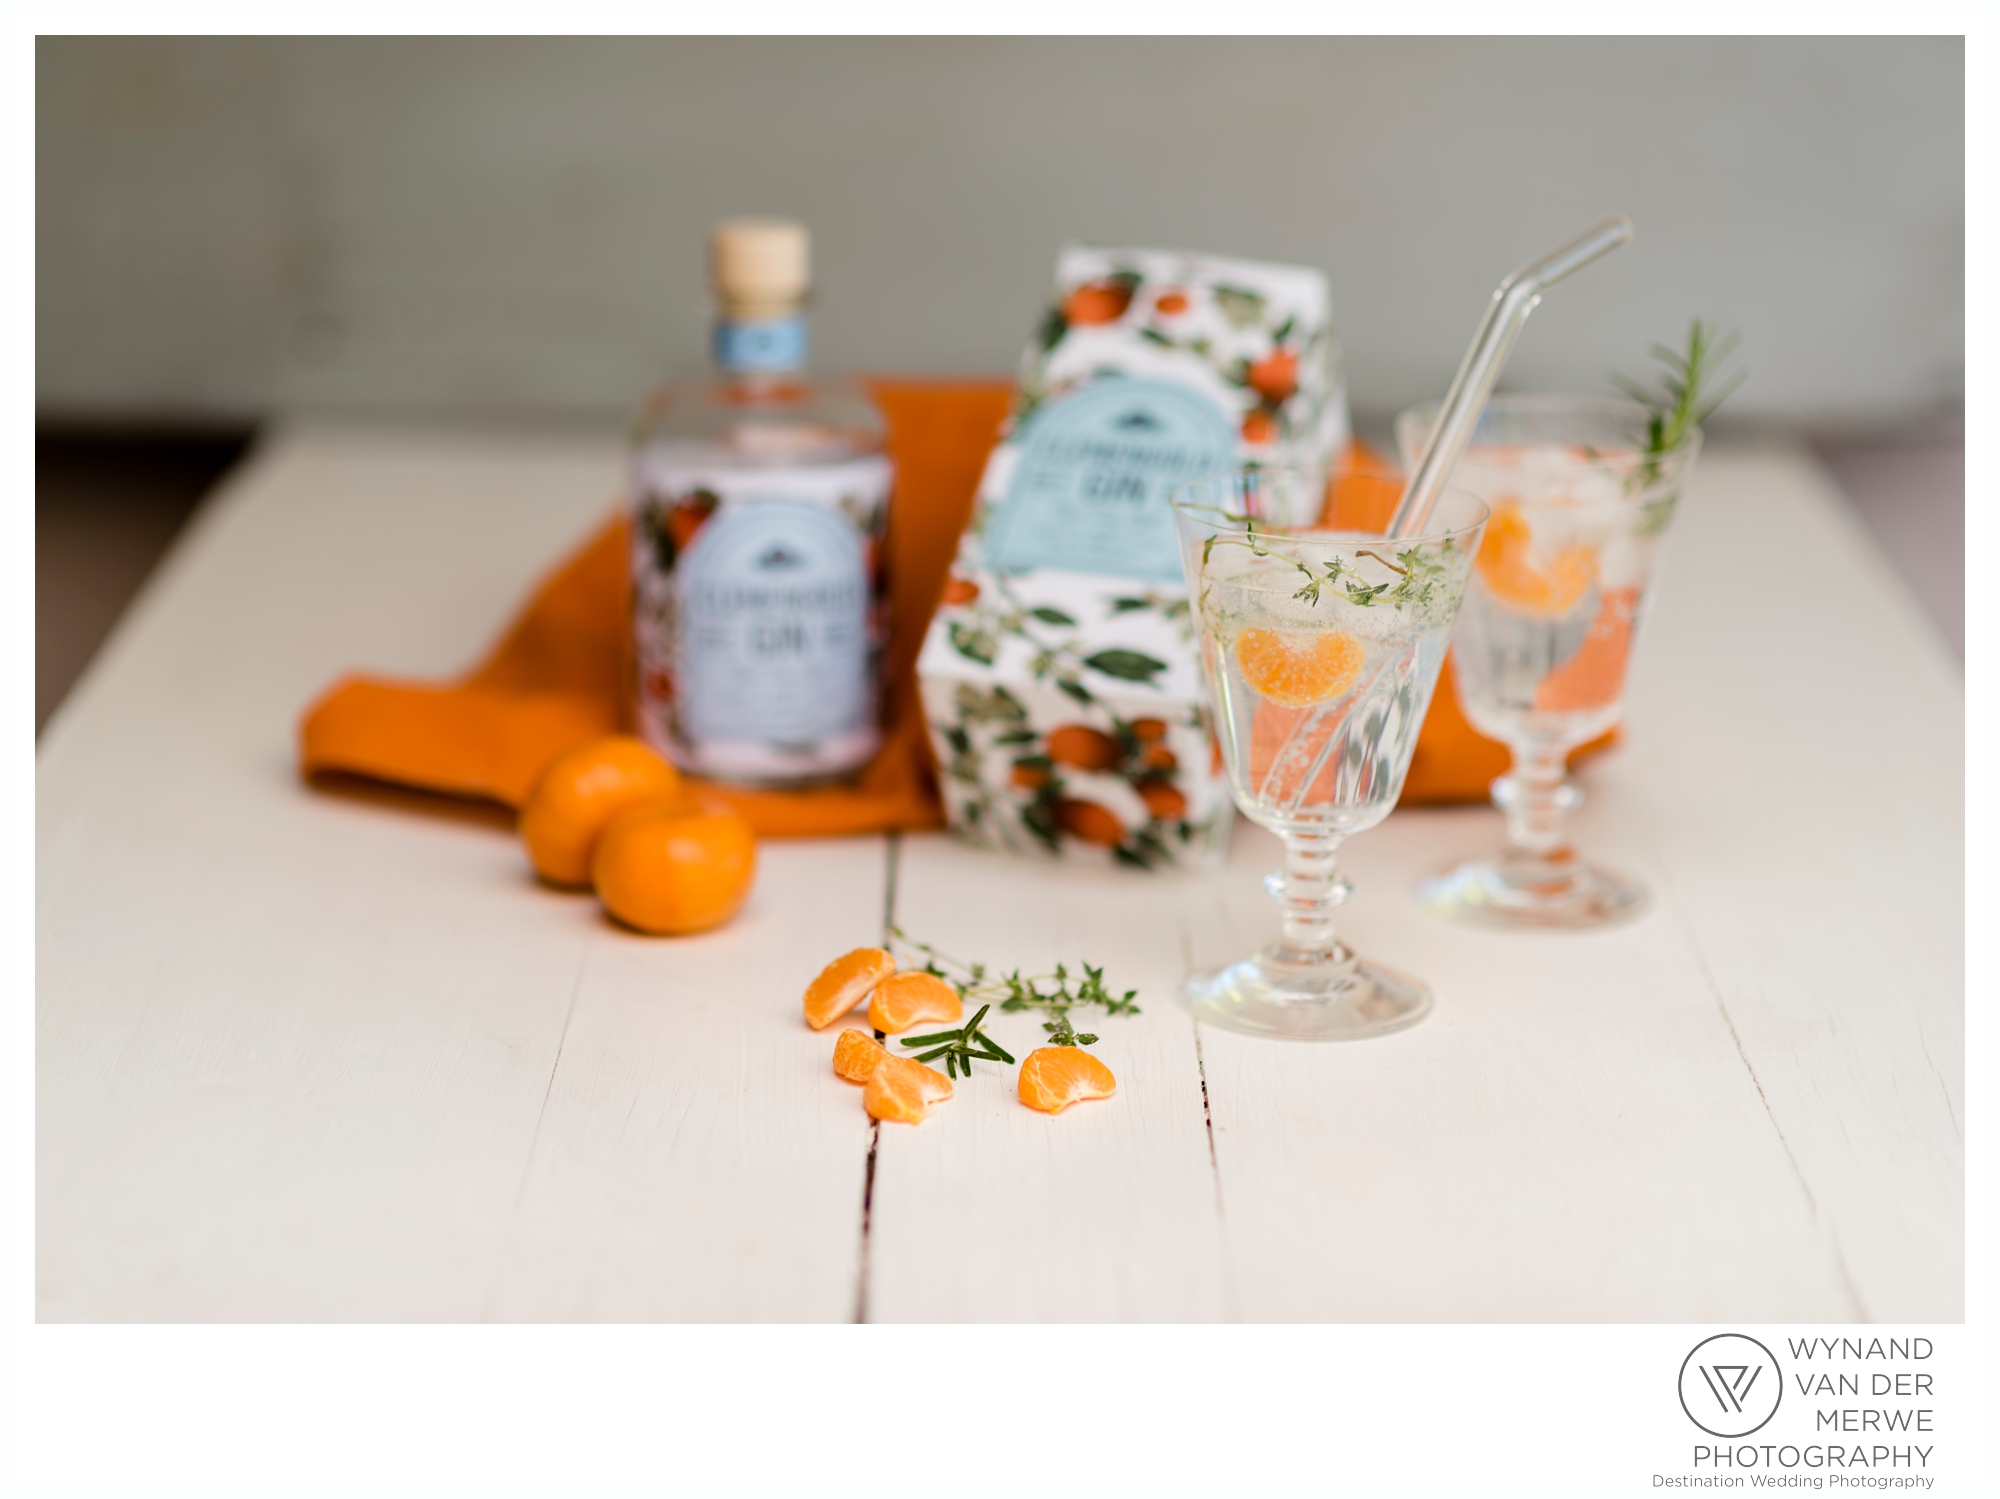
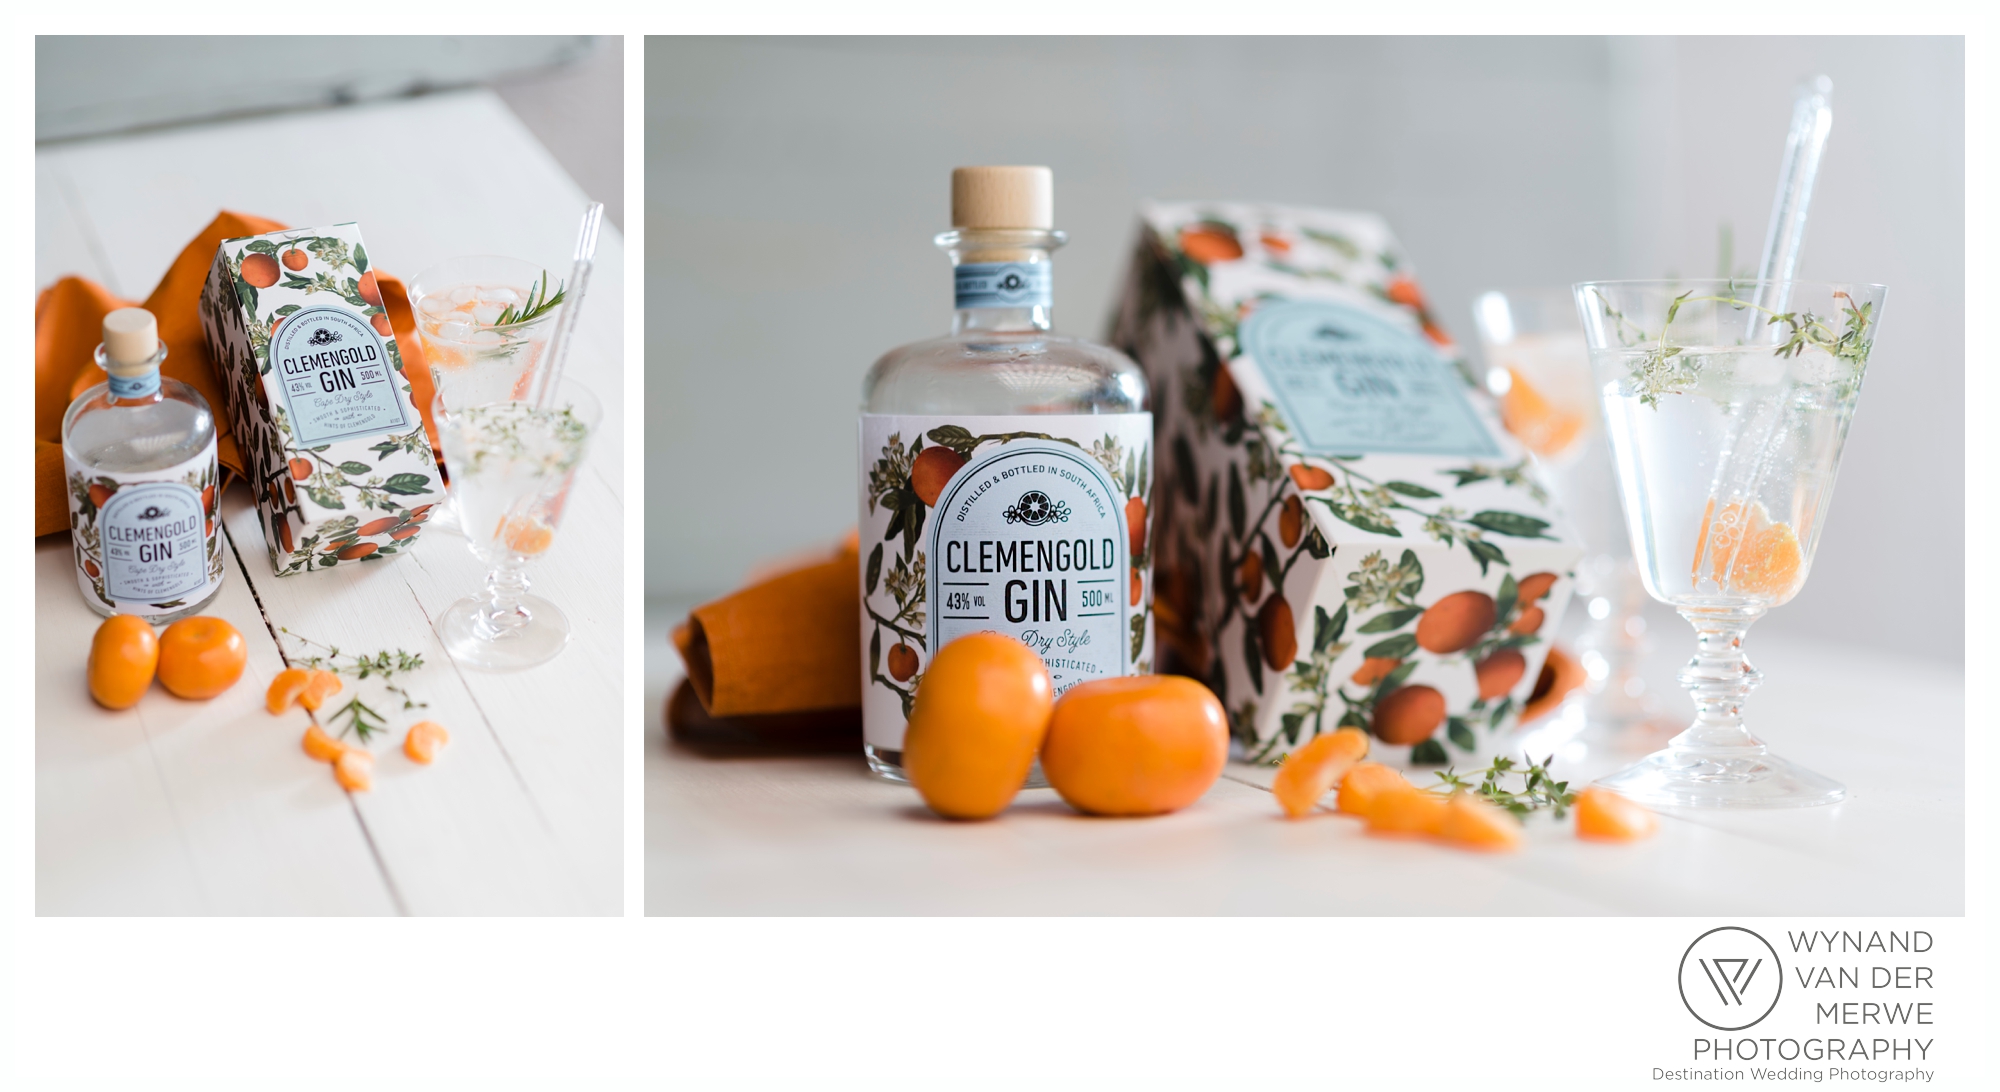
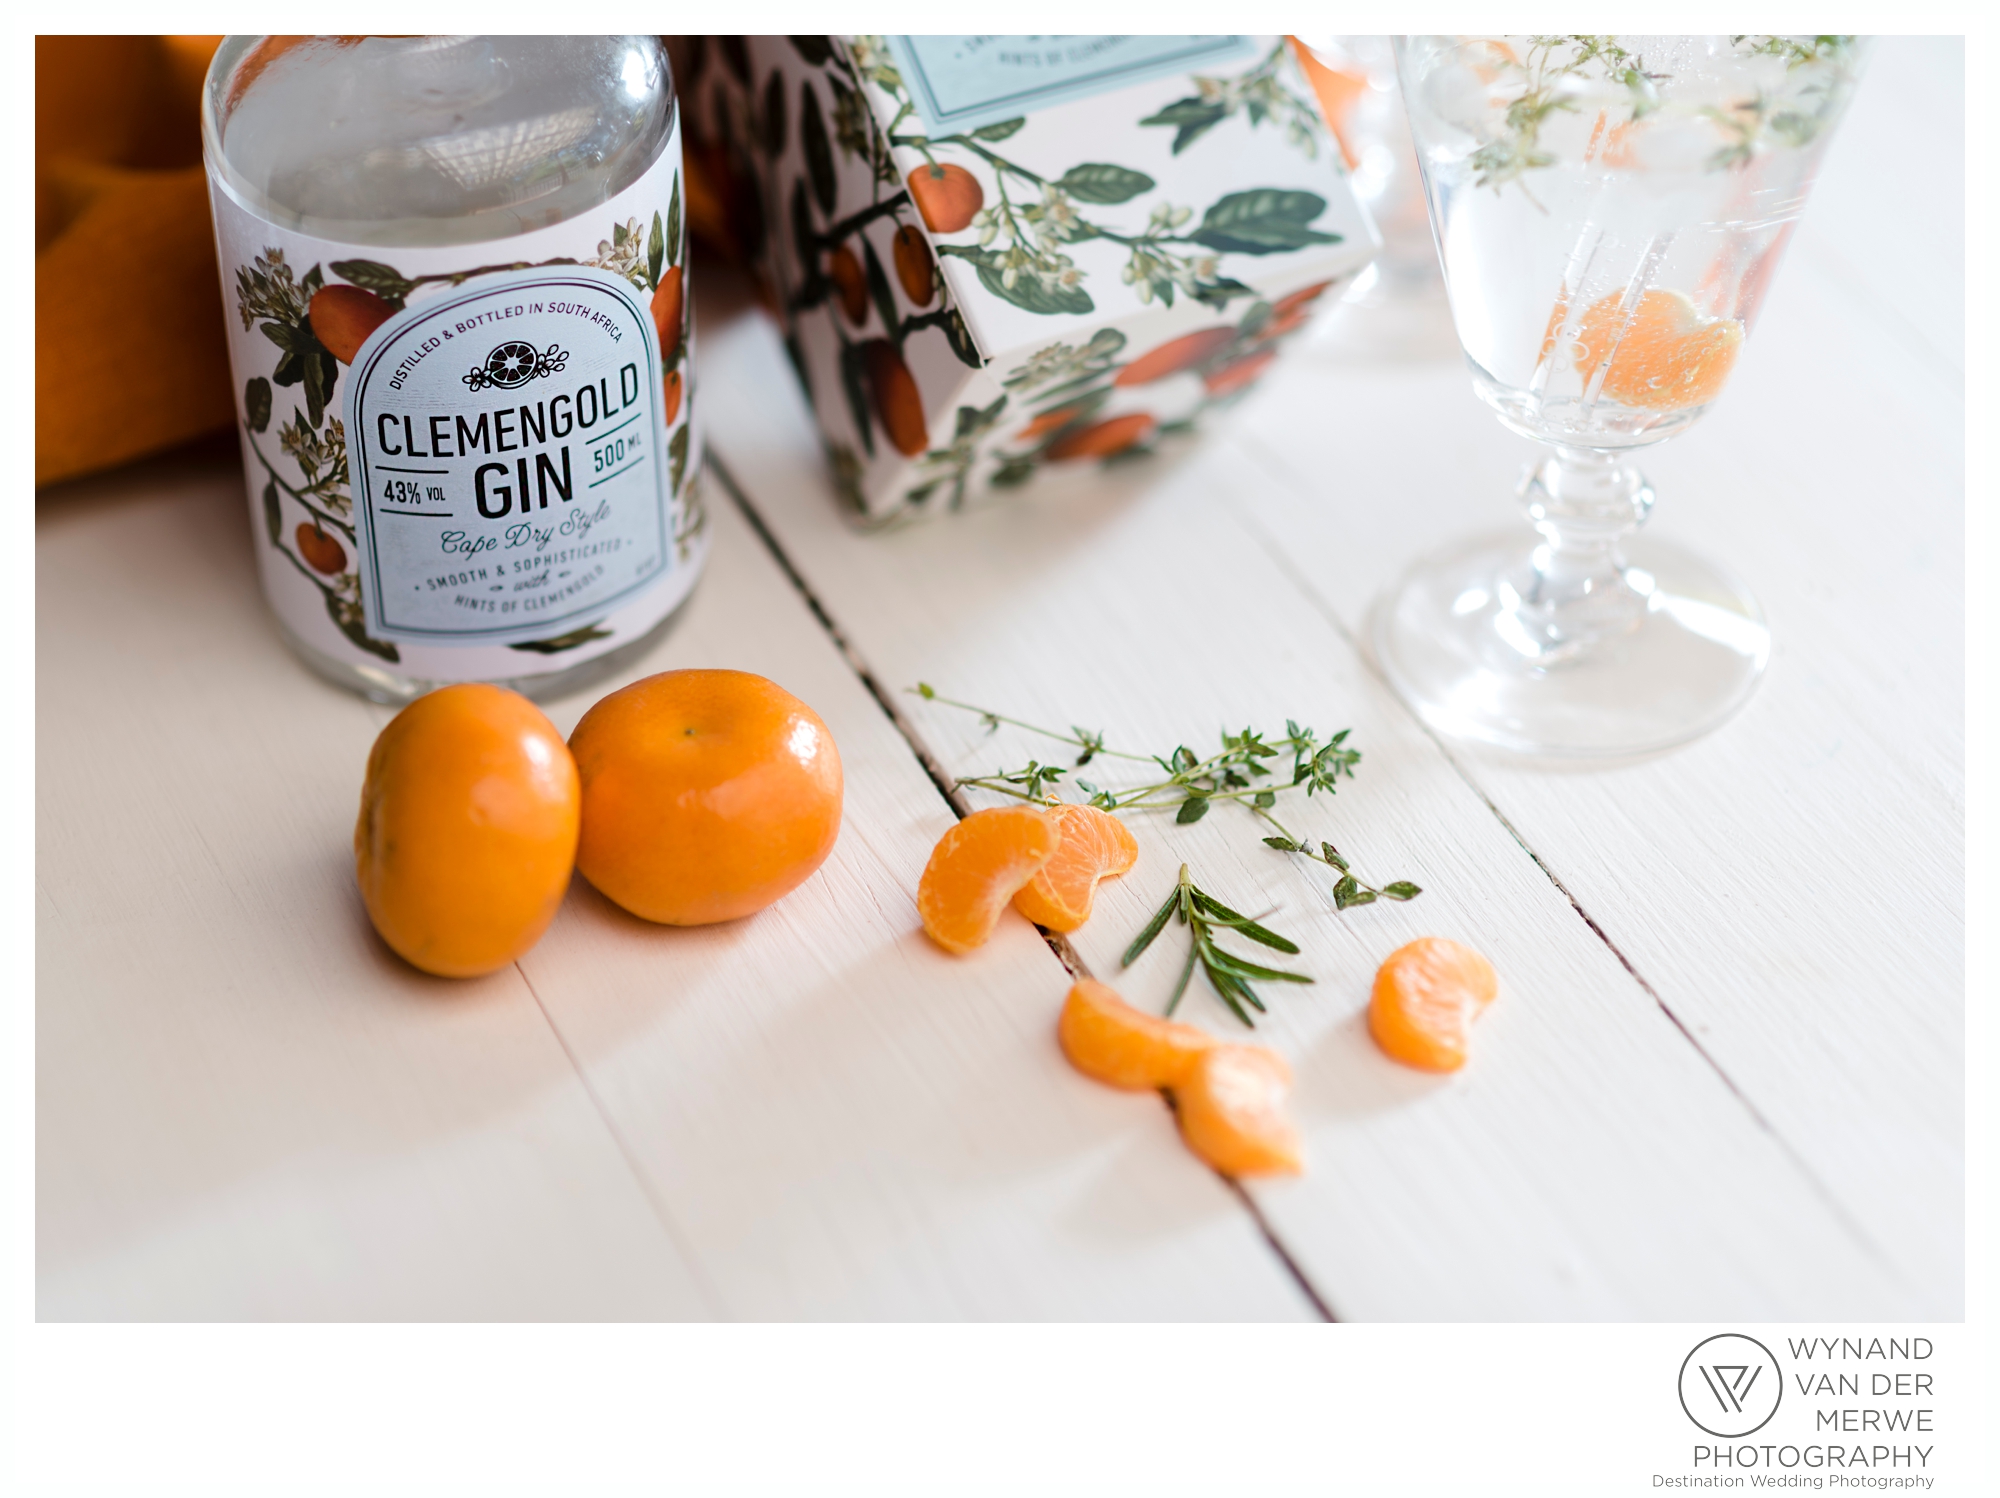
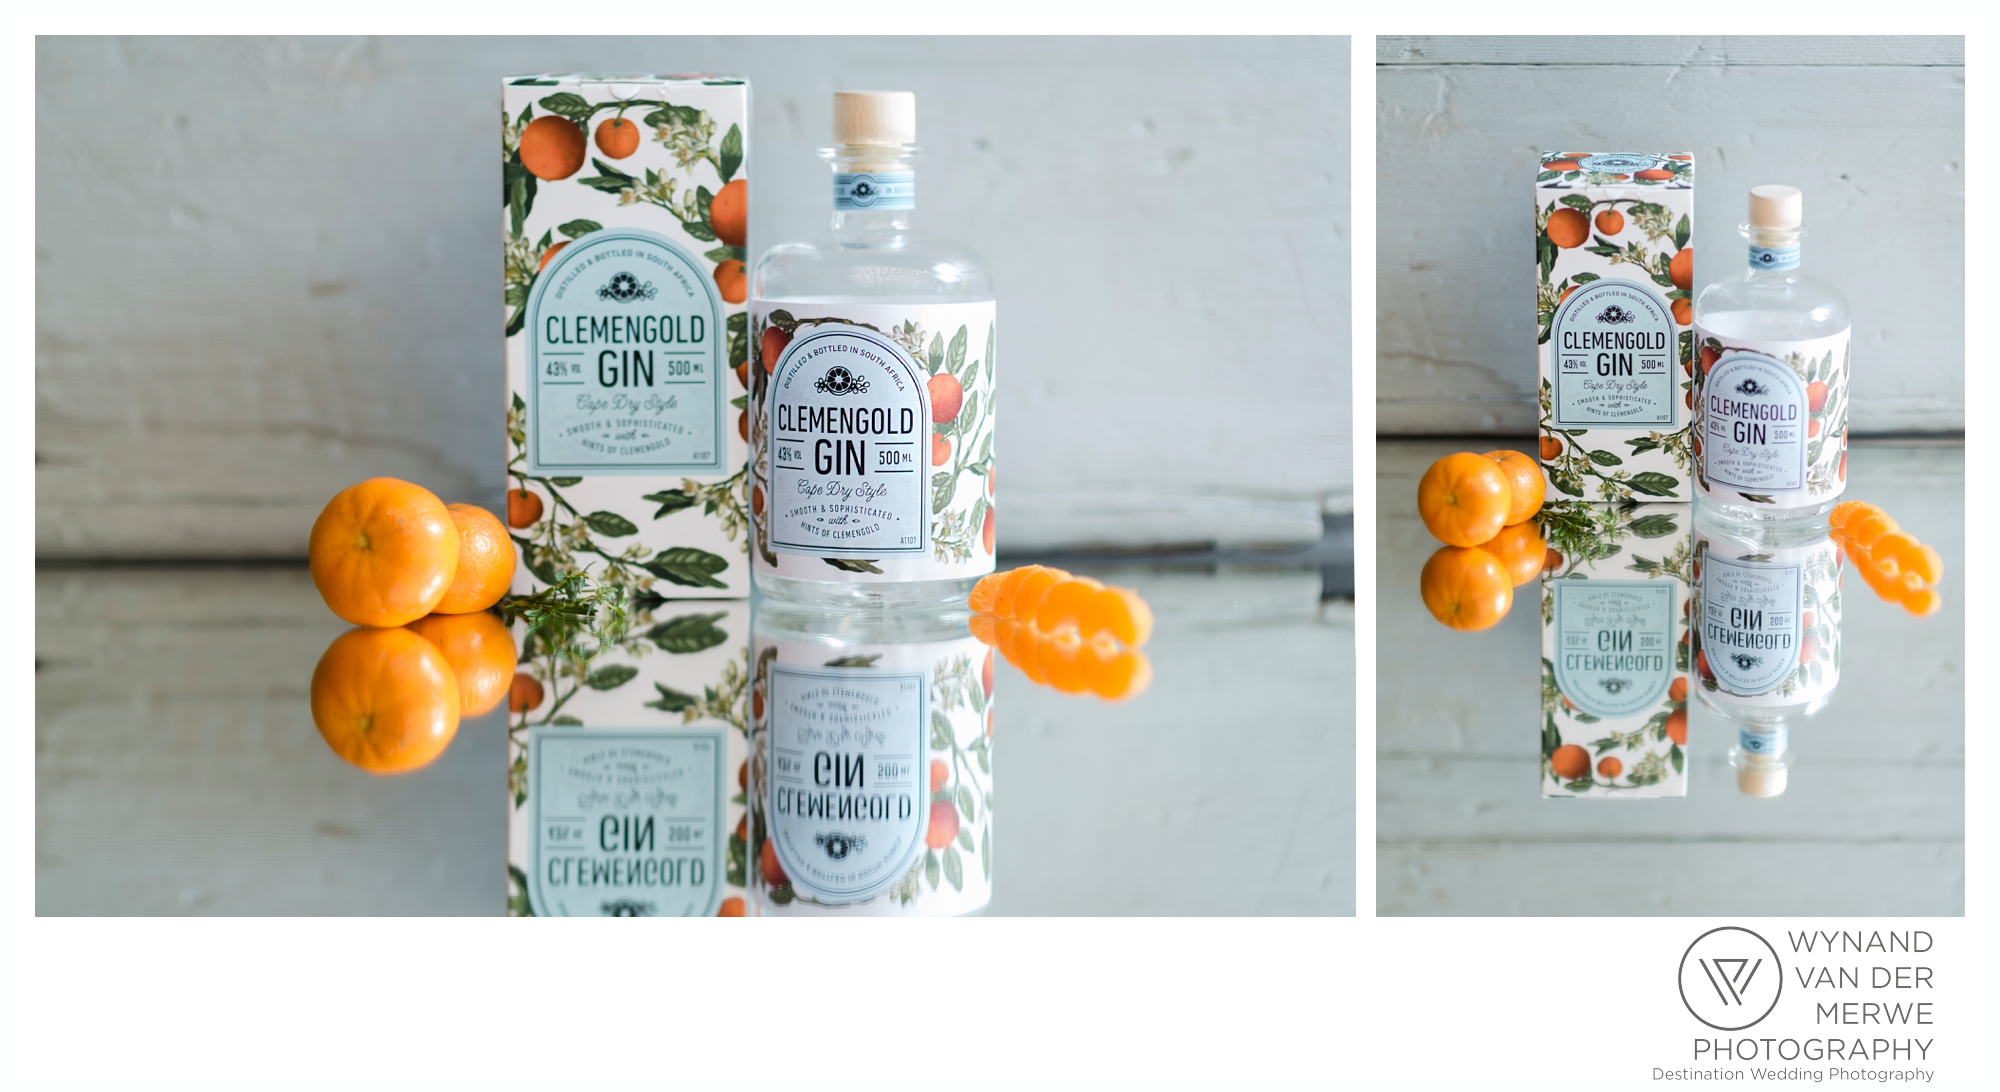
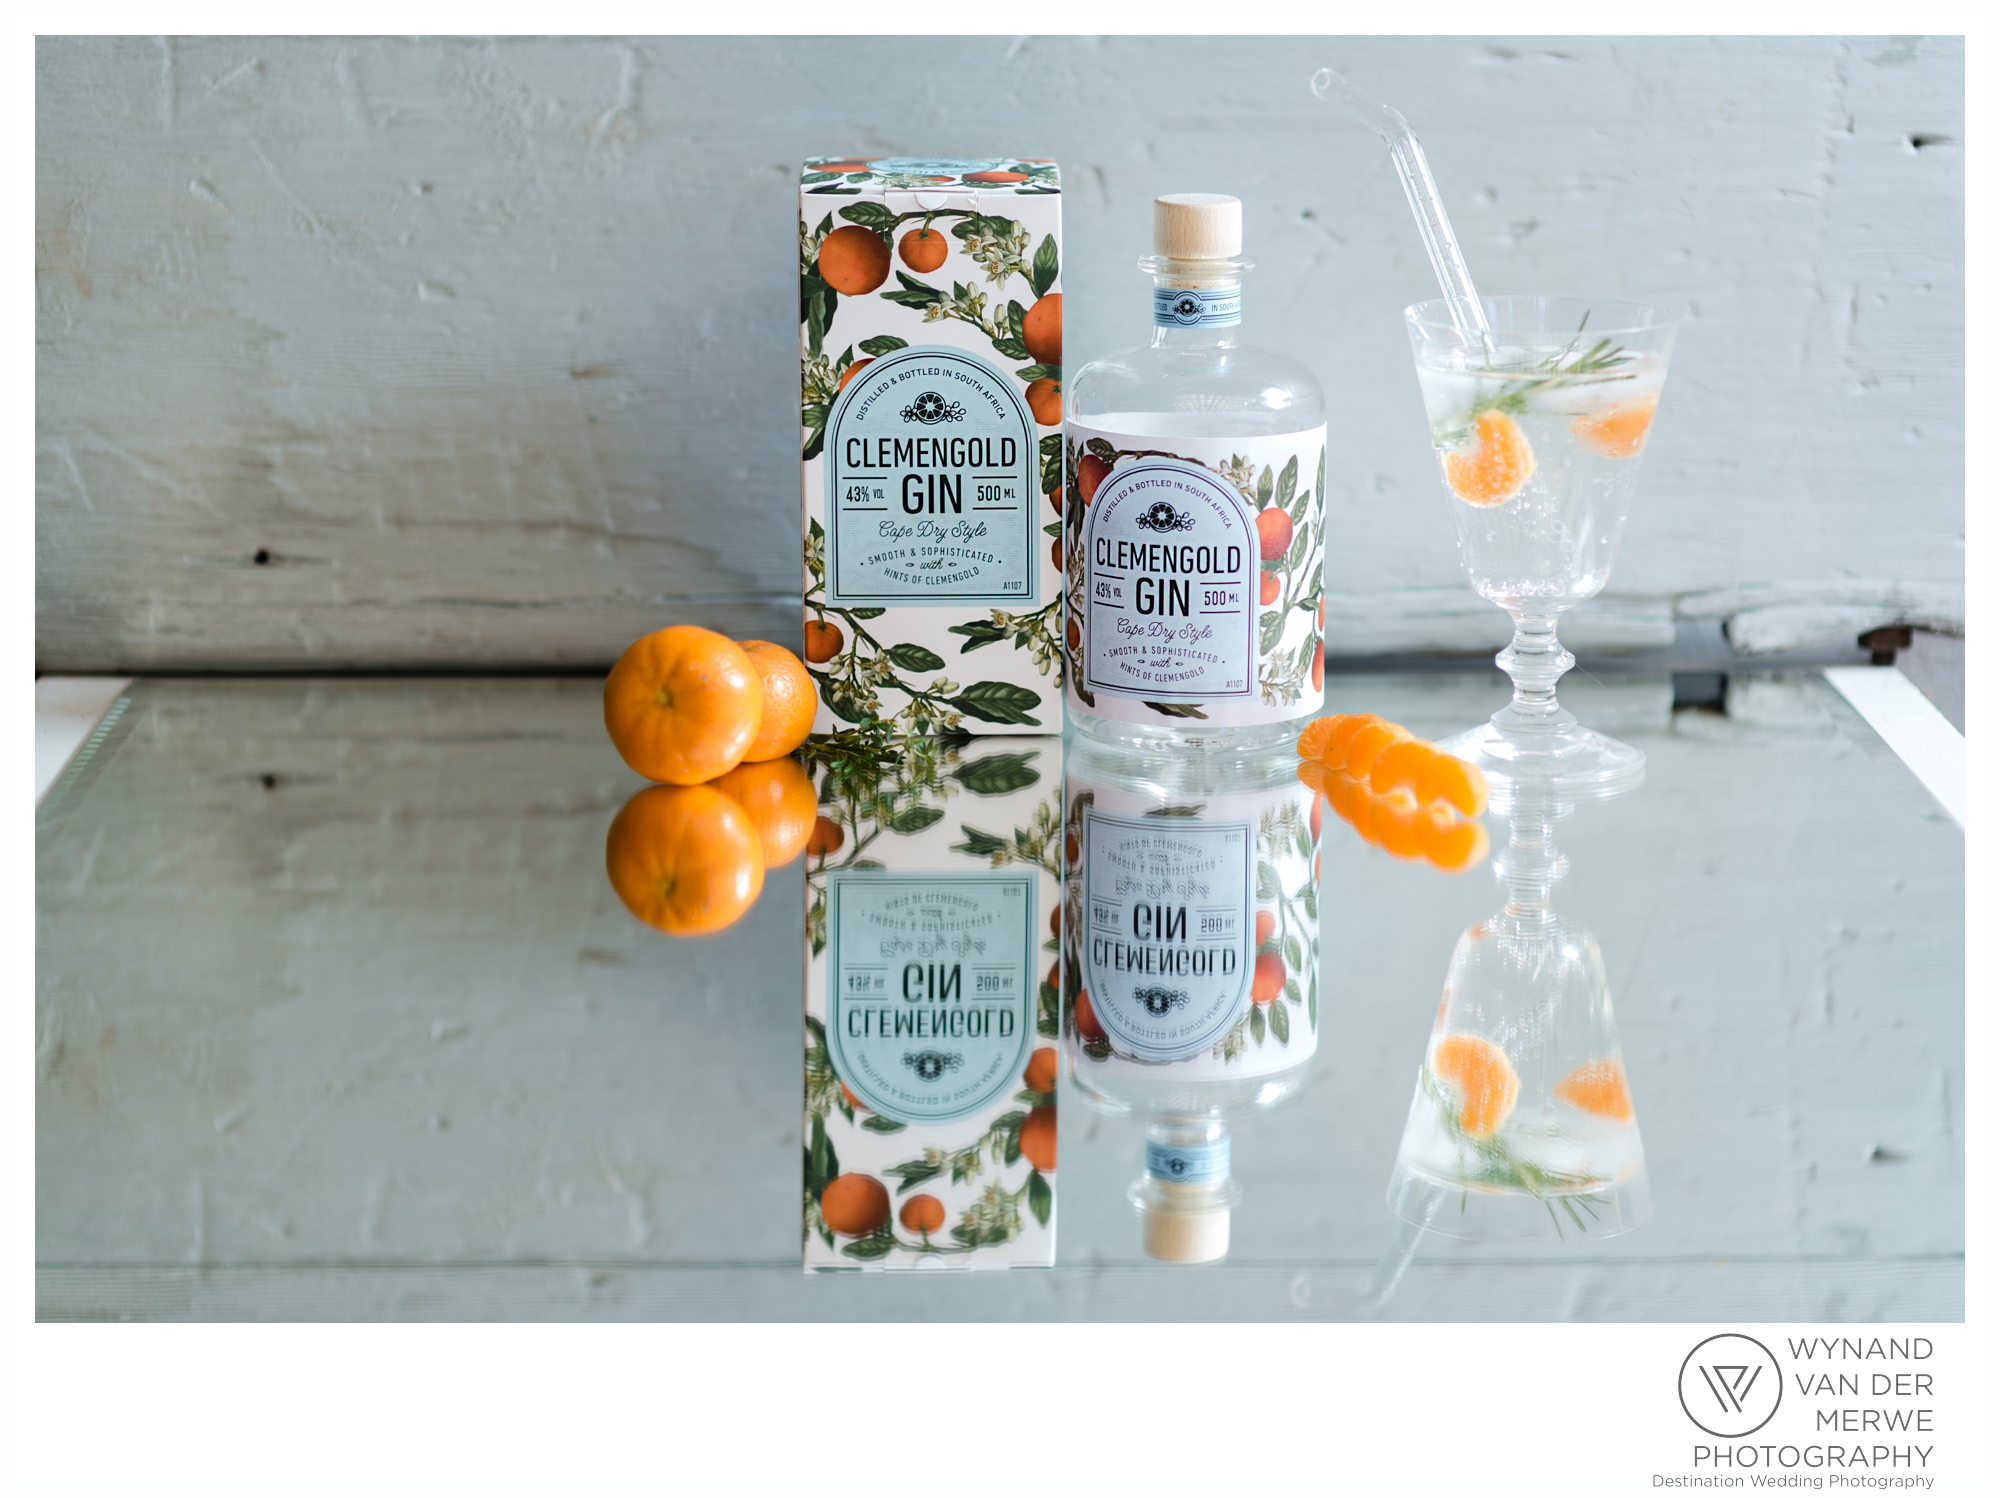
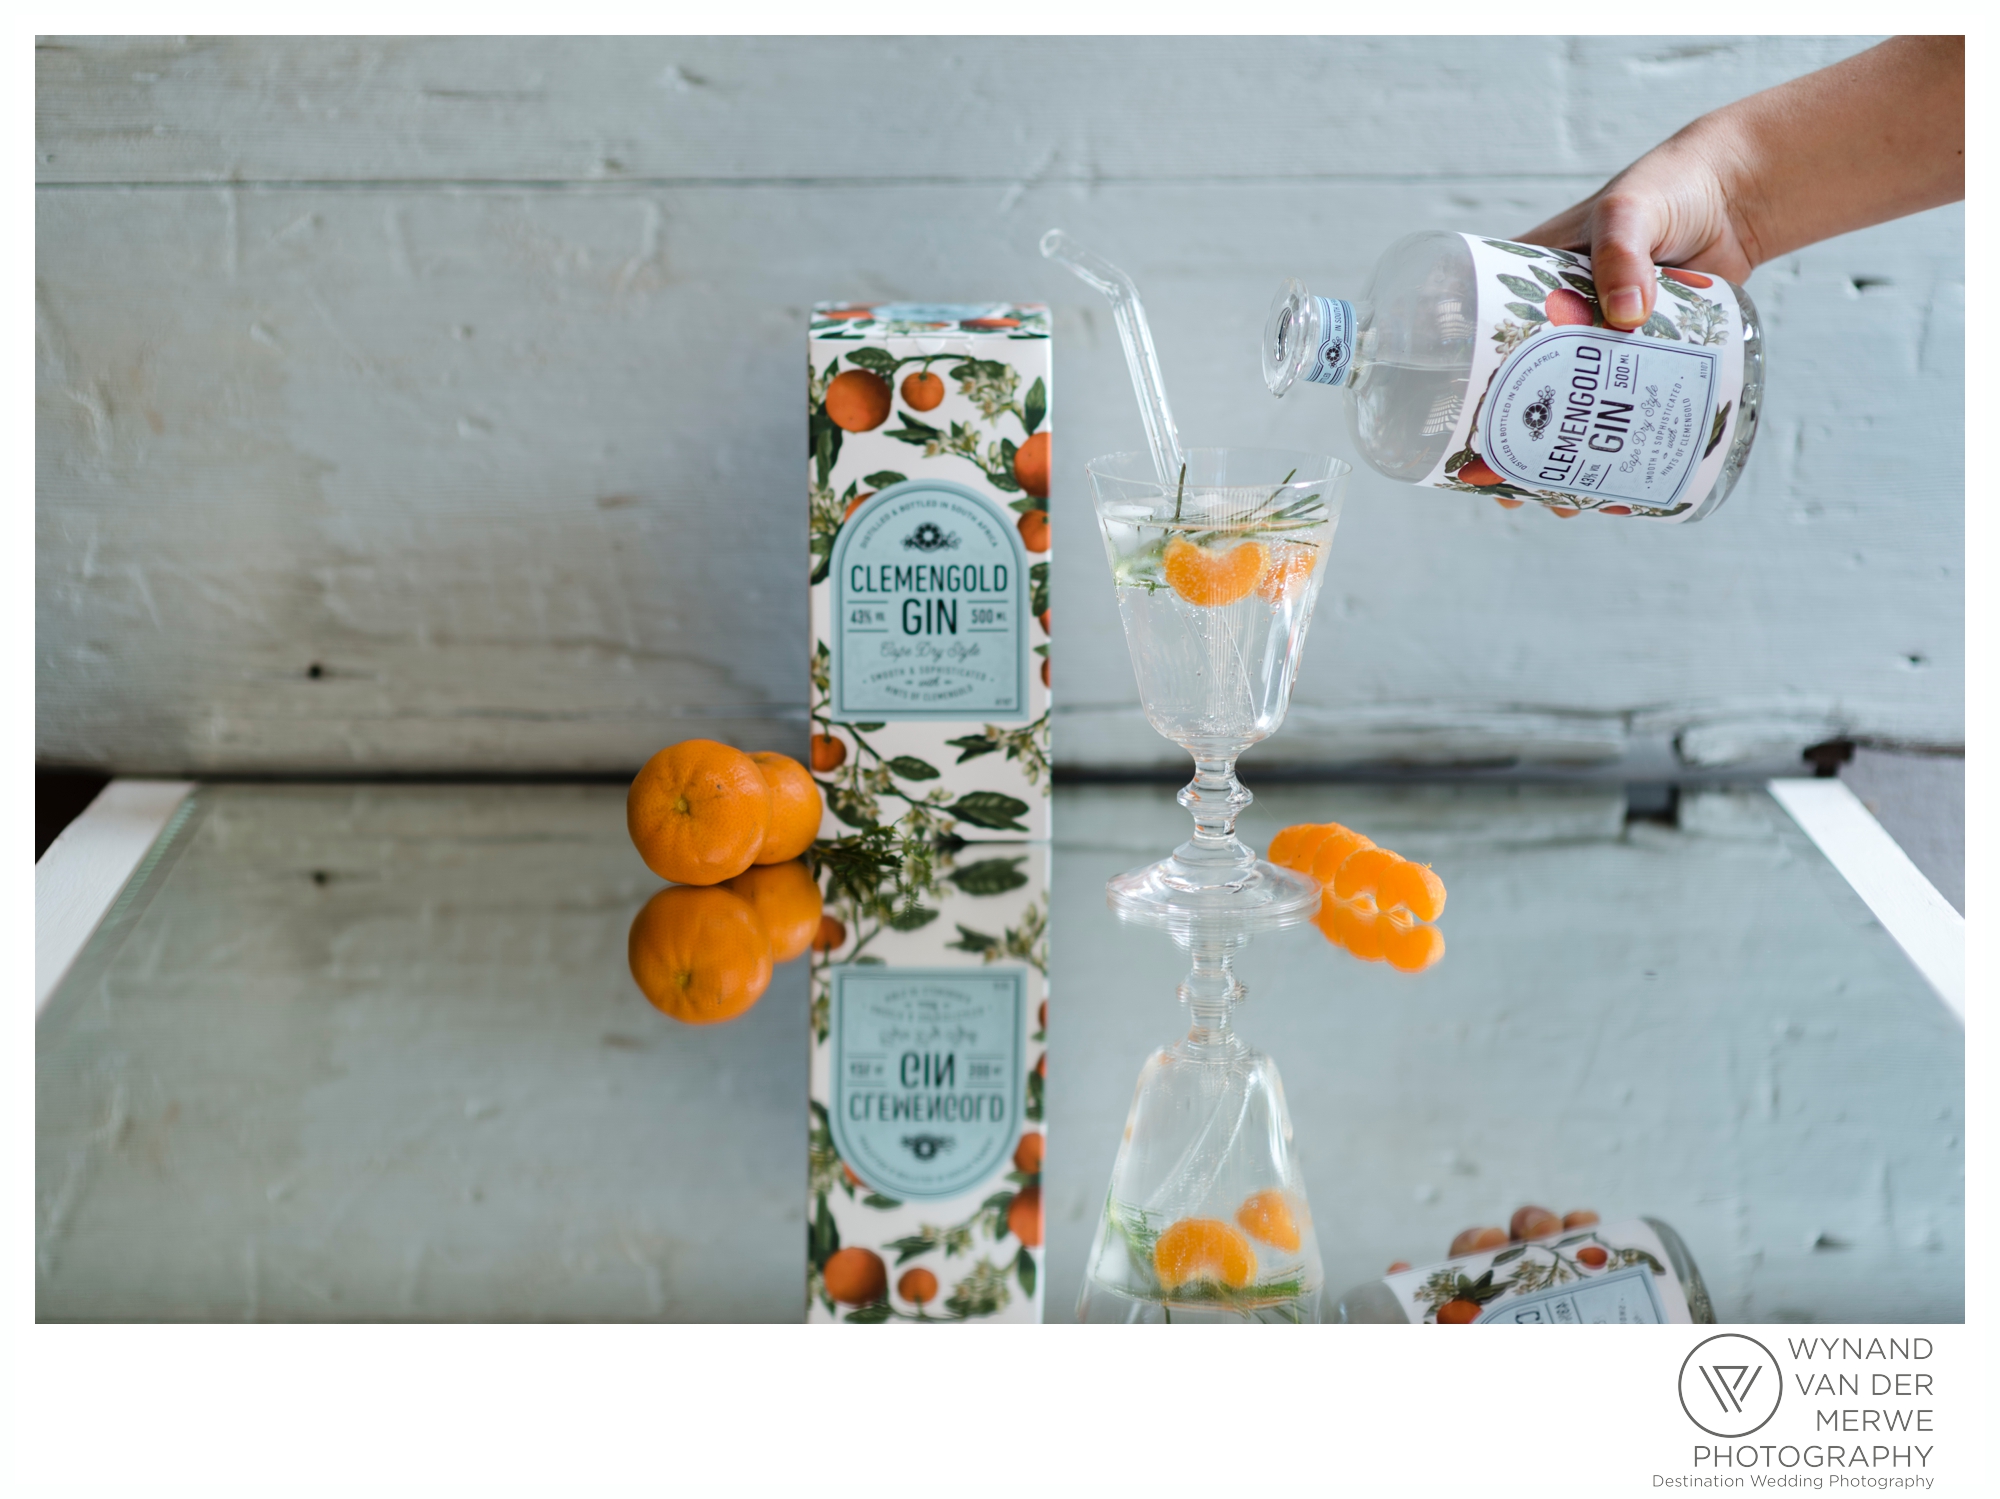
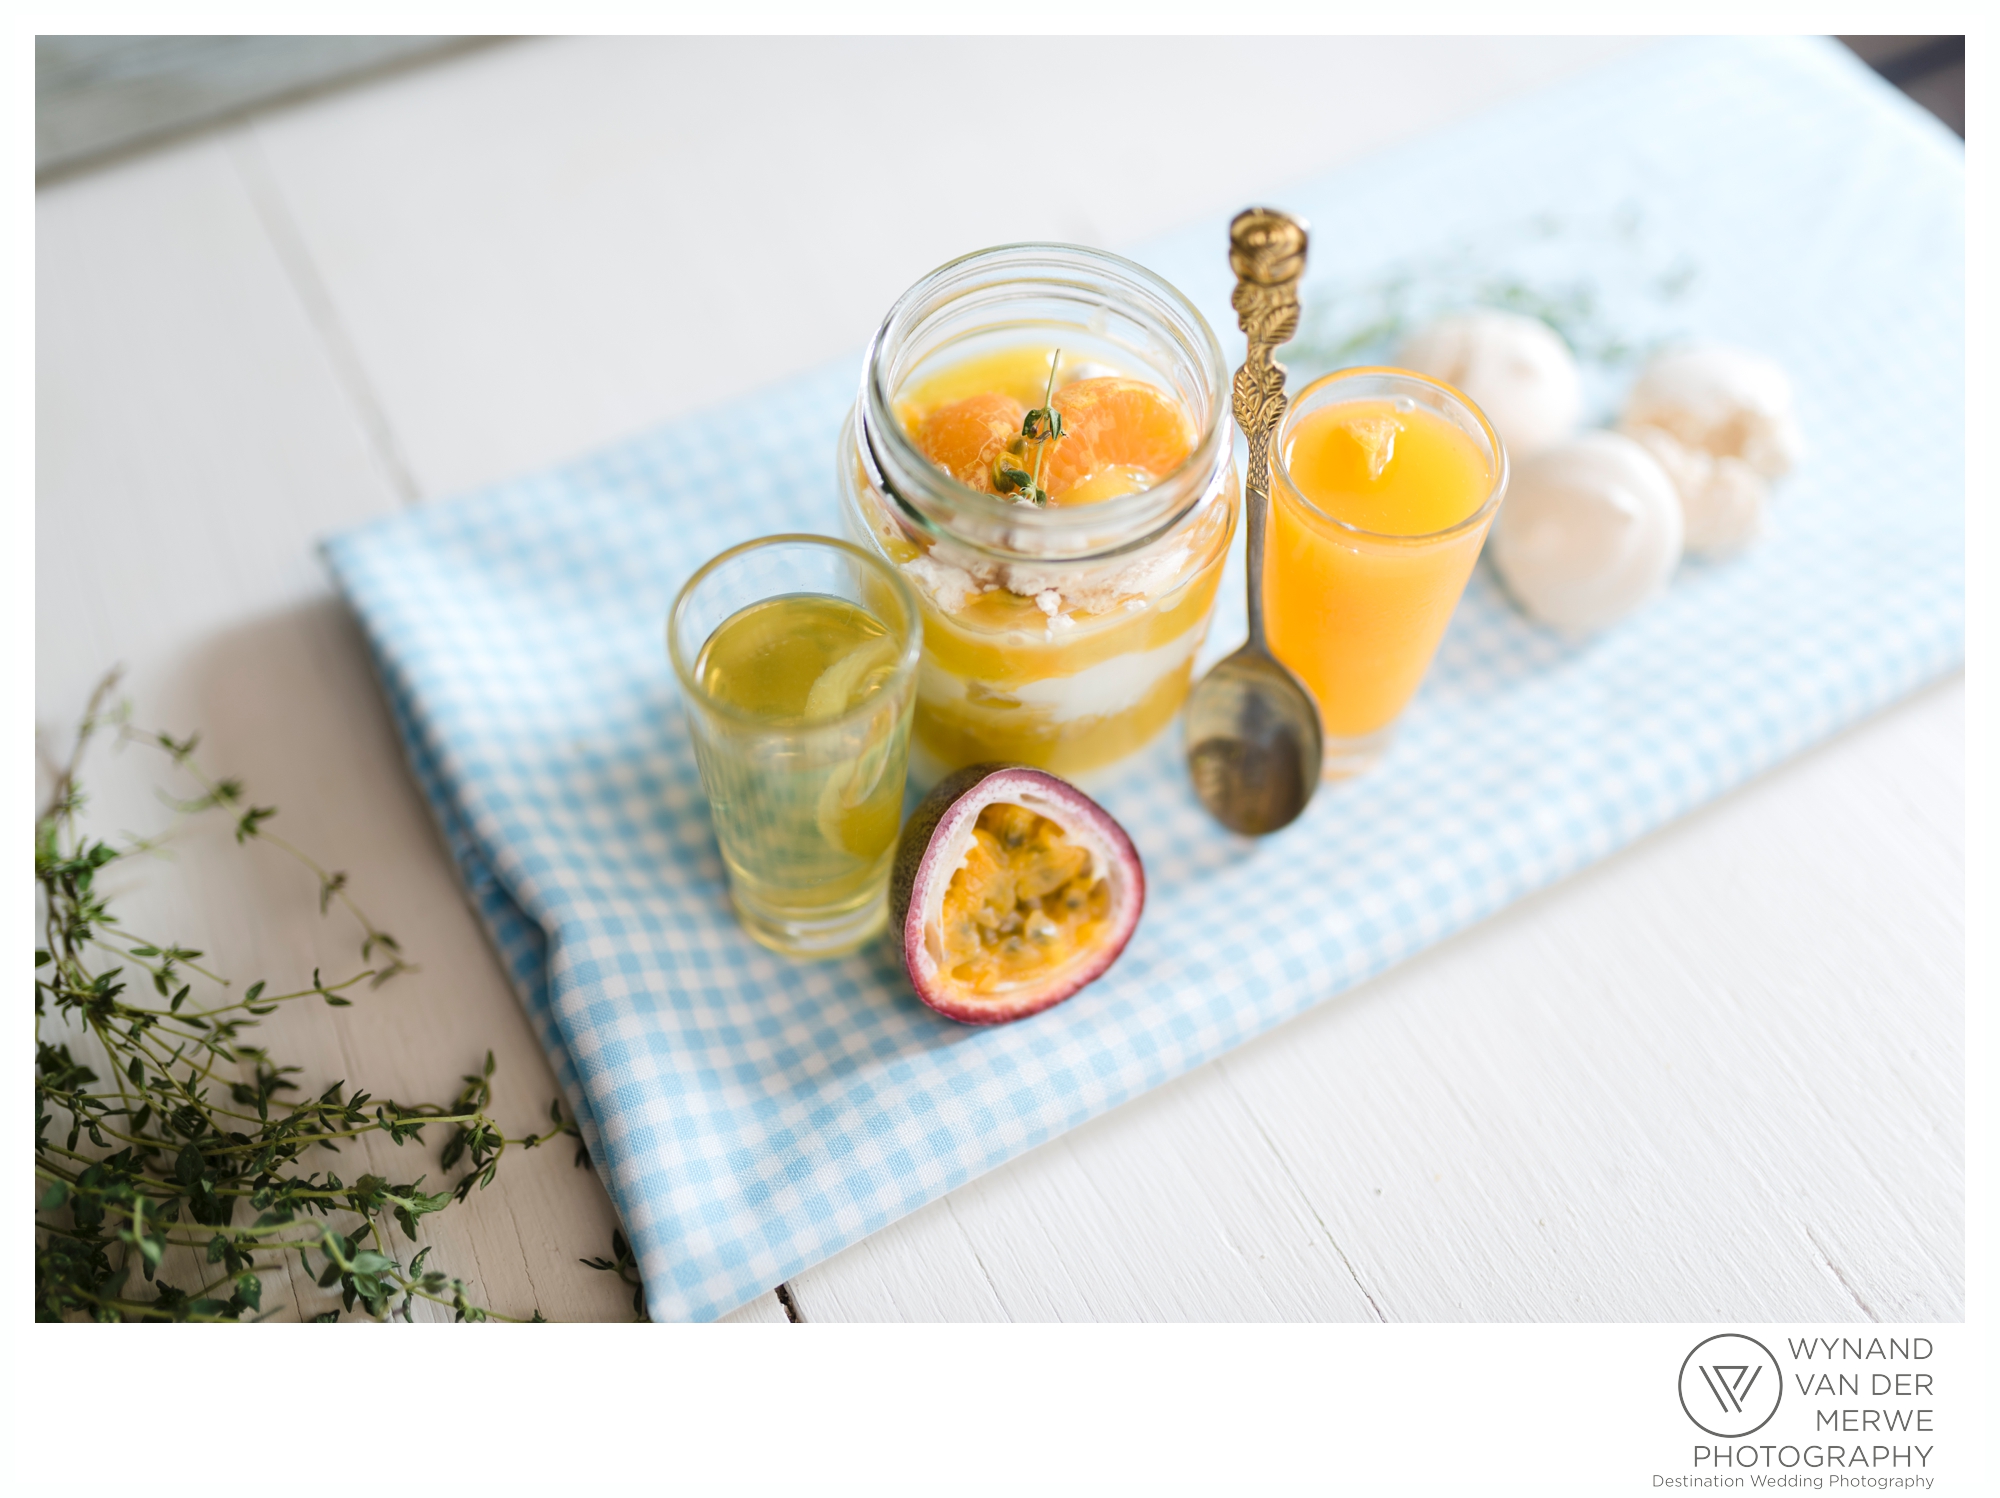
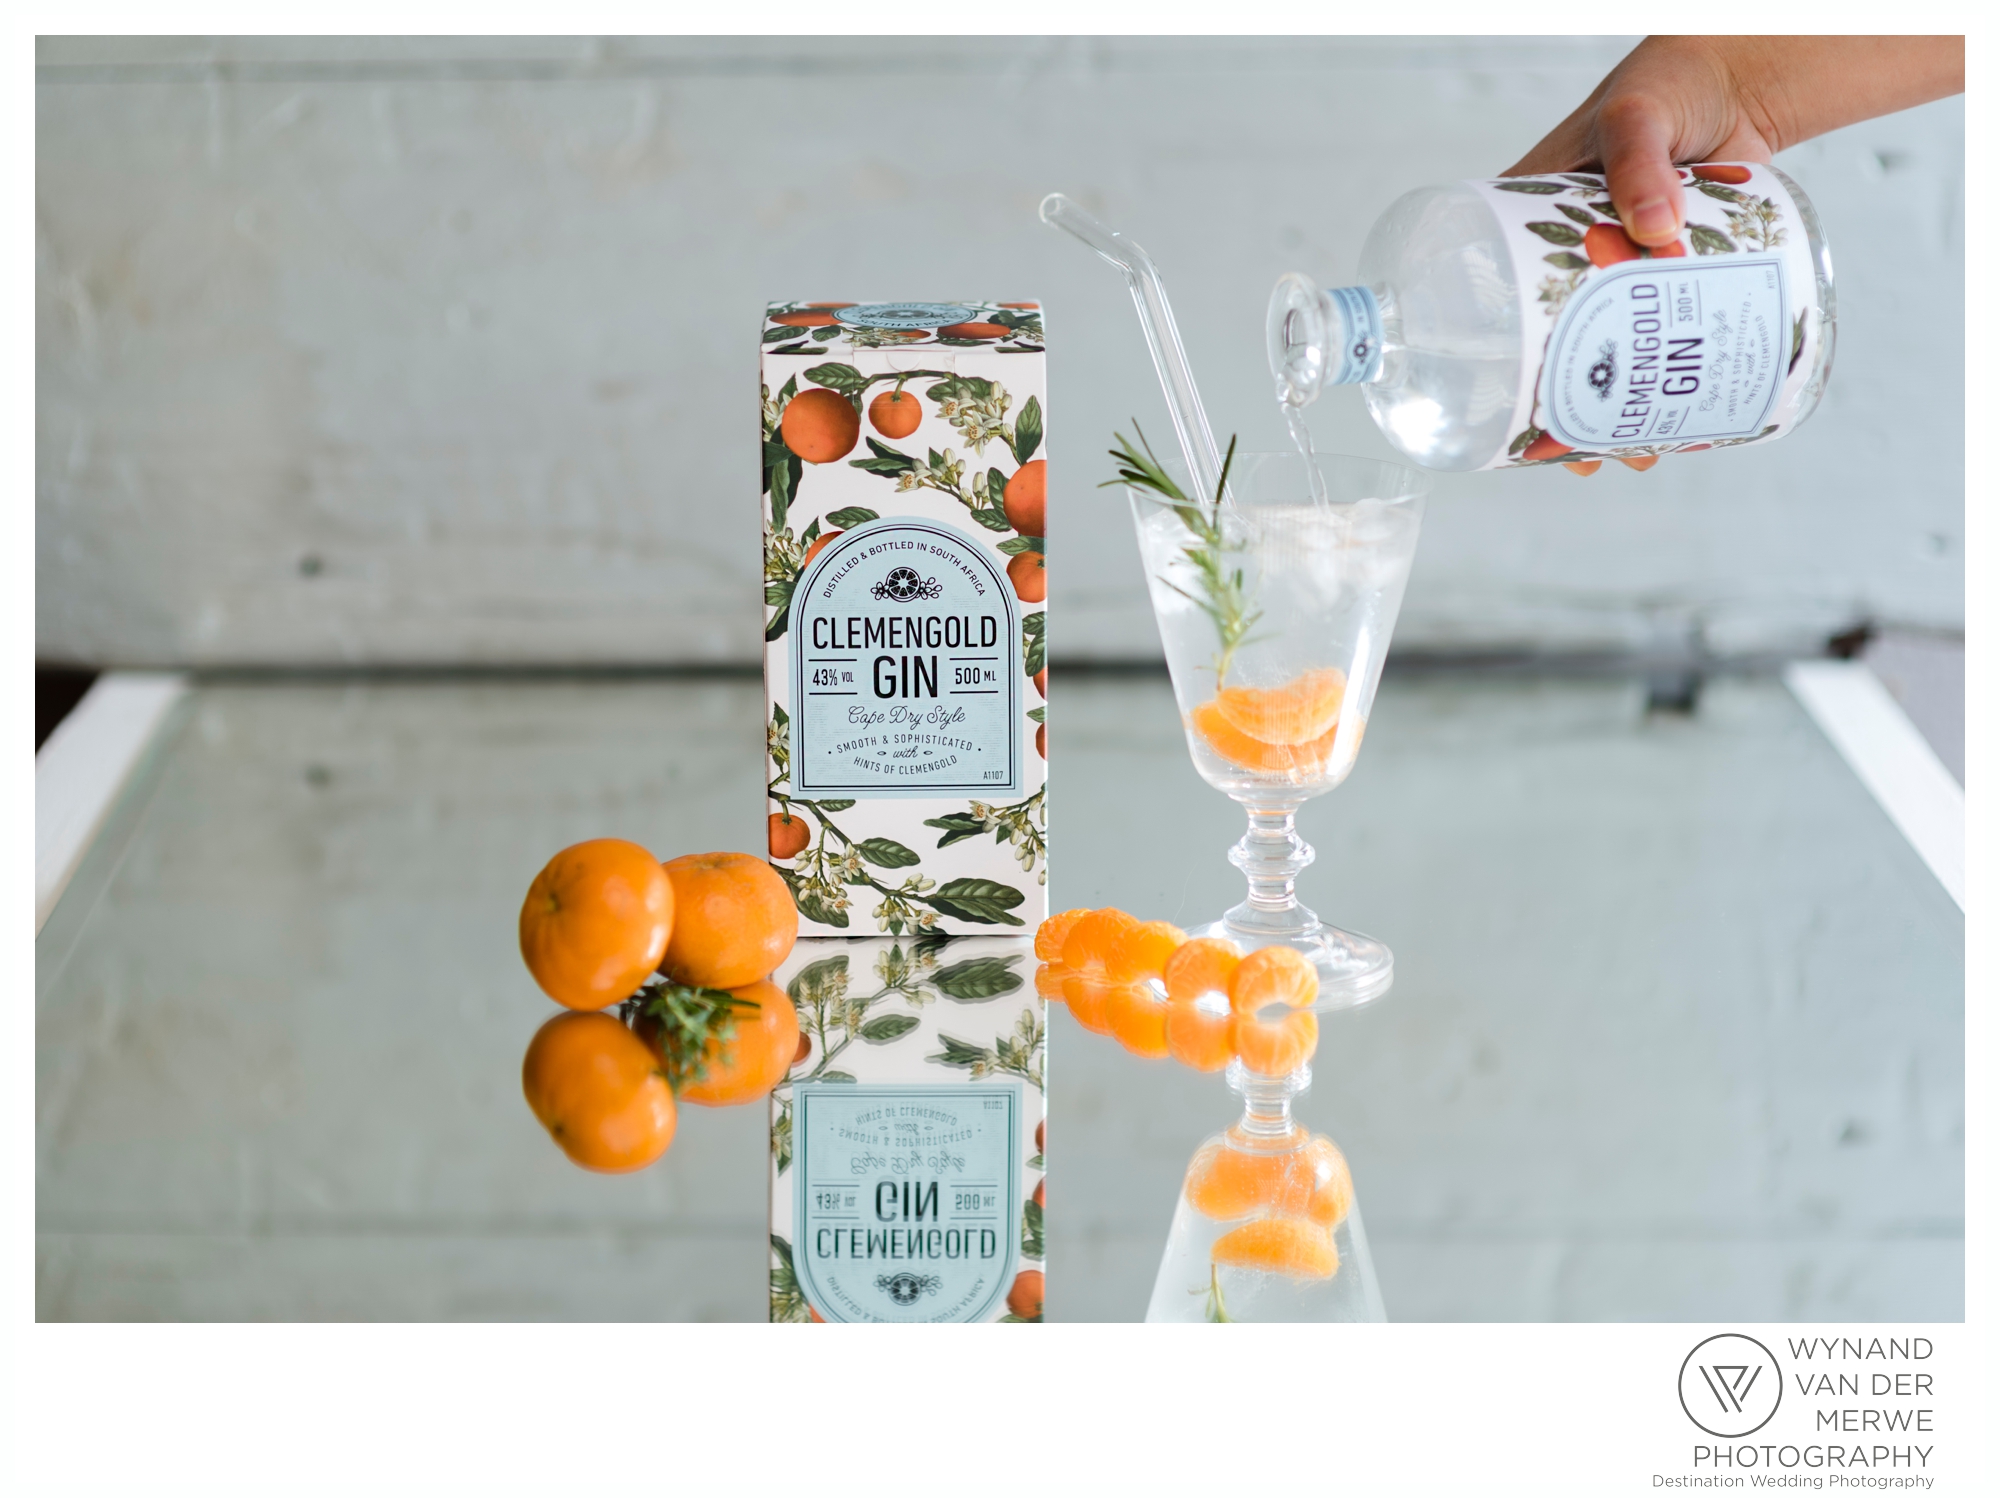
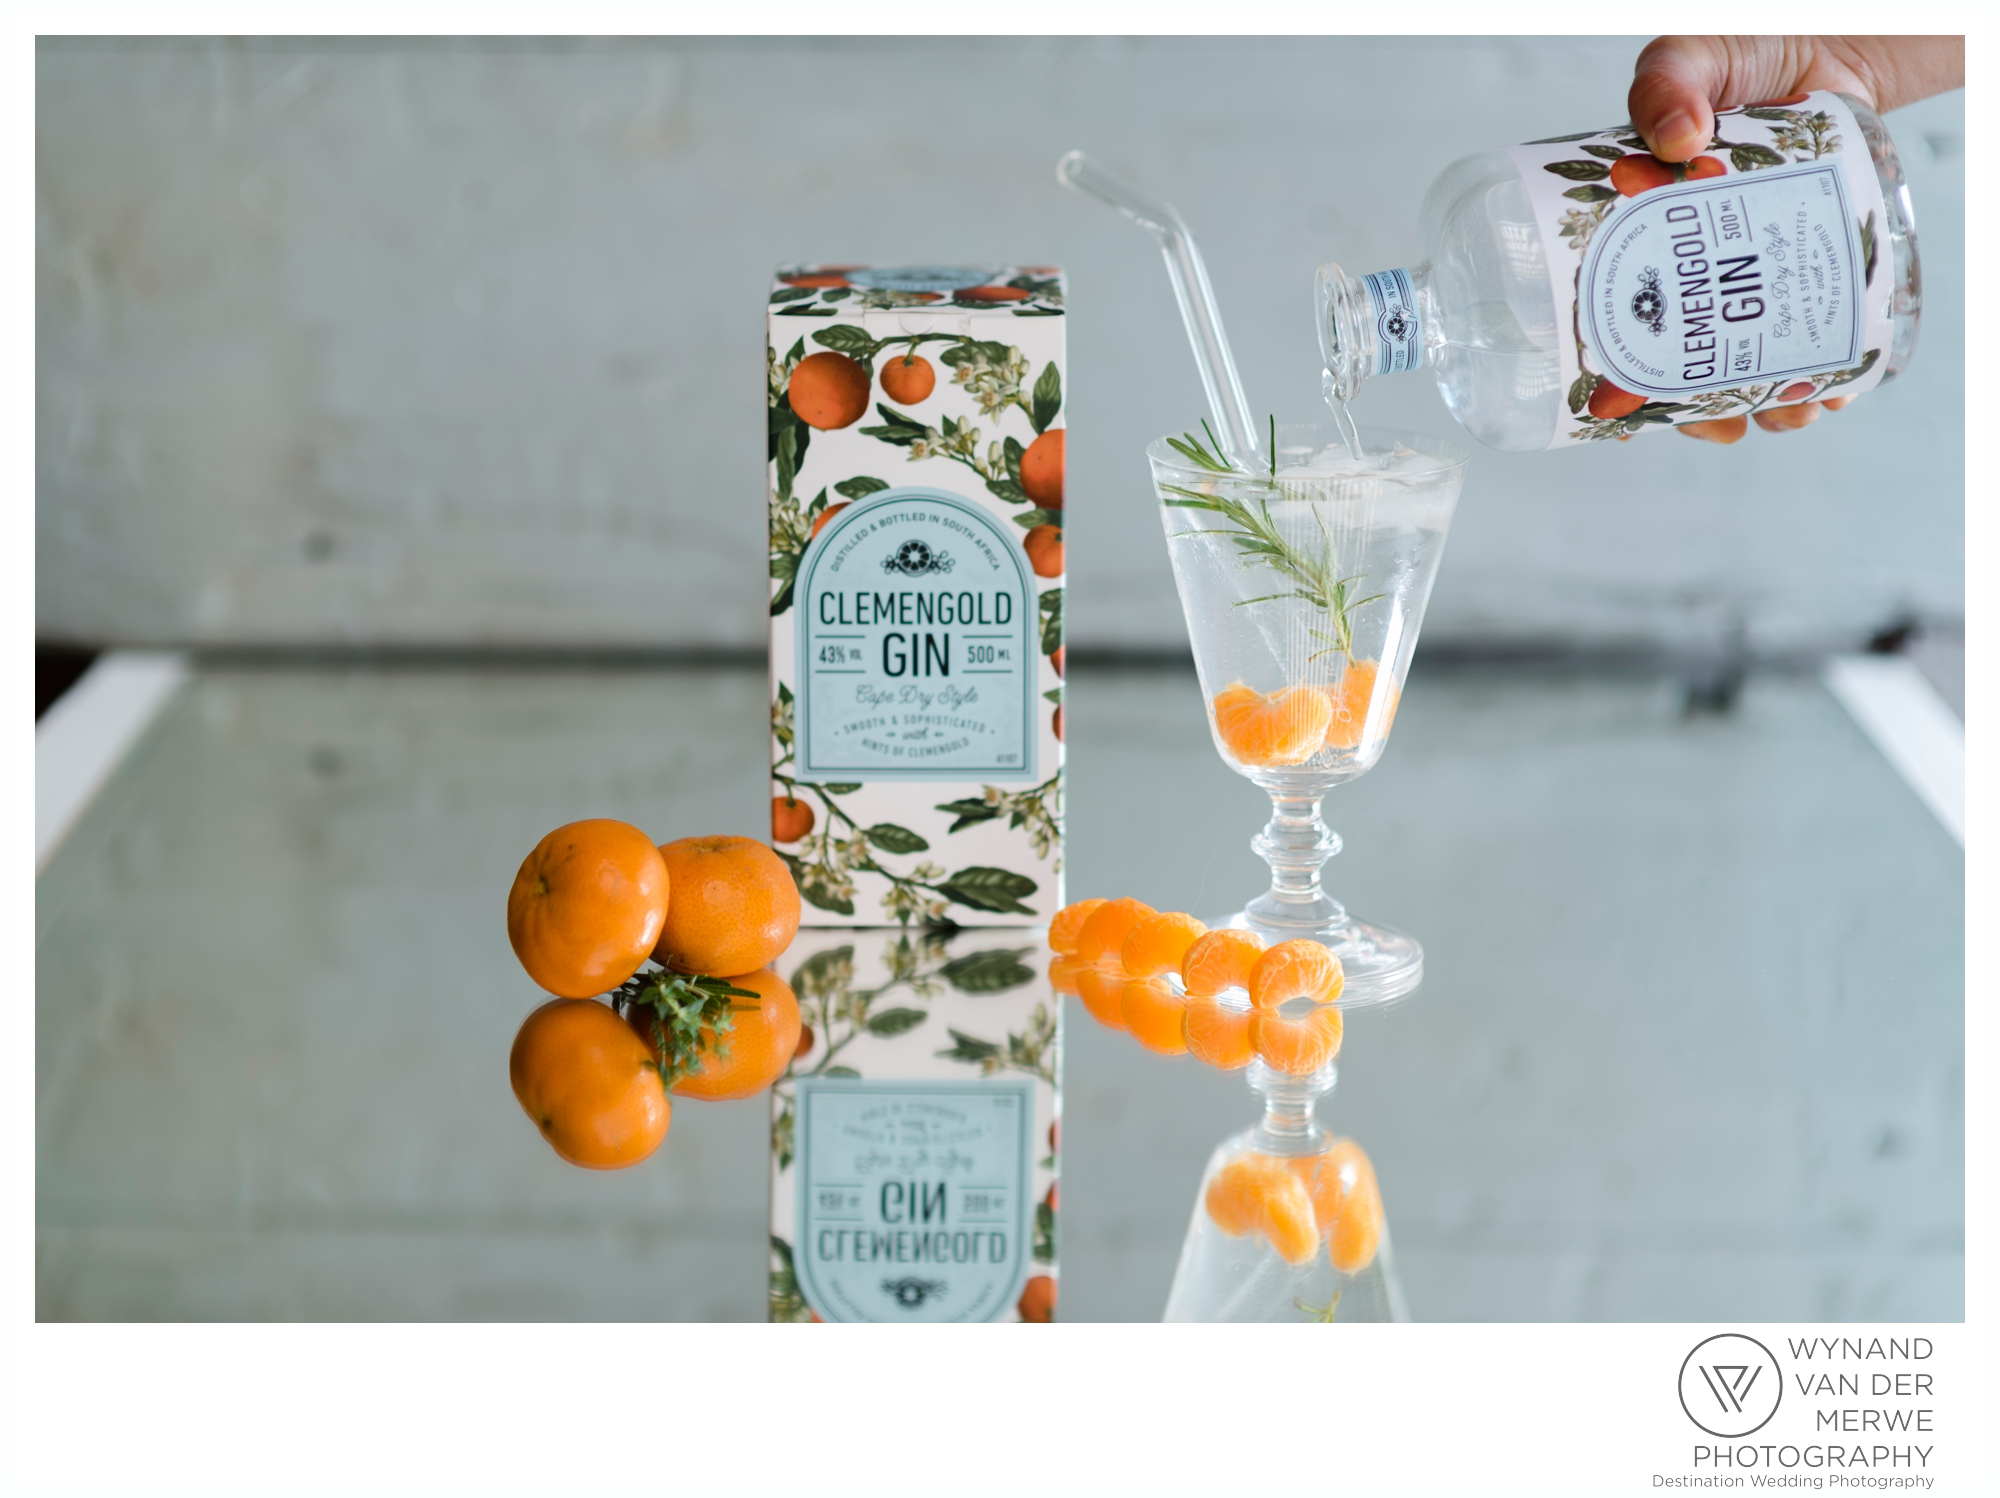
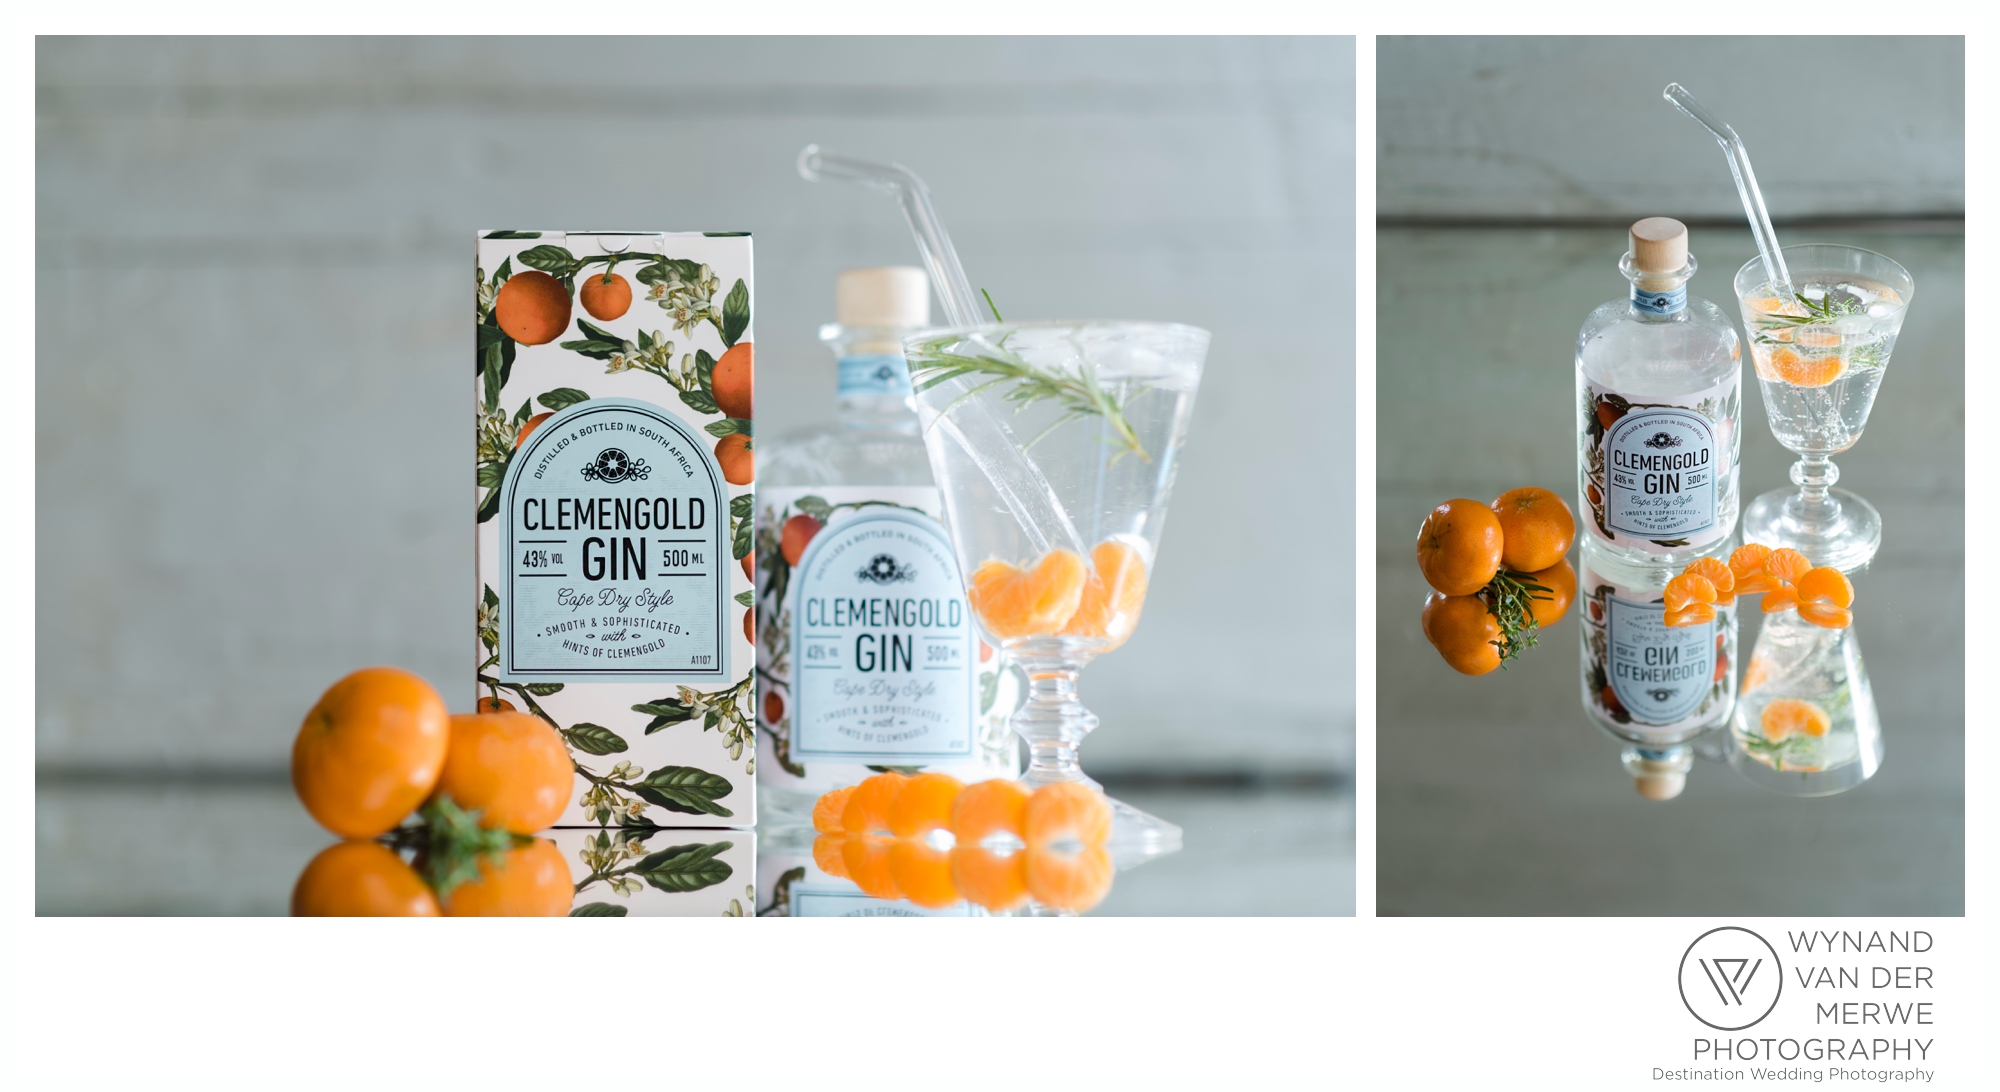
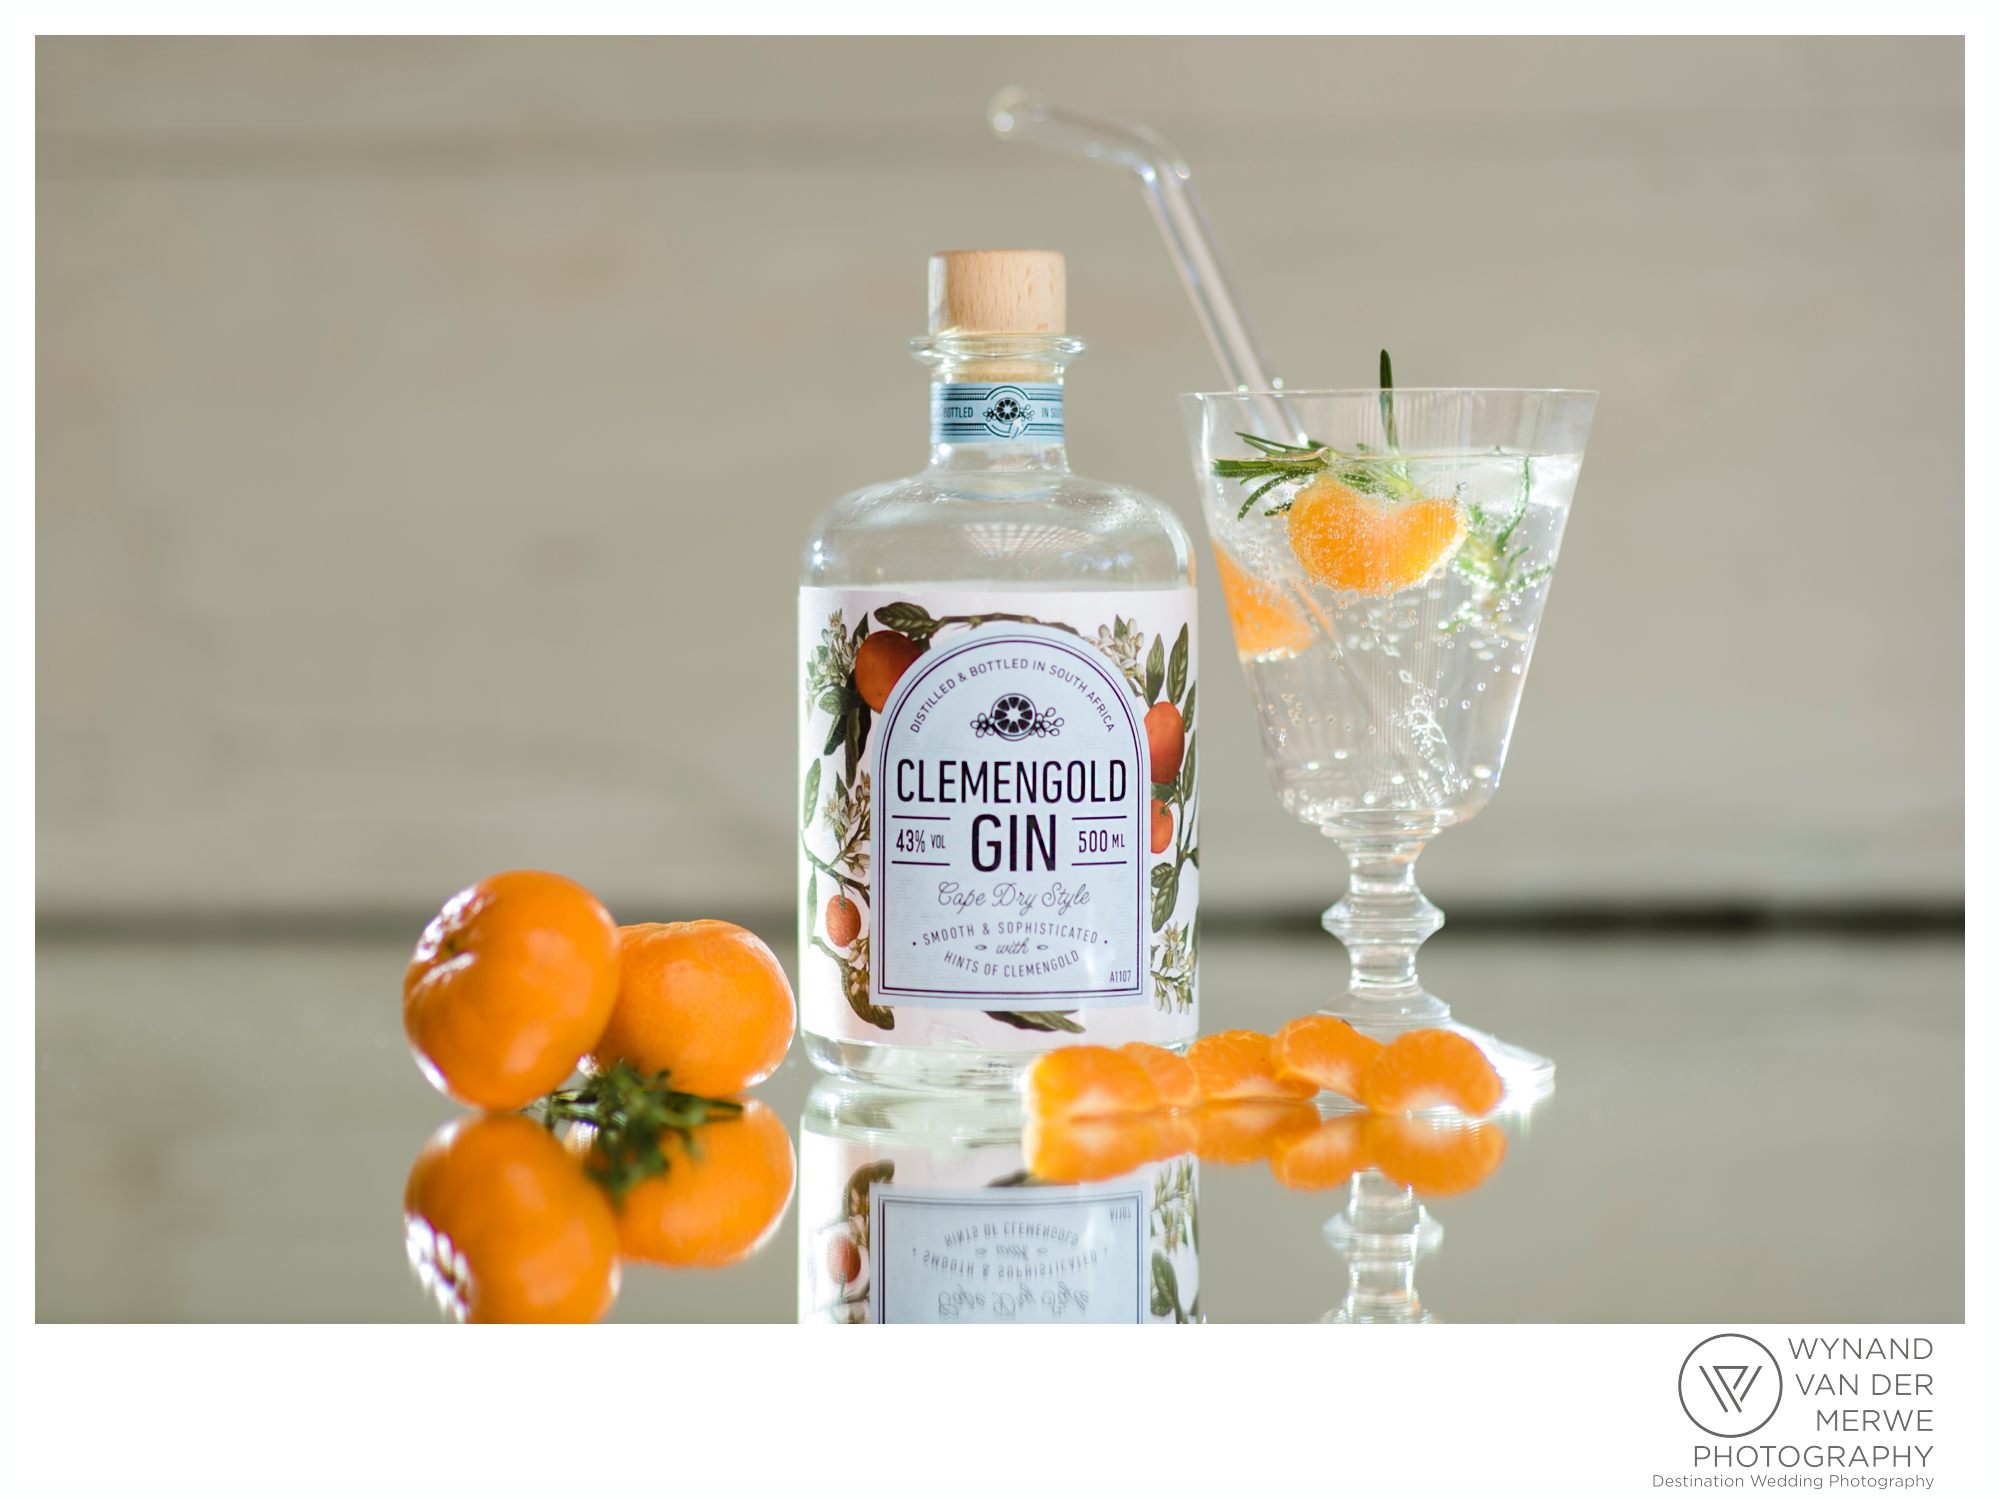
Inge from ClemenGold Gin was also invited to join with the Supper Club and she had a meeting with Ankie last week Monday, and Ankie said I should join them so that I can do some pretty product photos of the desert and the welcome drink she was going to make for the Supper Club....well Inge actually made the welcome drink but Wooden Spoon Kitchen was the host. The welcome drink was a Gin and Tonic made from ClemenGold Gin, and ClemenGold mandarins slices. You can buy them from Woolworhs Food, but they are unfortunately out of season as of last week...whihc means you will have to wait until next season.
I really loved photographing the ClemenGold Gin...look at the beautiful packaging and bottle! Such an amazing design.
Here is the photos taken on Ankie's stoep with one flash with softbox.

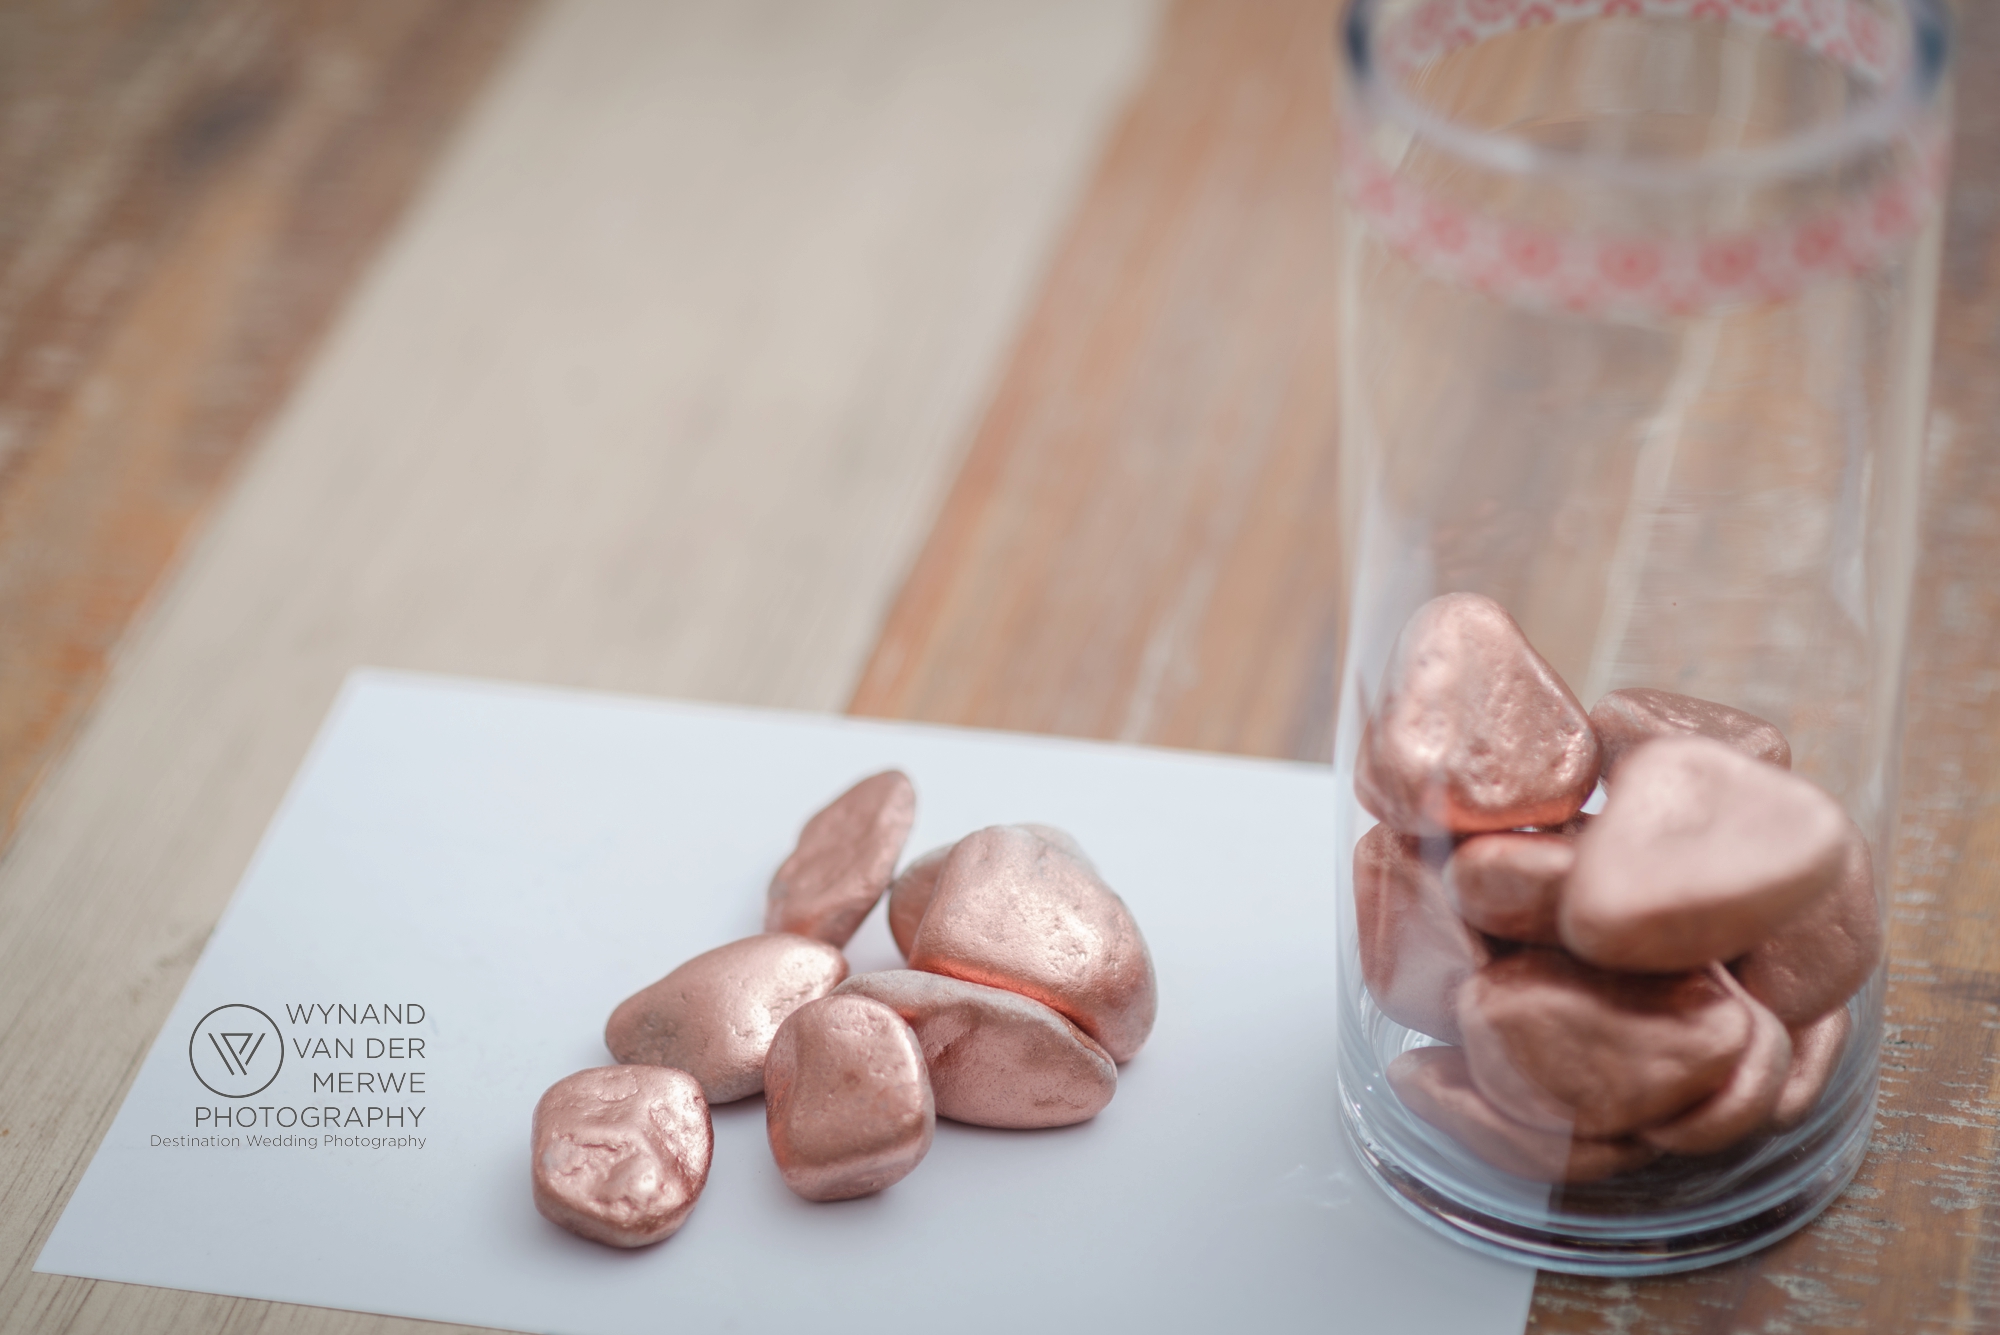
A dash of RoseGold | Protea DIY project
You can never go home again, but the truth is you can never leave home, so it's all right. Maya Angelou

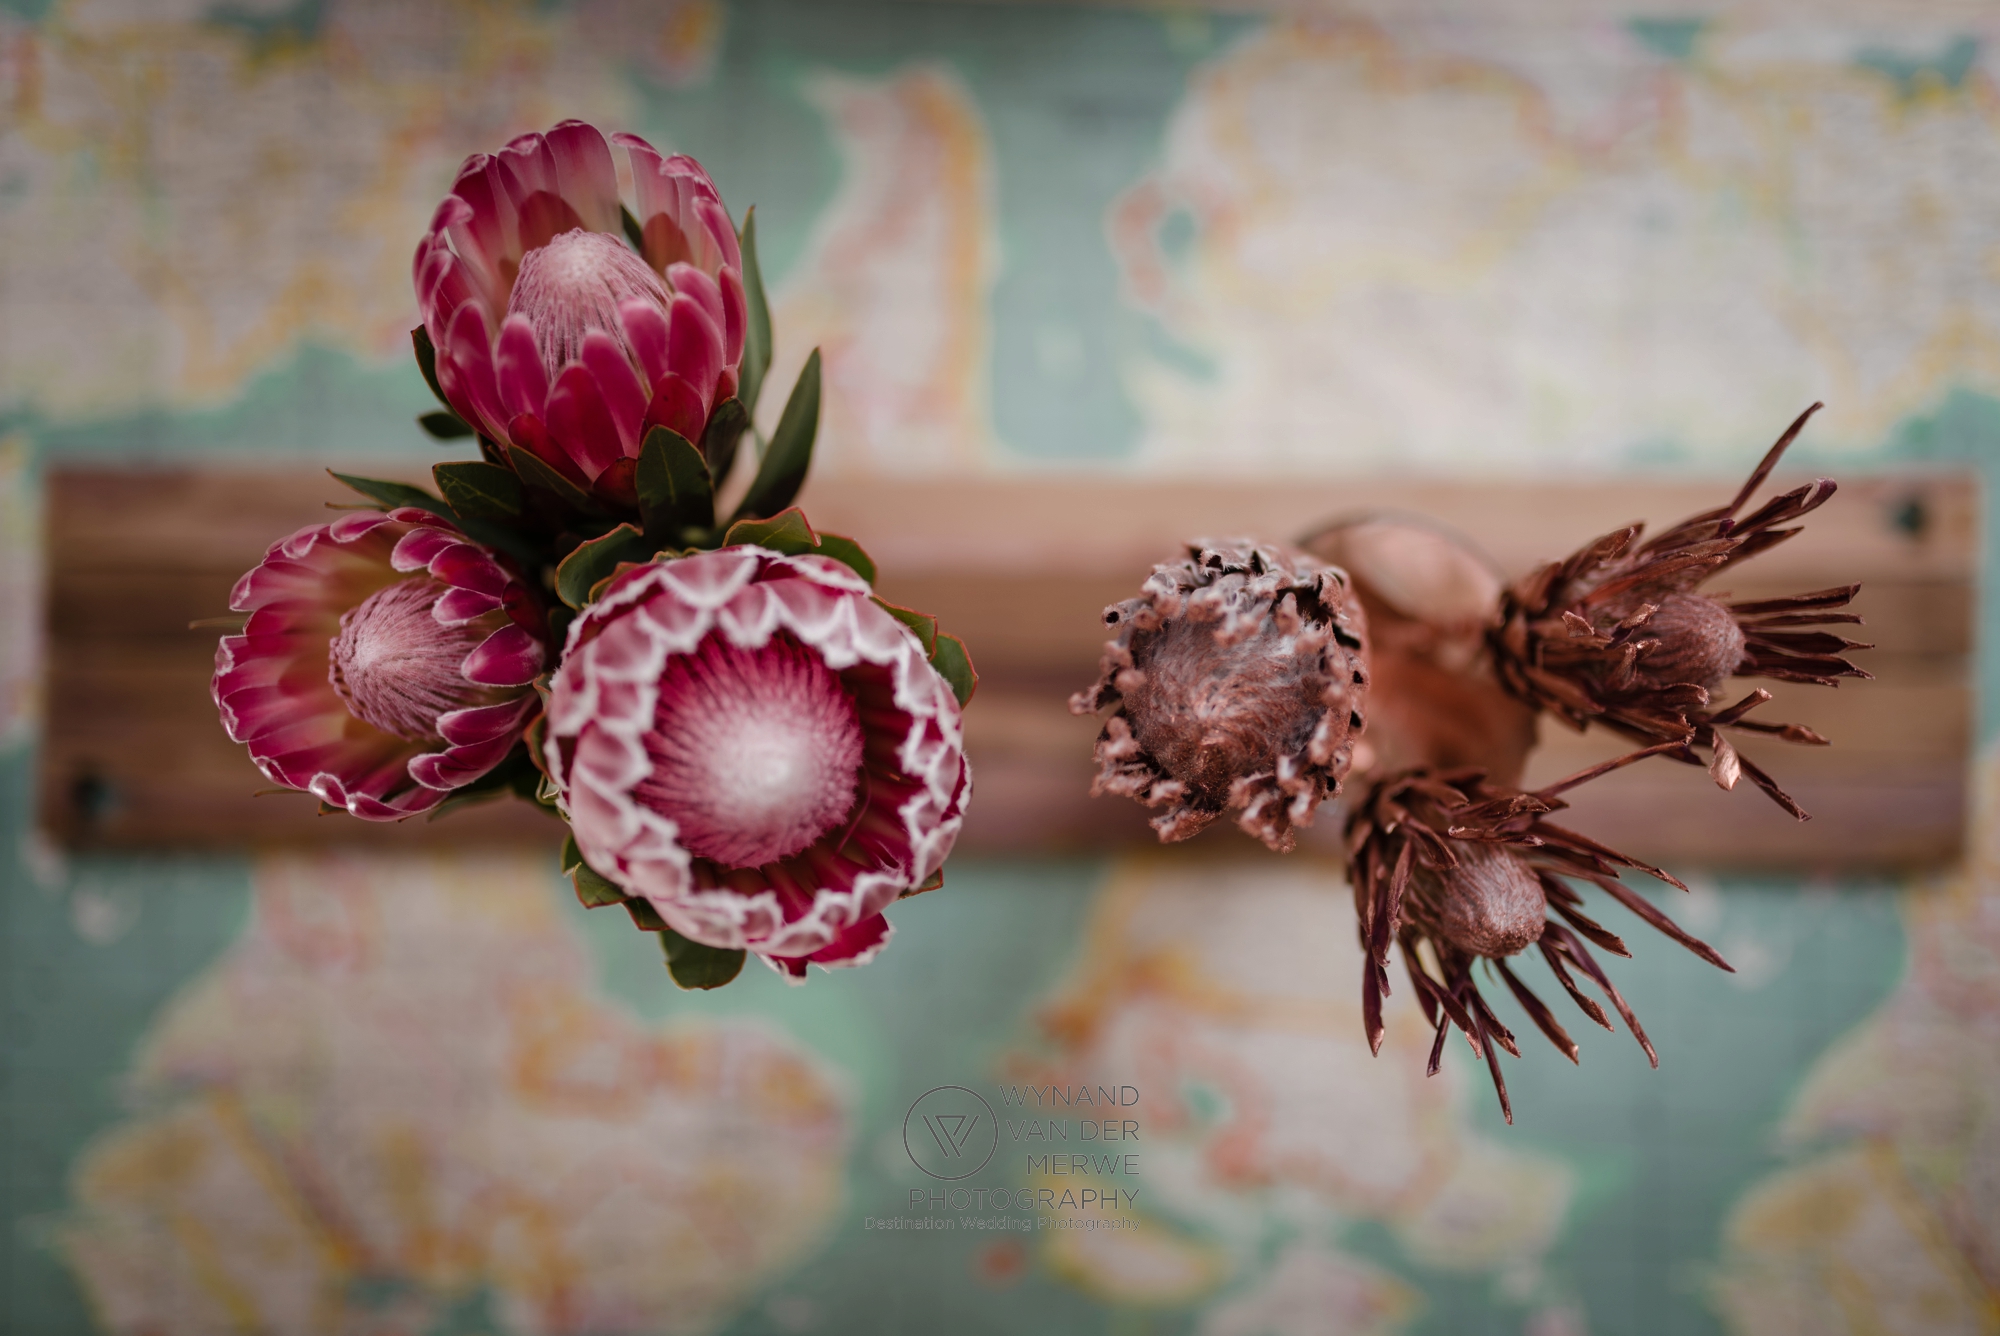
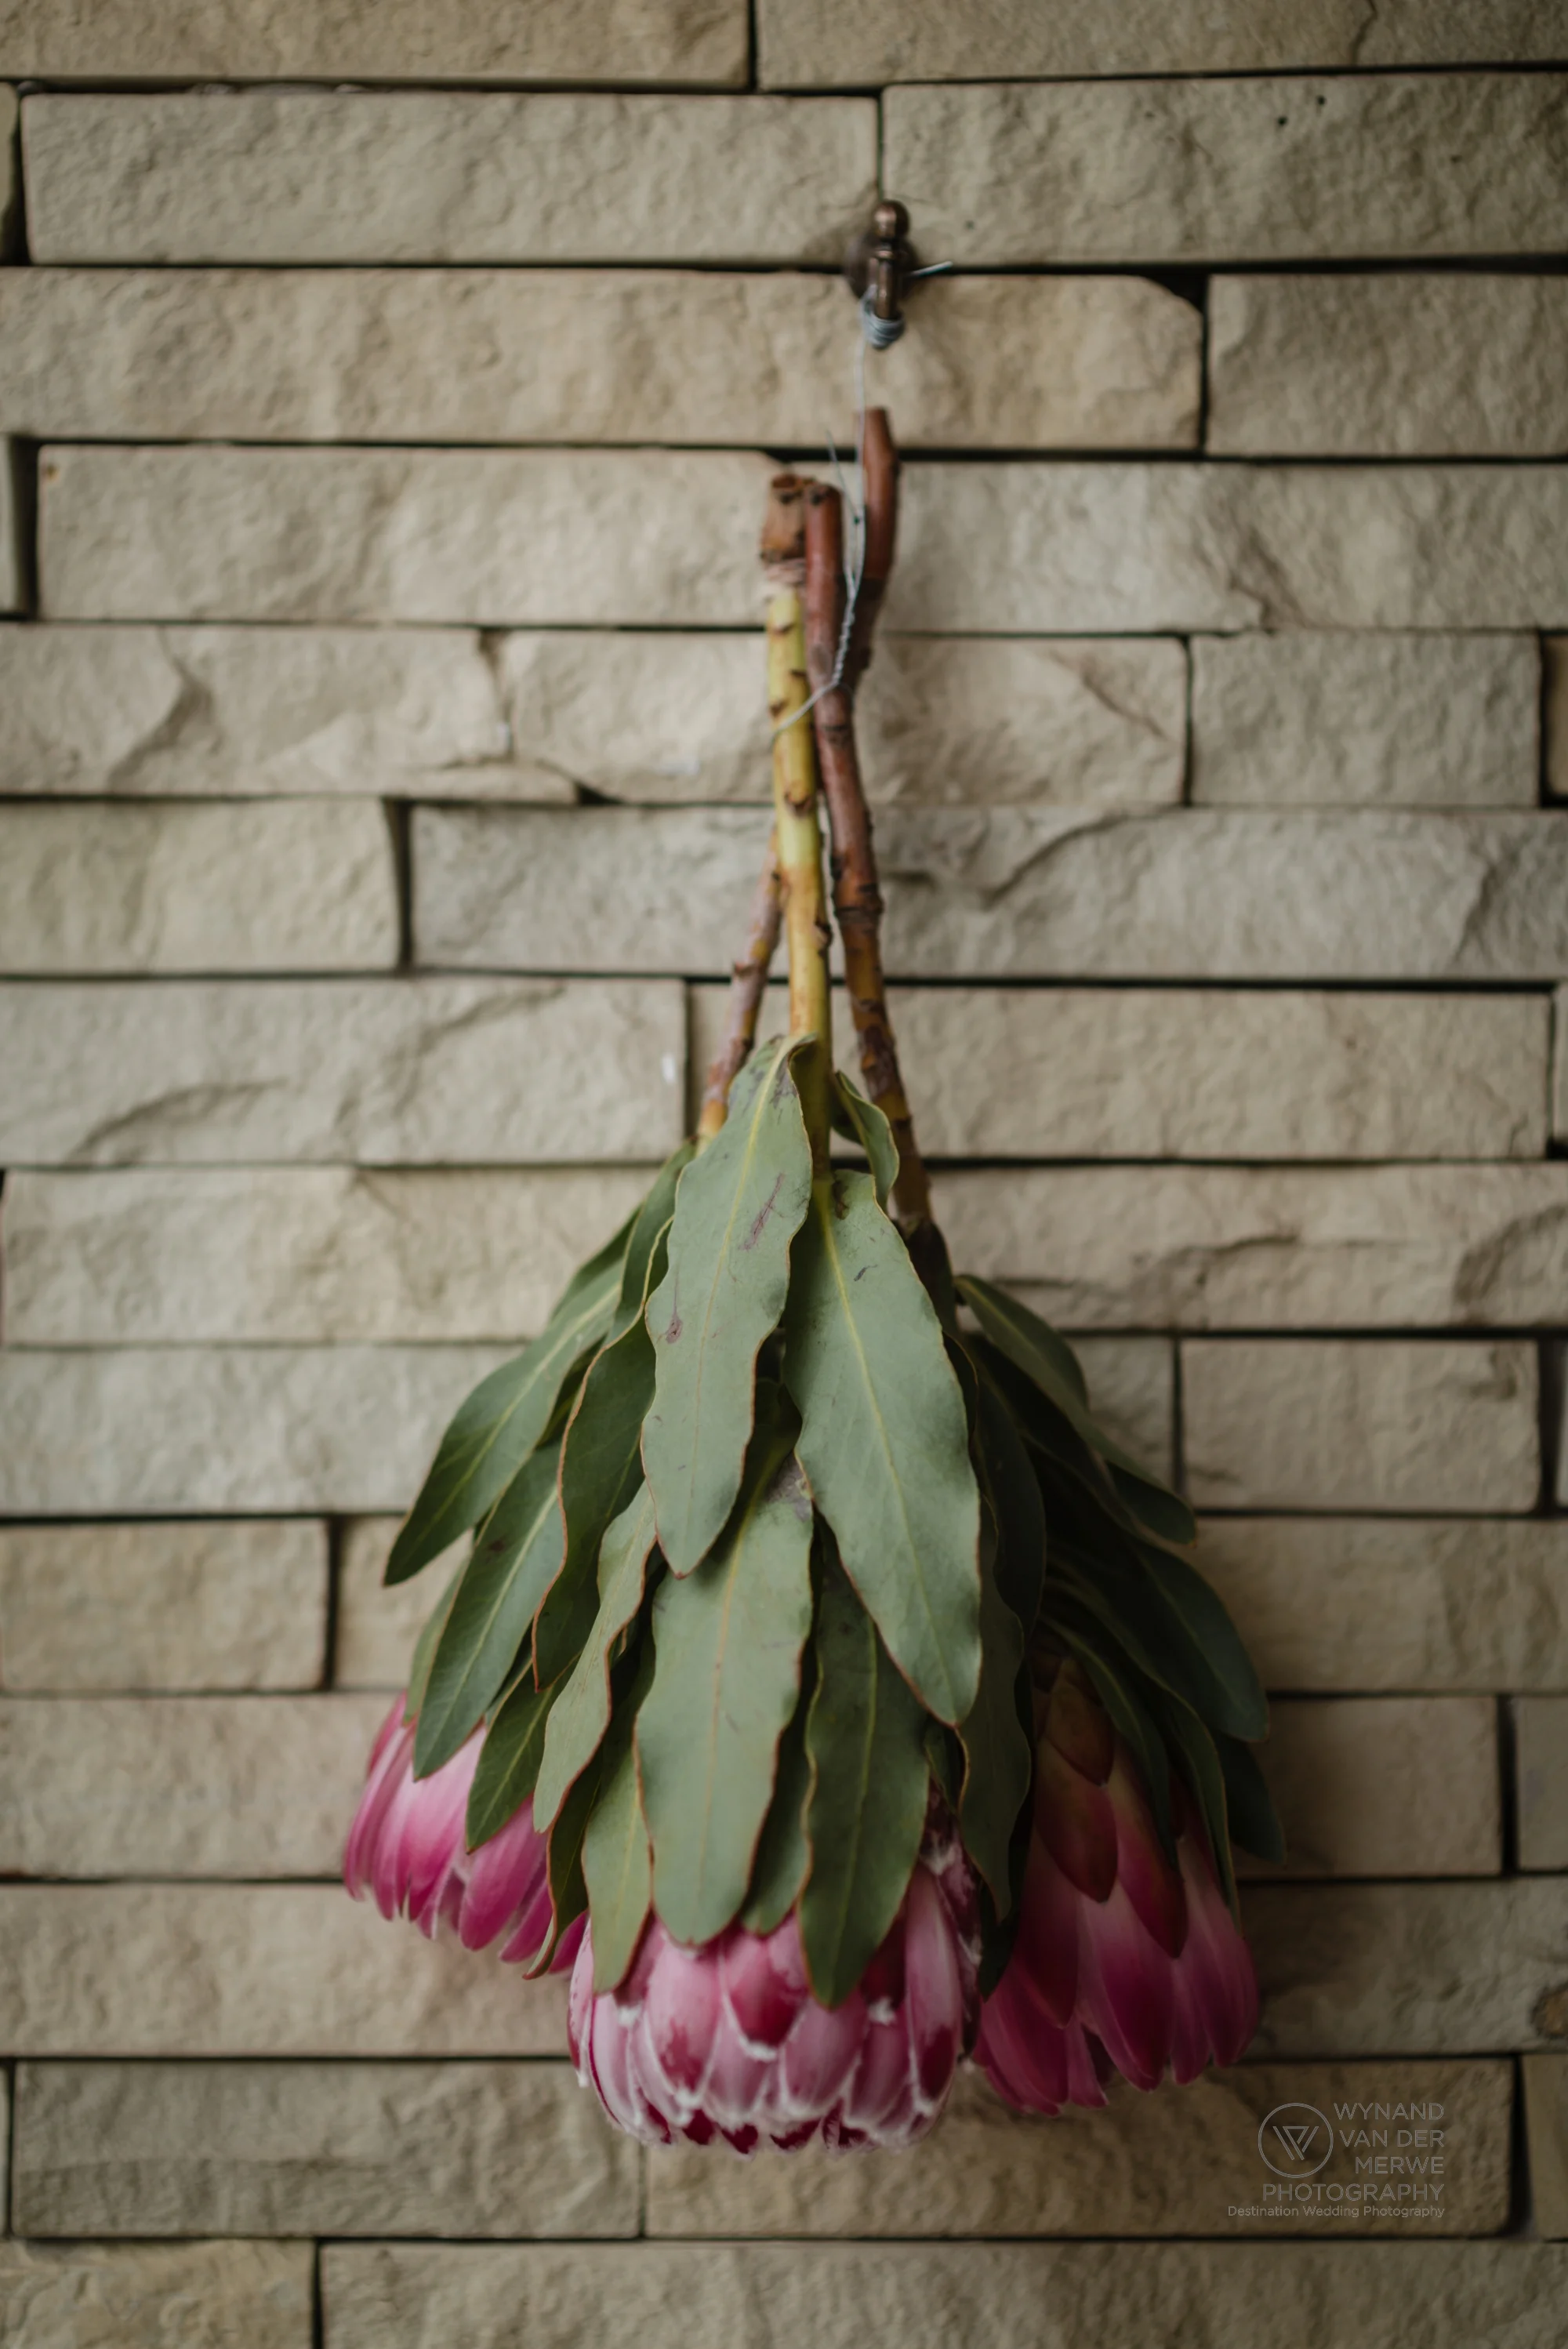
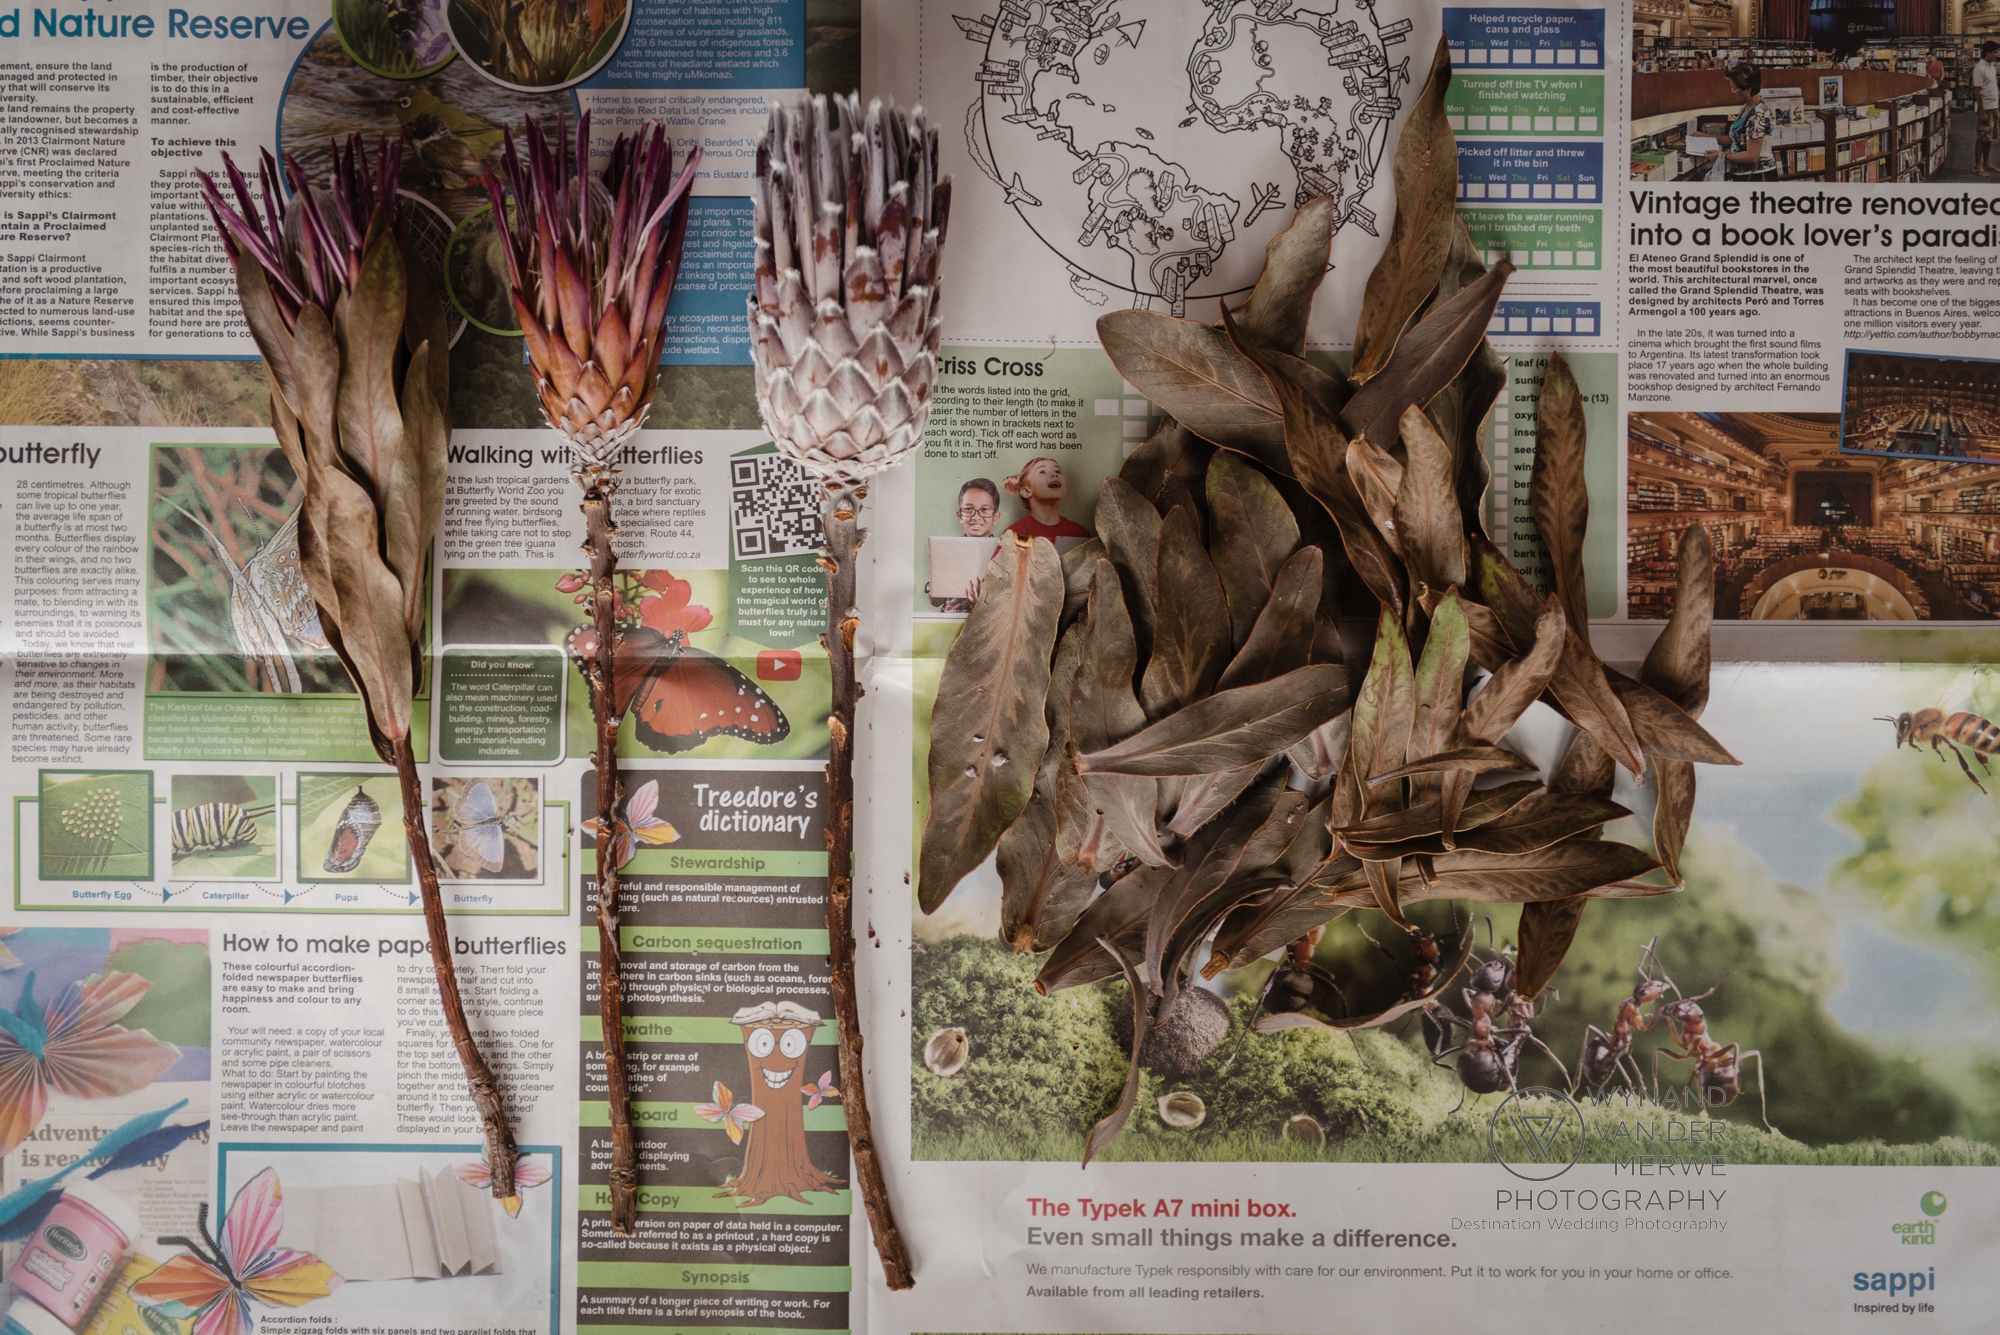
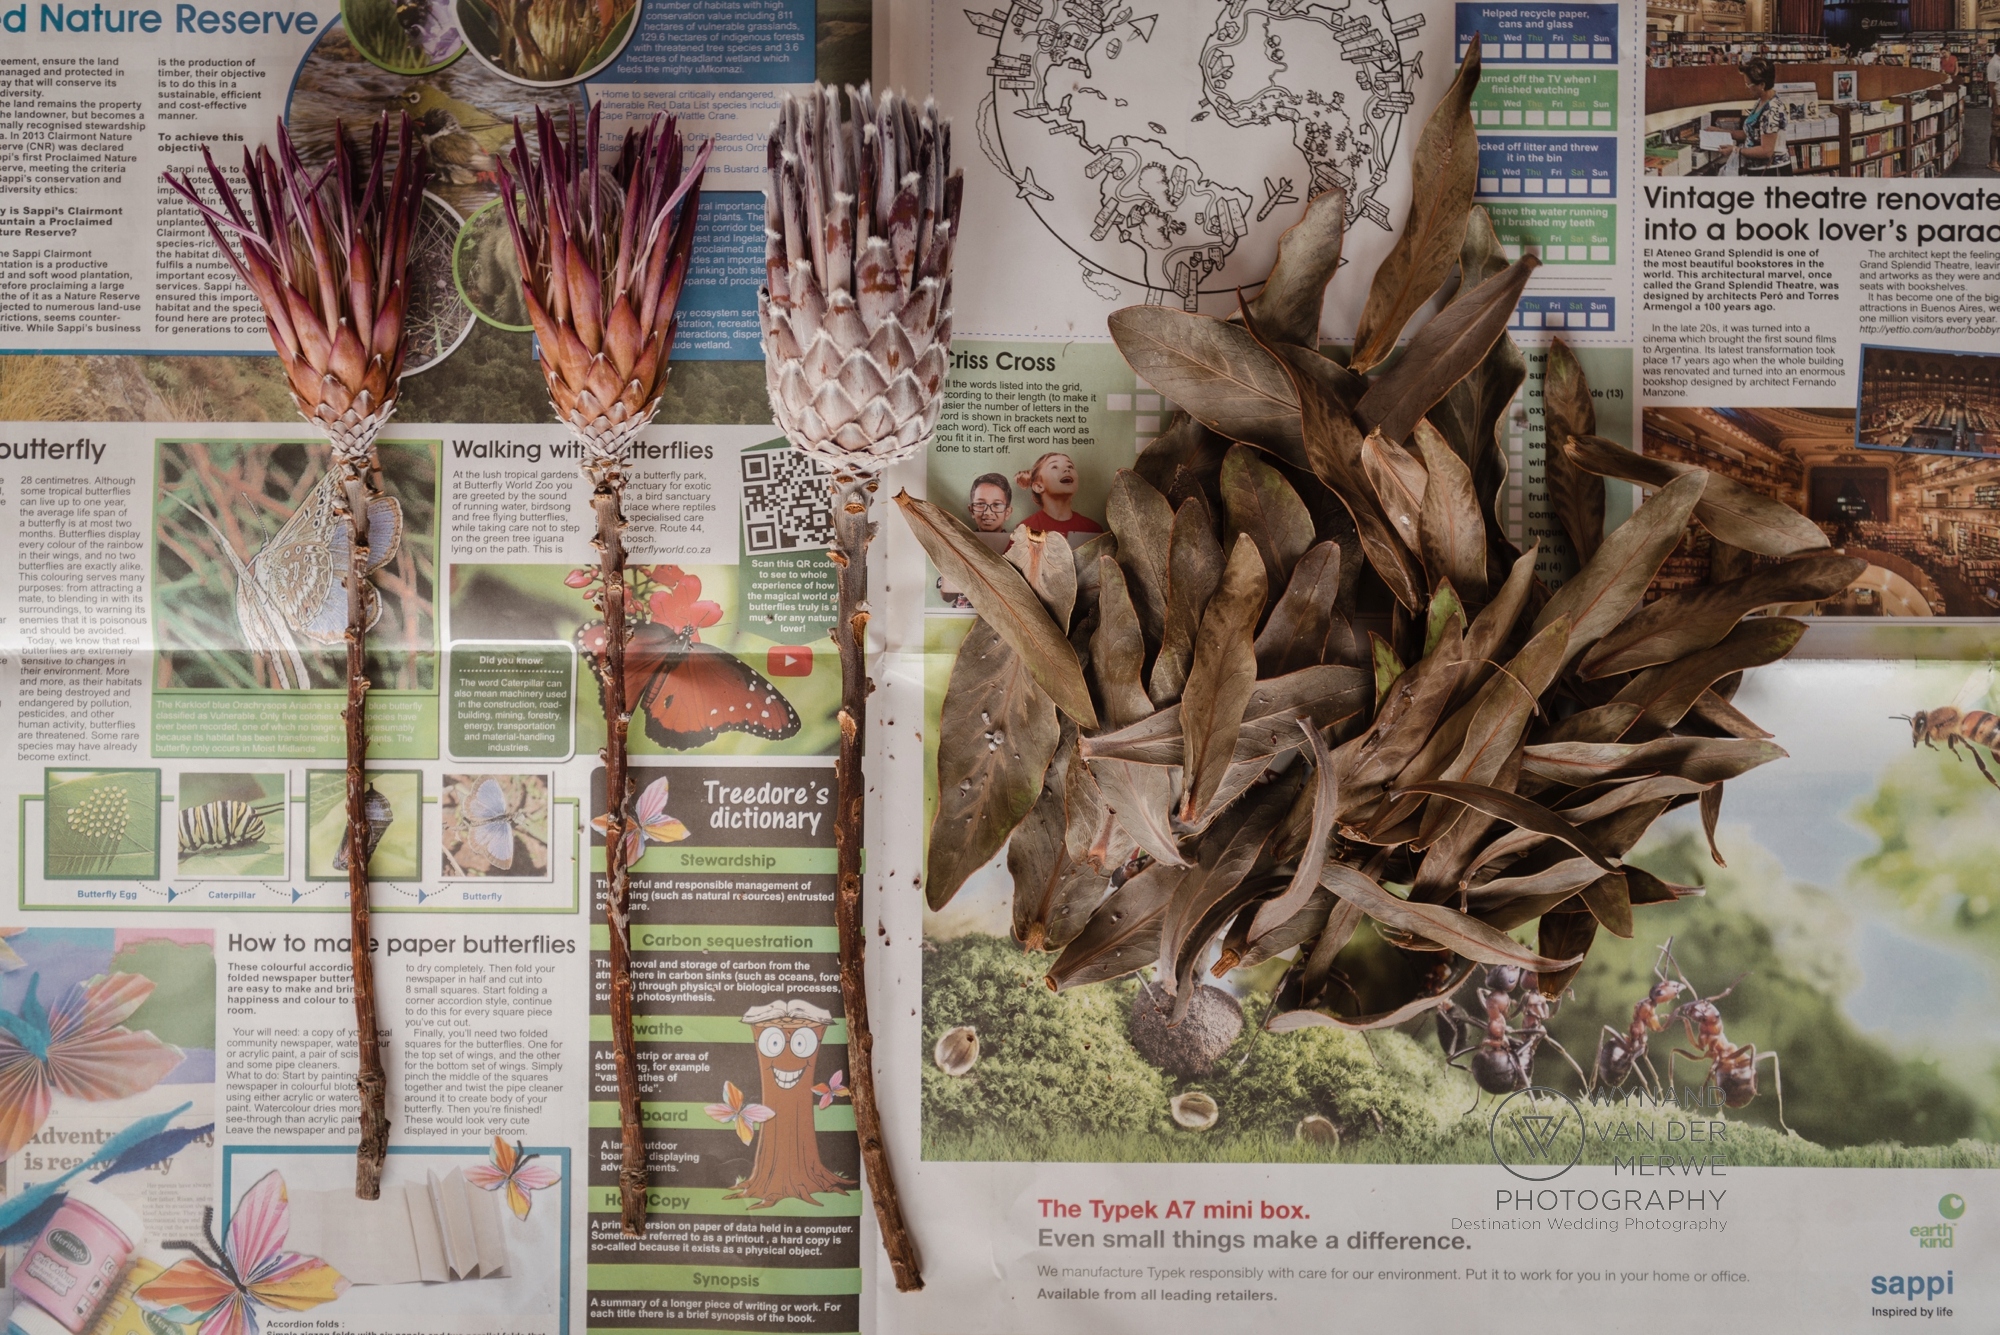
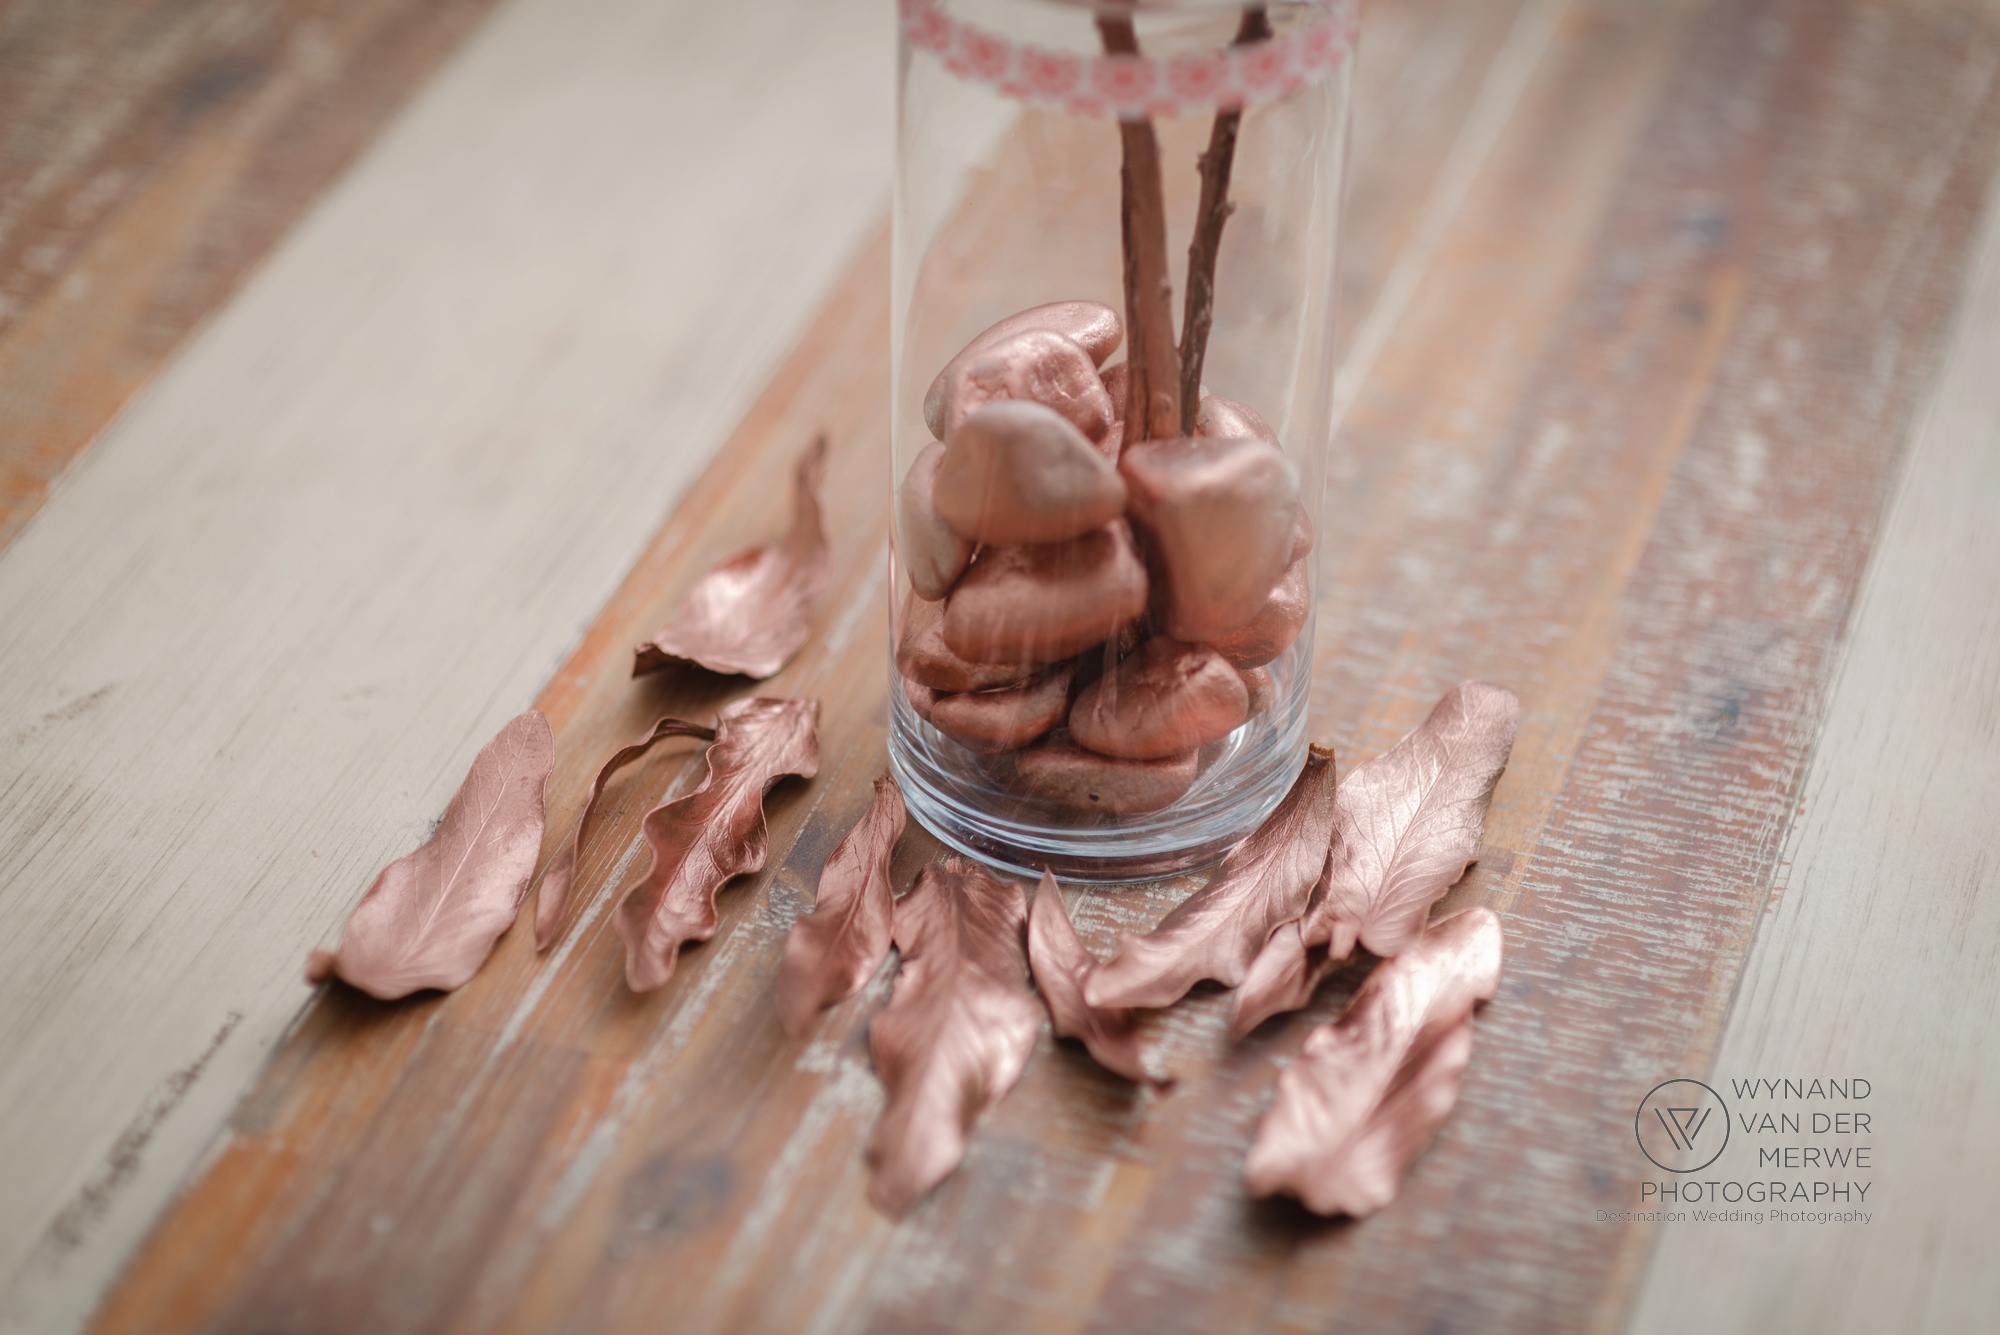
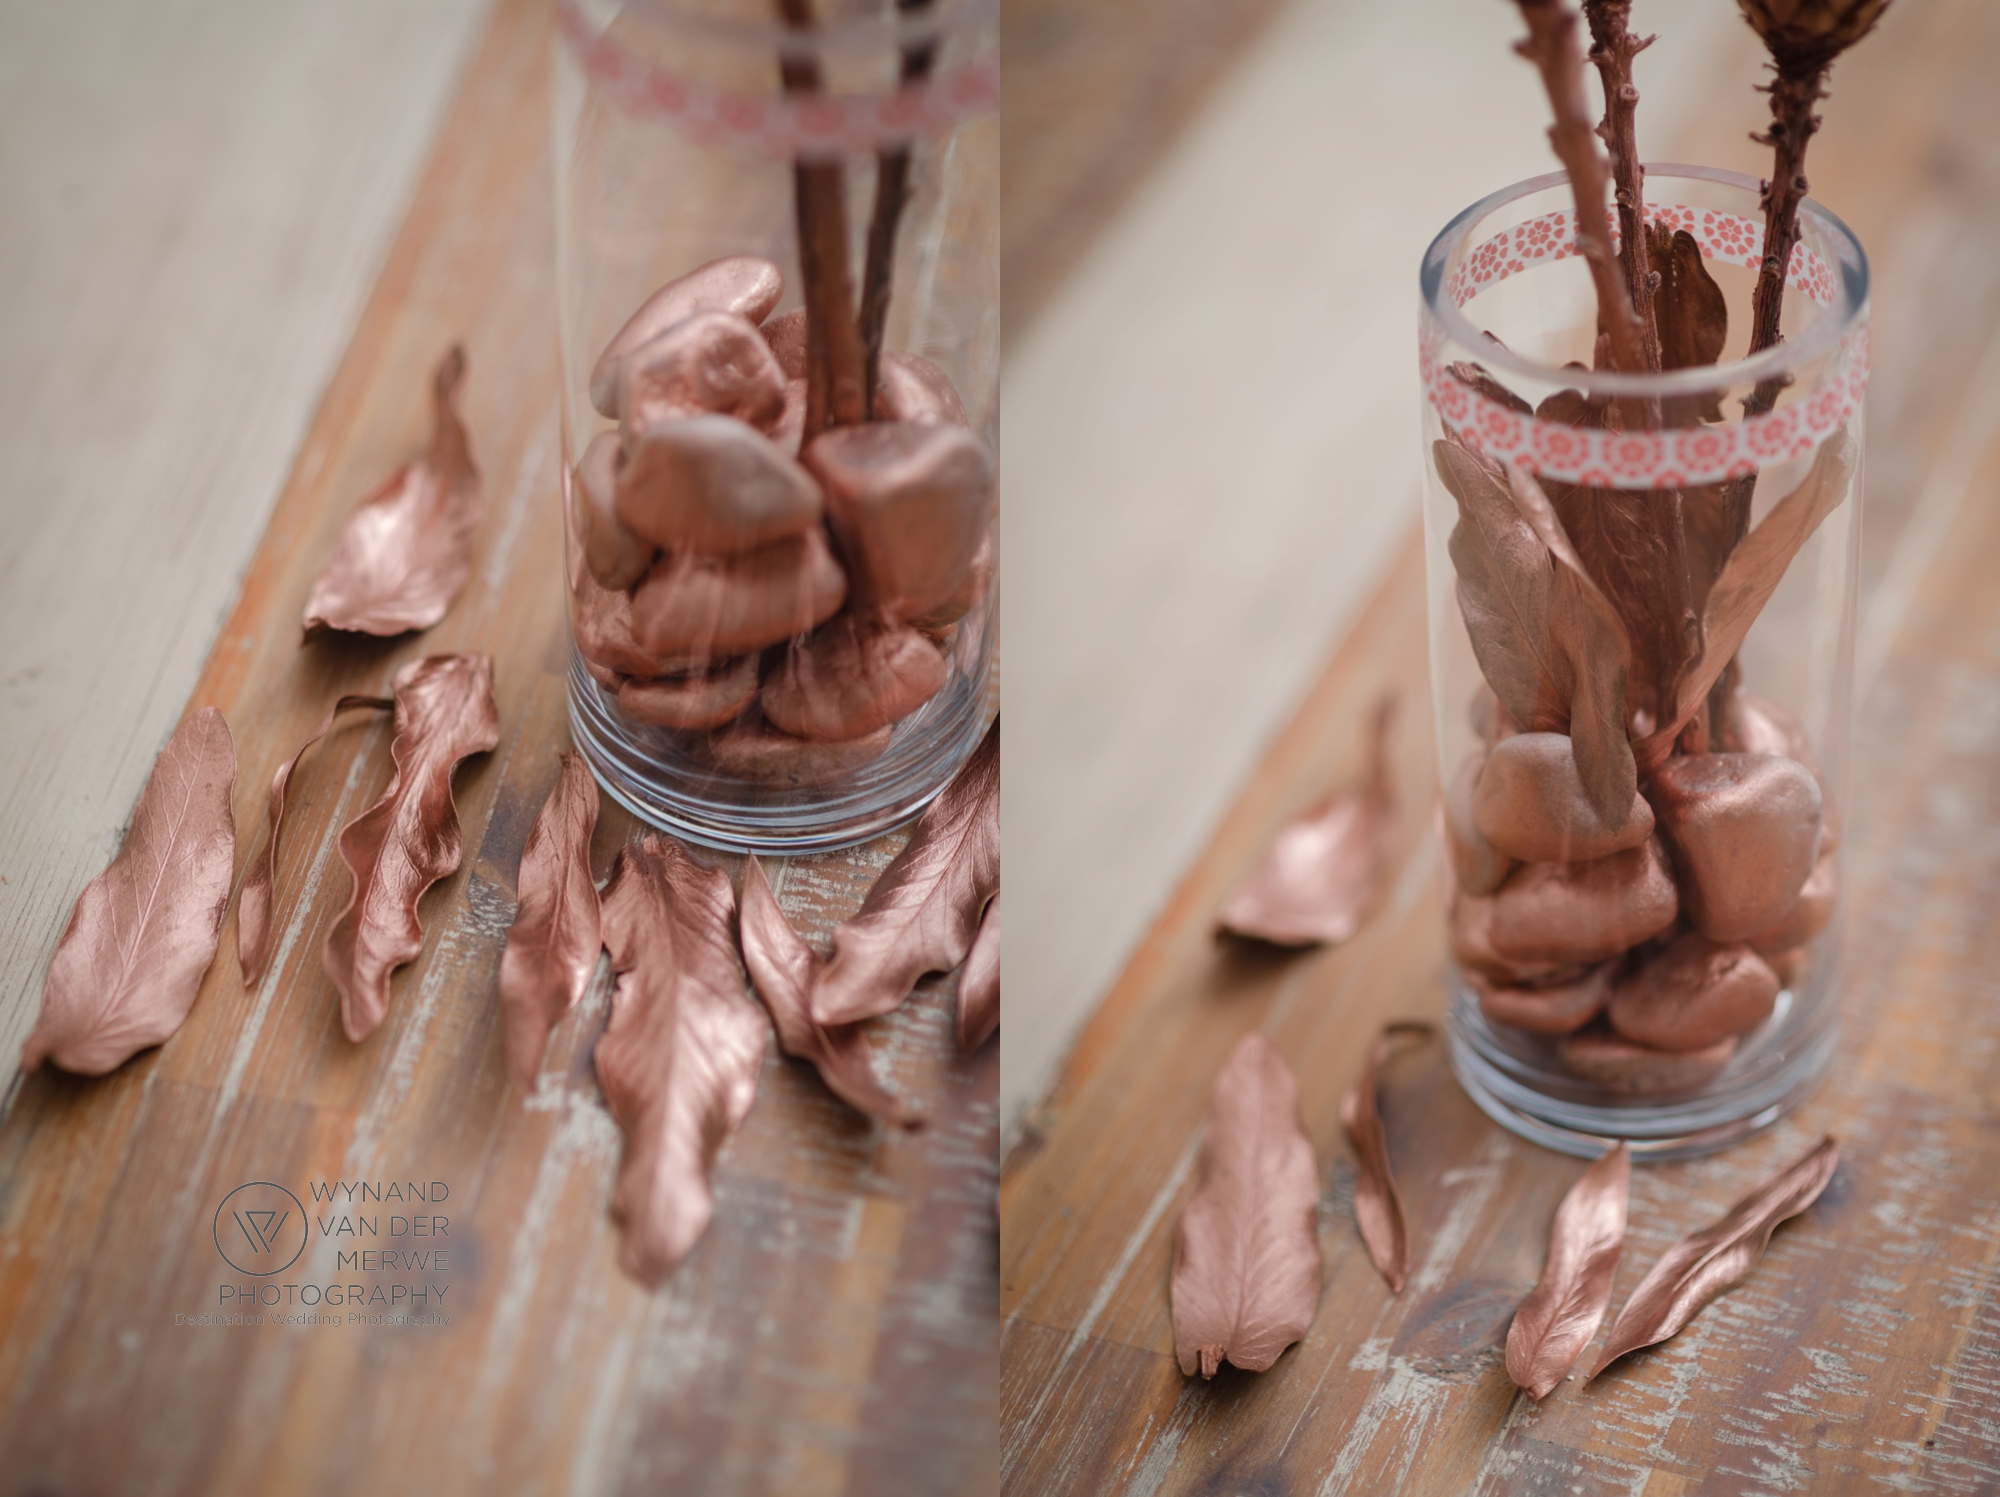
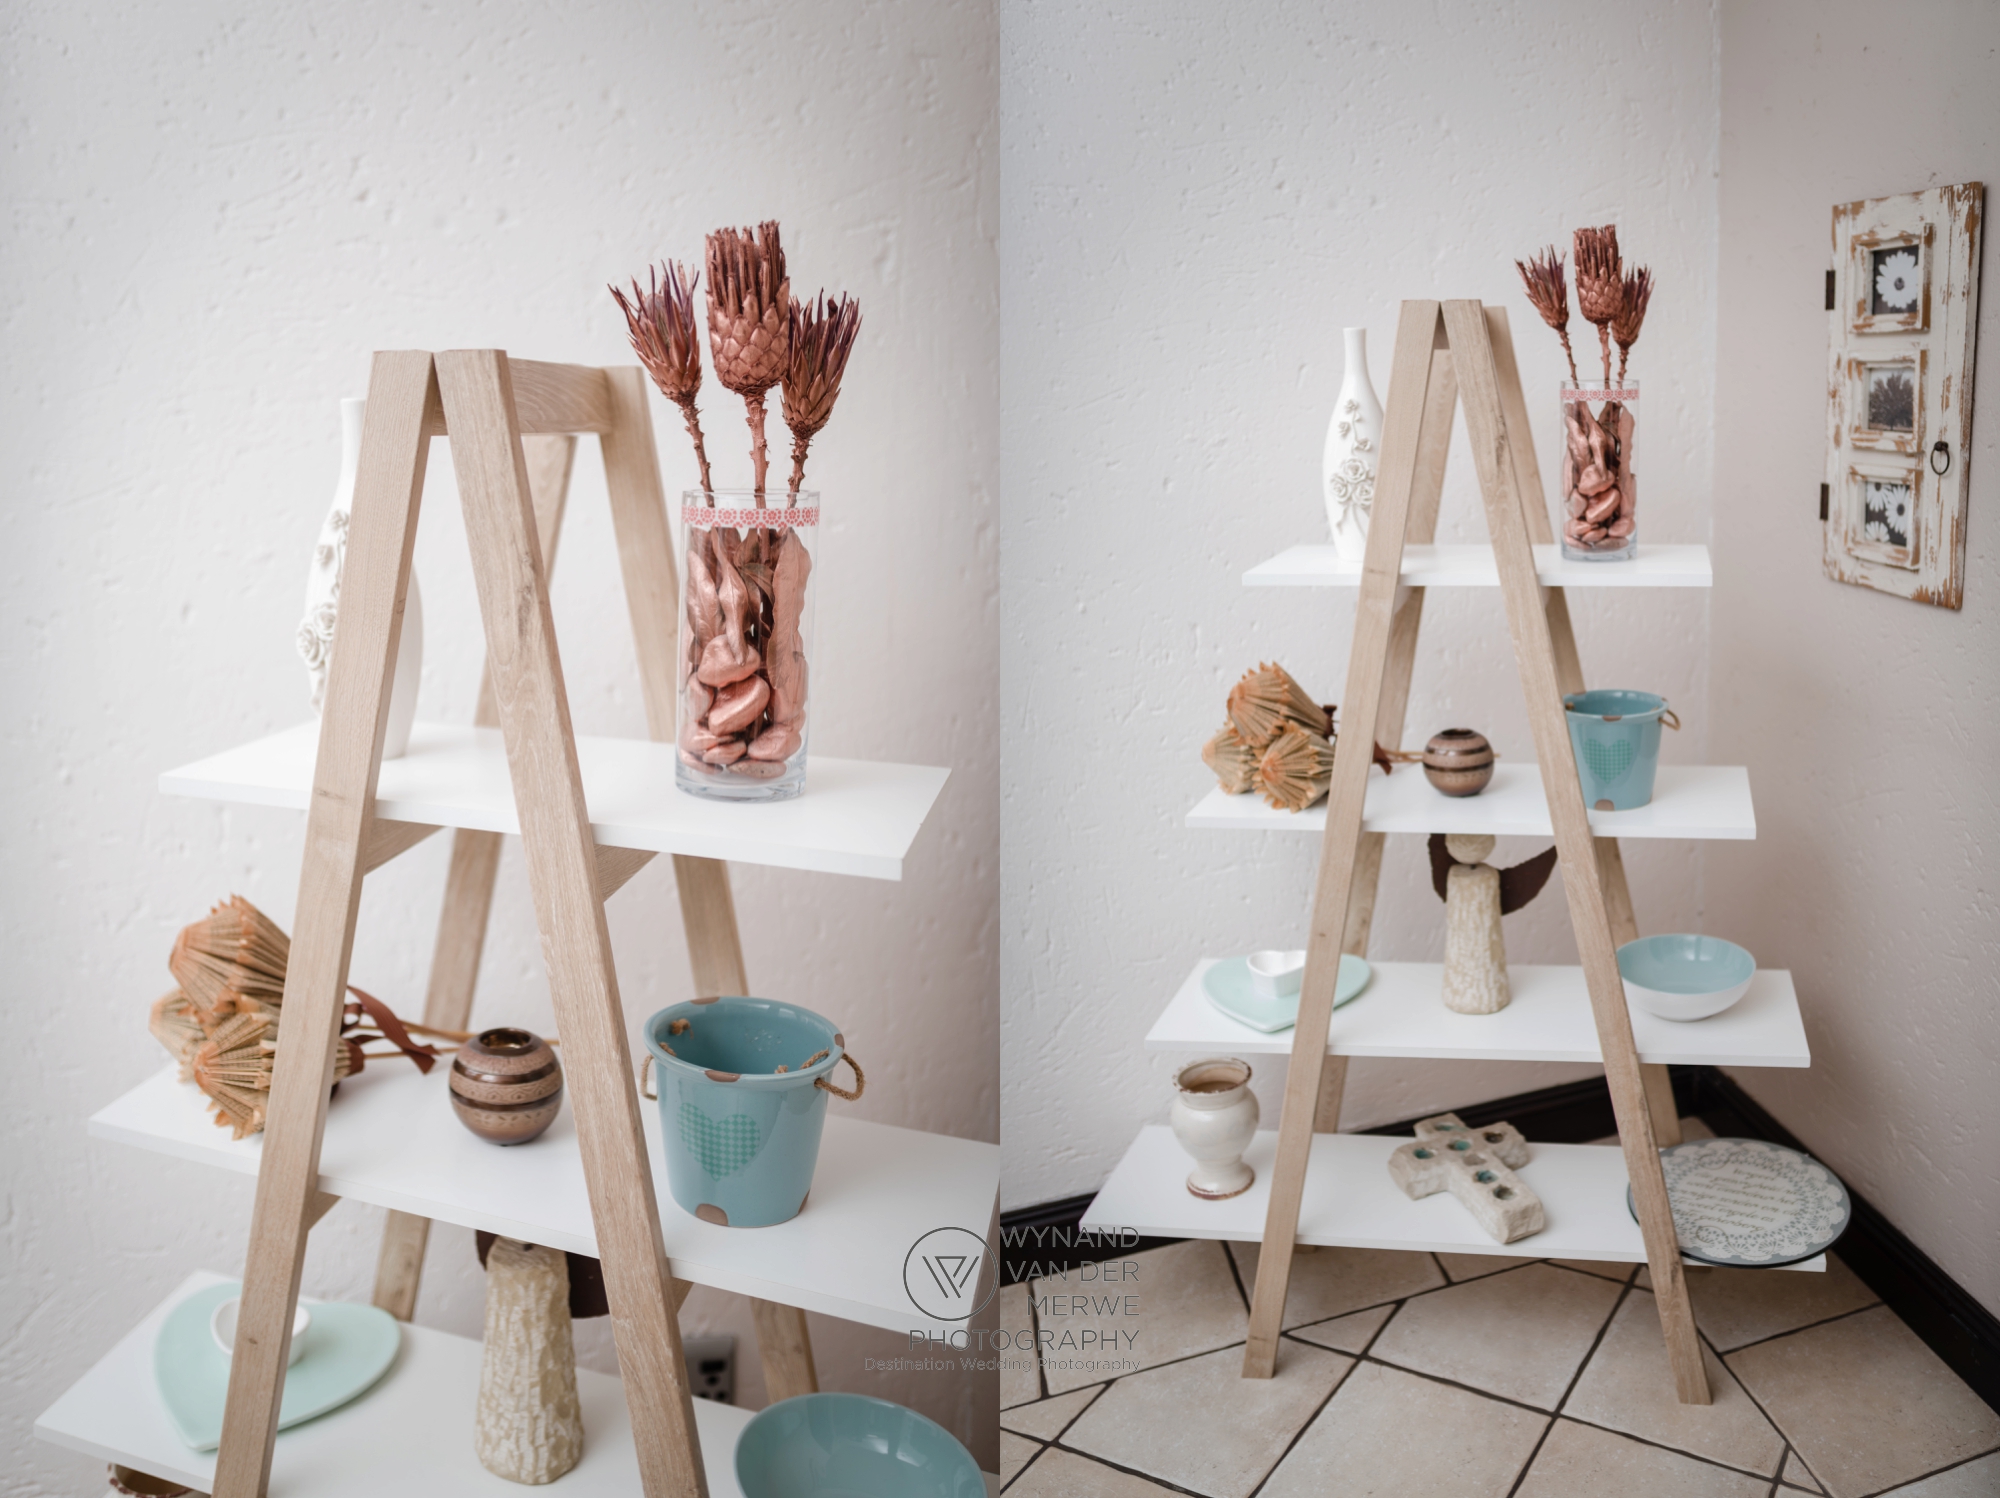
Rose Gold is fashion at the moment in South Africa, and I have been using some items from my home for some of my styled shoots. My wife has an impressive eye for styling our home and she gave me this idea of spraying the proteas I used in a shoot Rose Gold color. Proteas are seasonal at the moment so they are super cheap, so proteas feature at many weddings at the moment as wedding flowers and bouquets. And they are very pretty, and obviously our national flower.
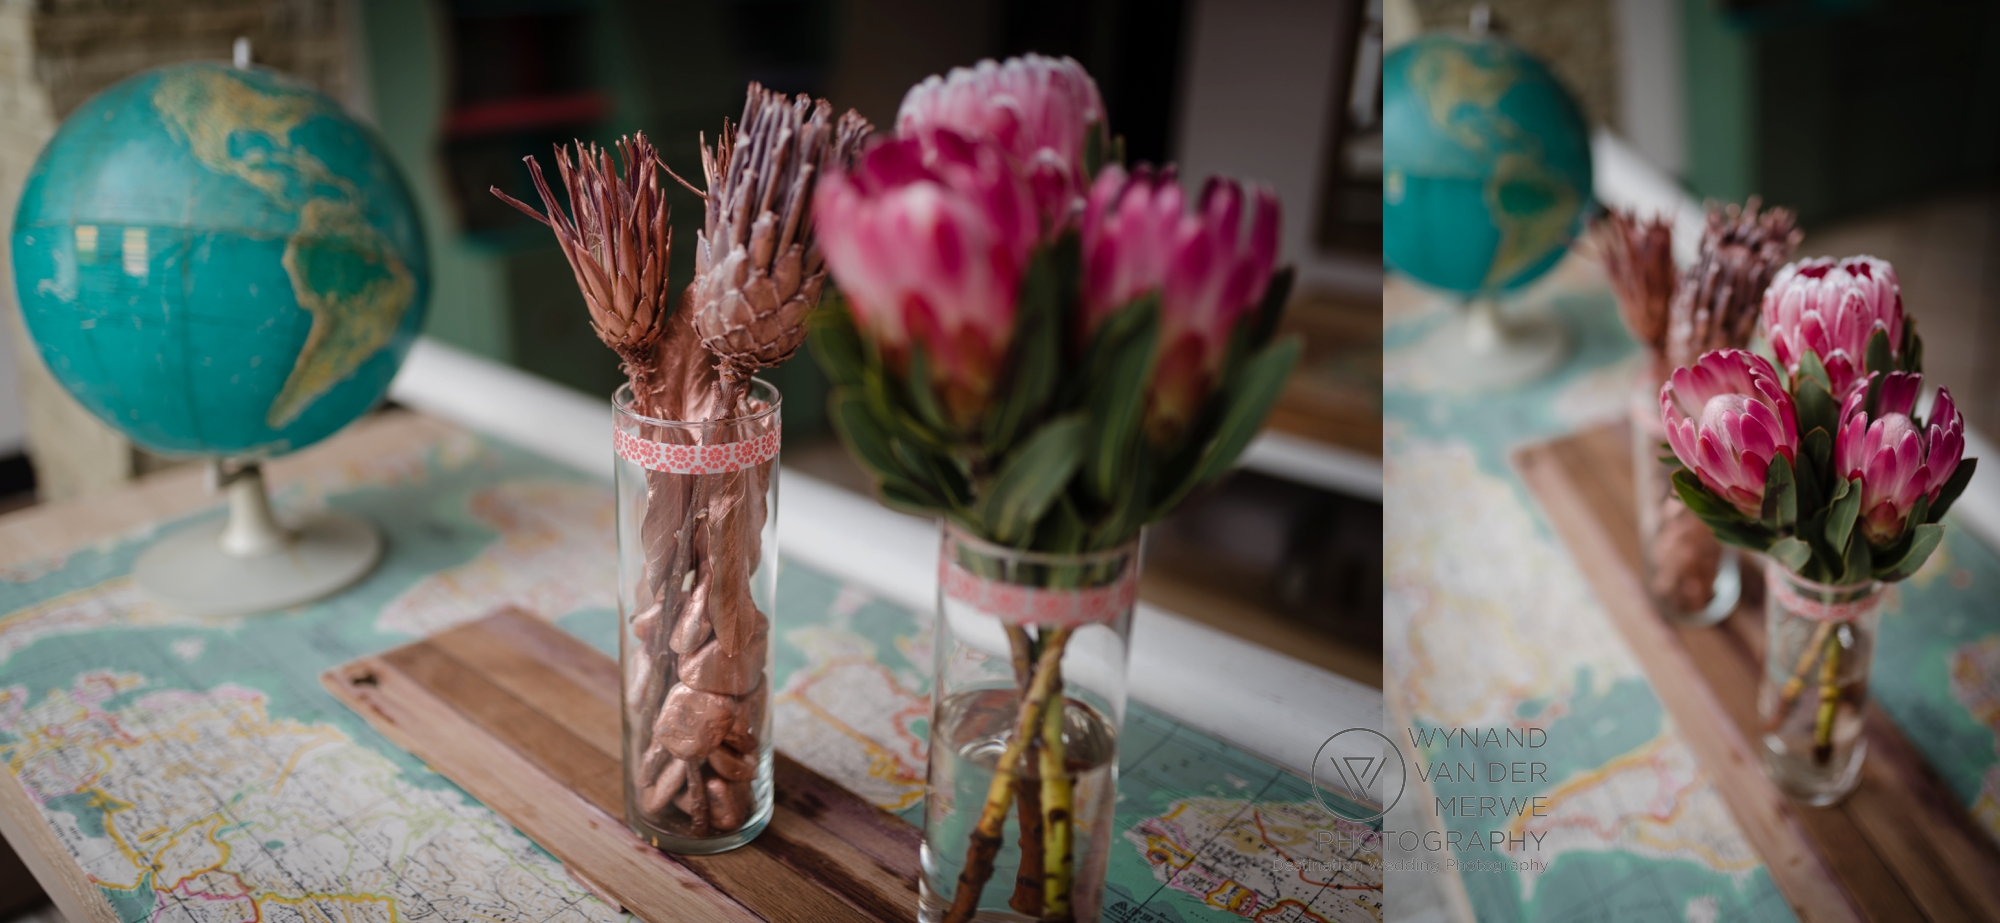
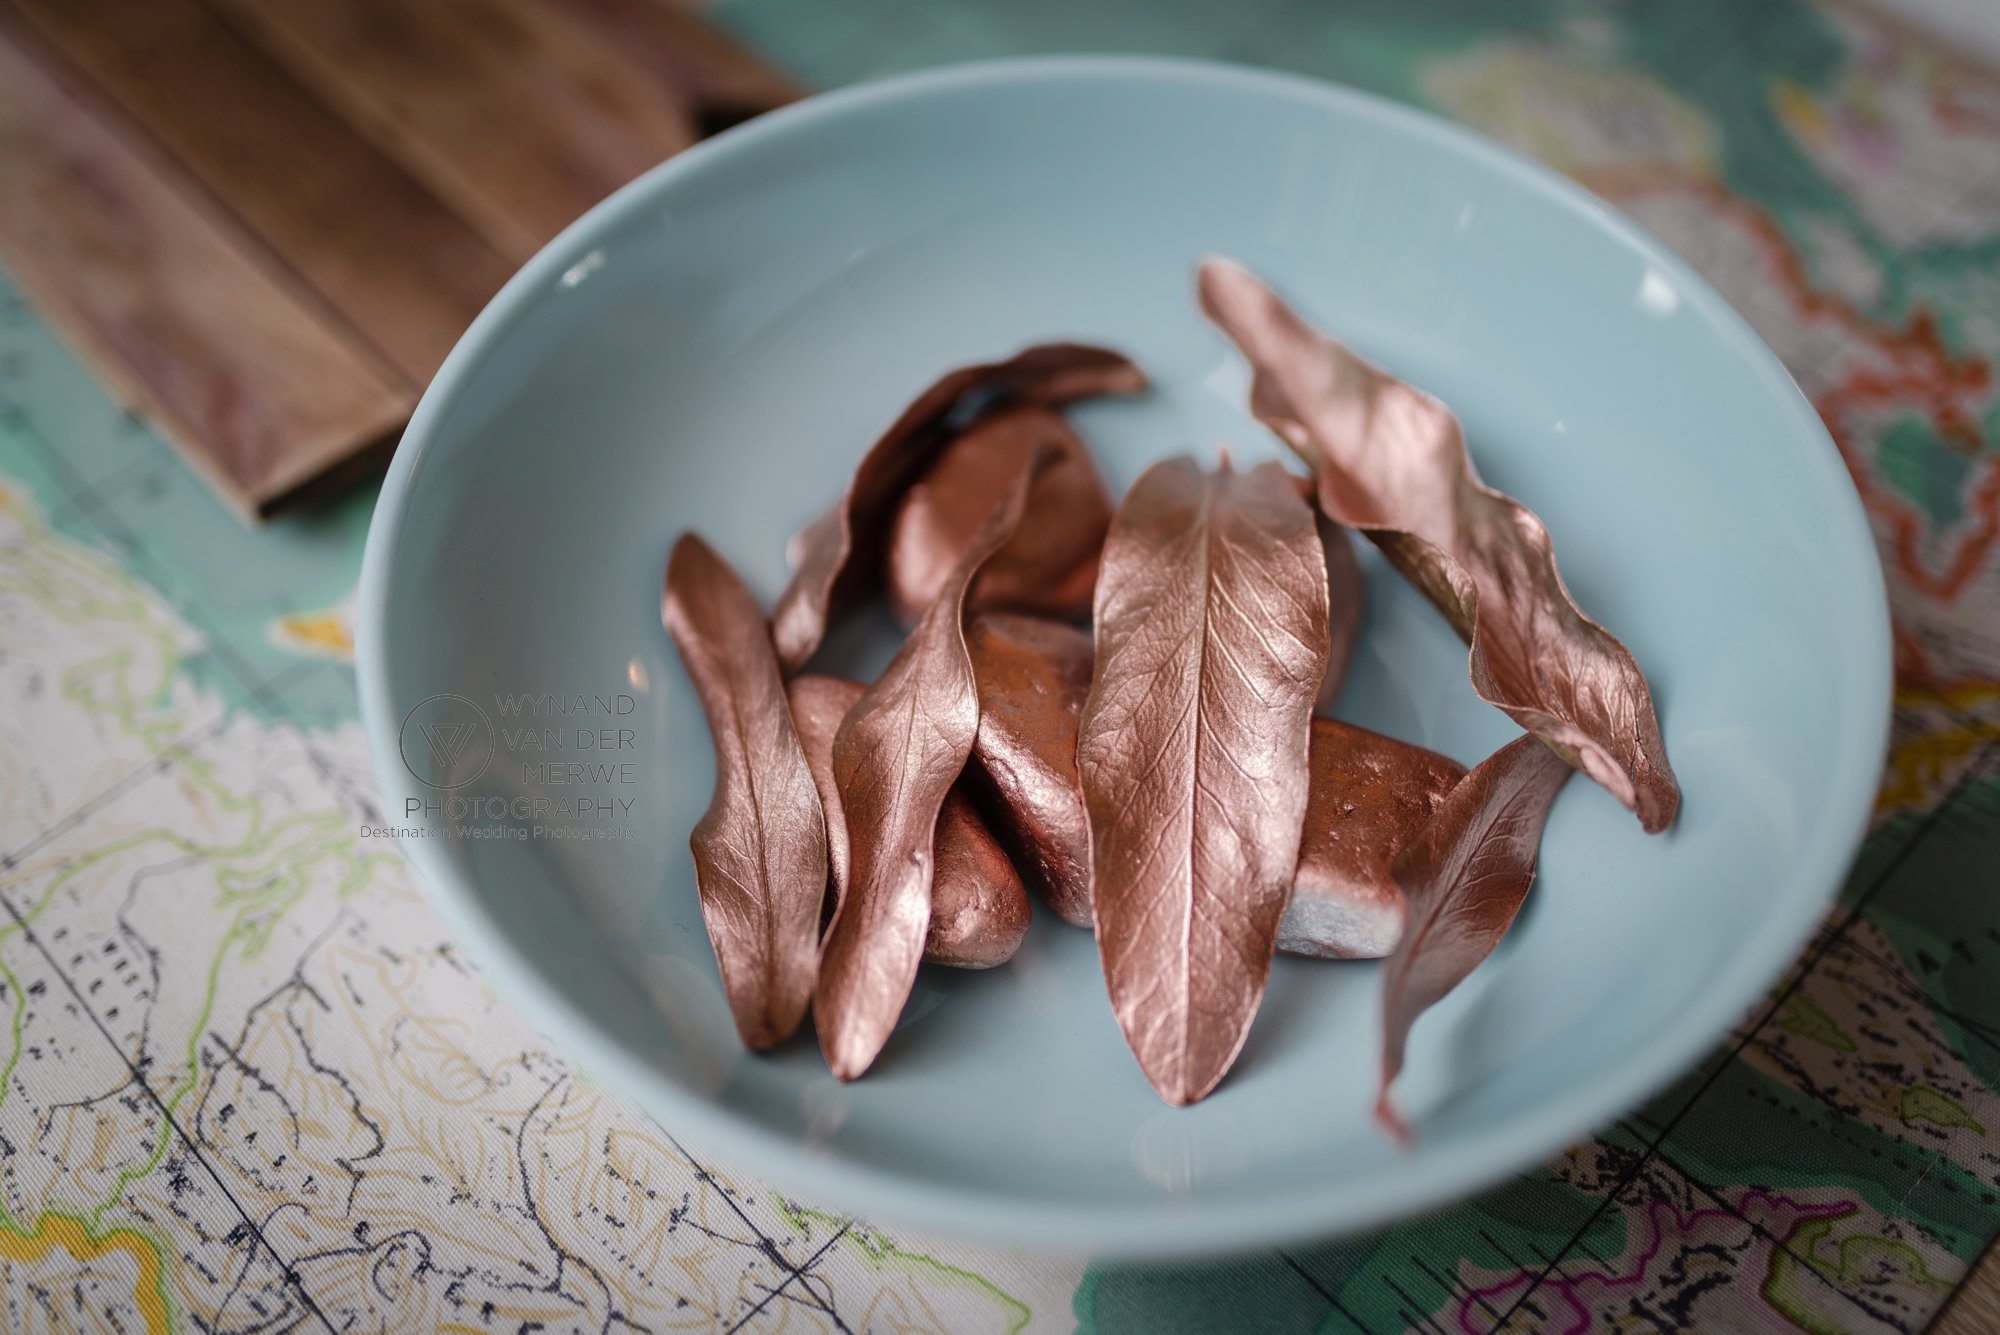
I only made the Rose Gold flower display, with the Rose Gold leafs and pebbles in the bowl, shown in the image above. The rest of our home has been styled by my wife.
How can I make this for myself?

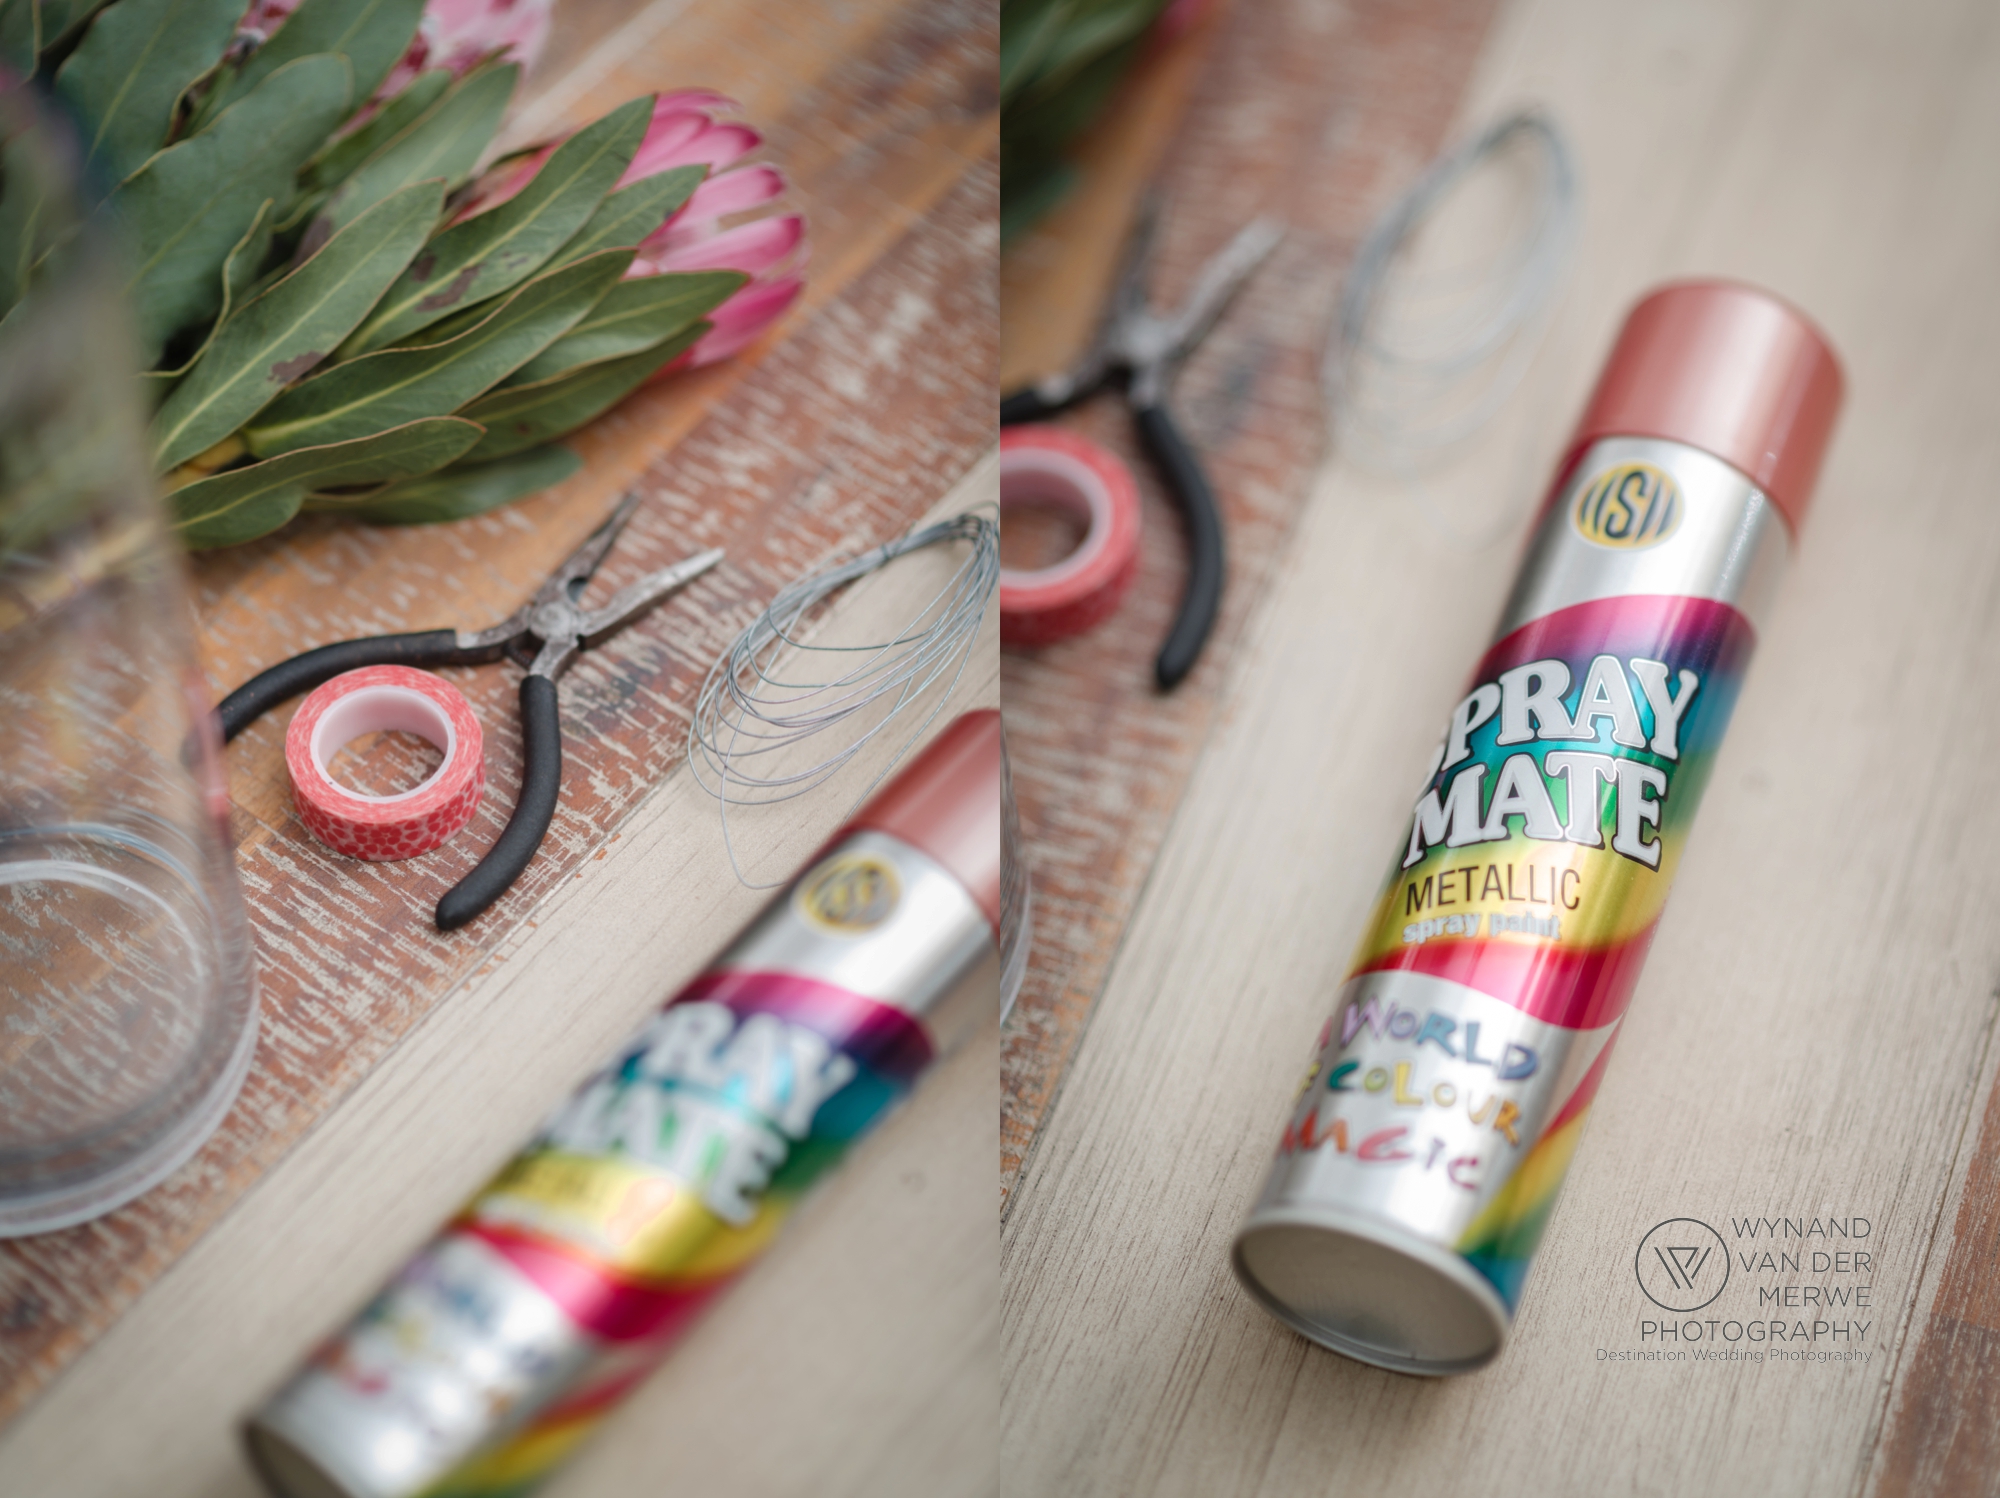
Here is what you will need:
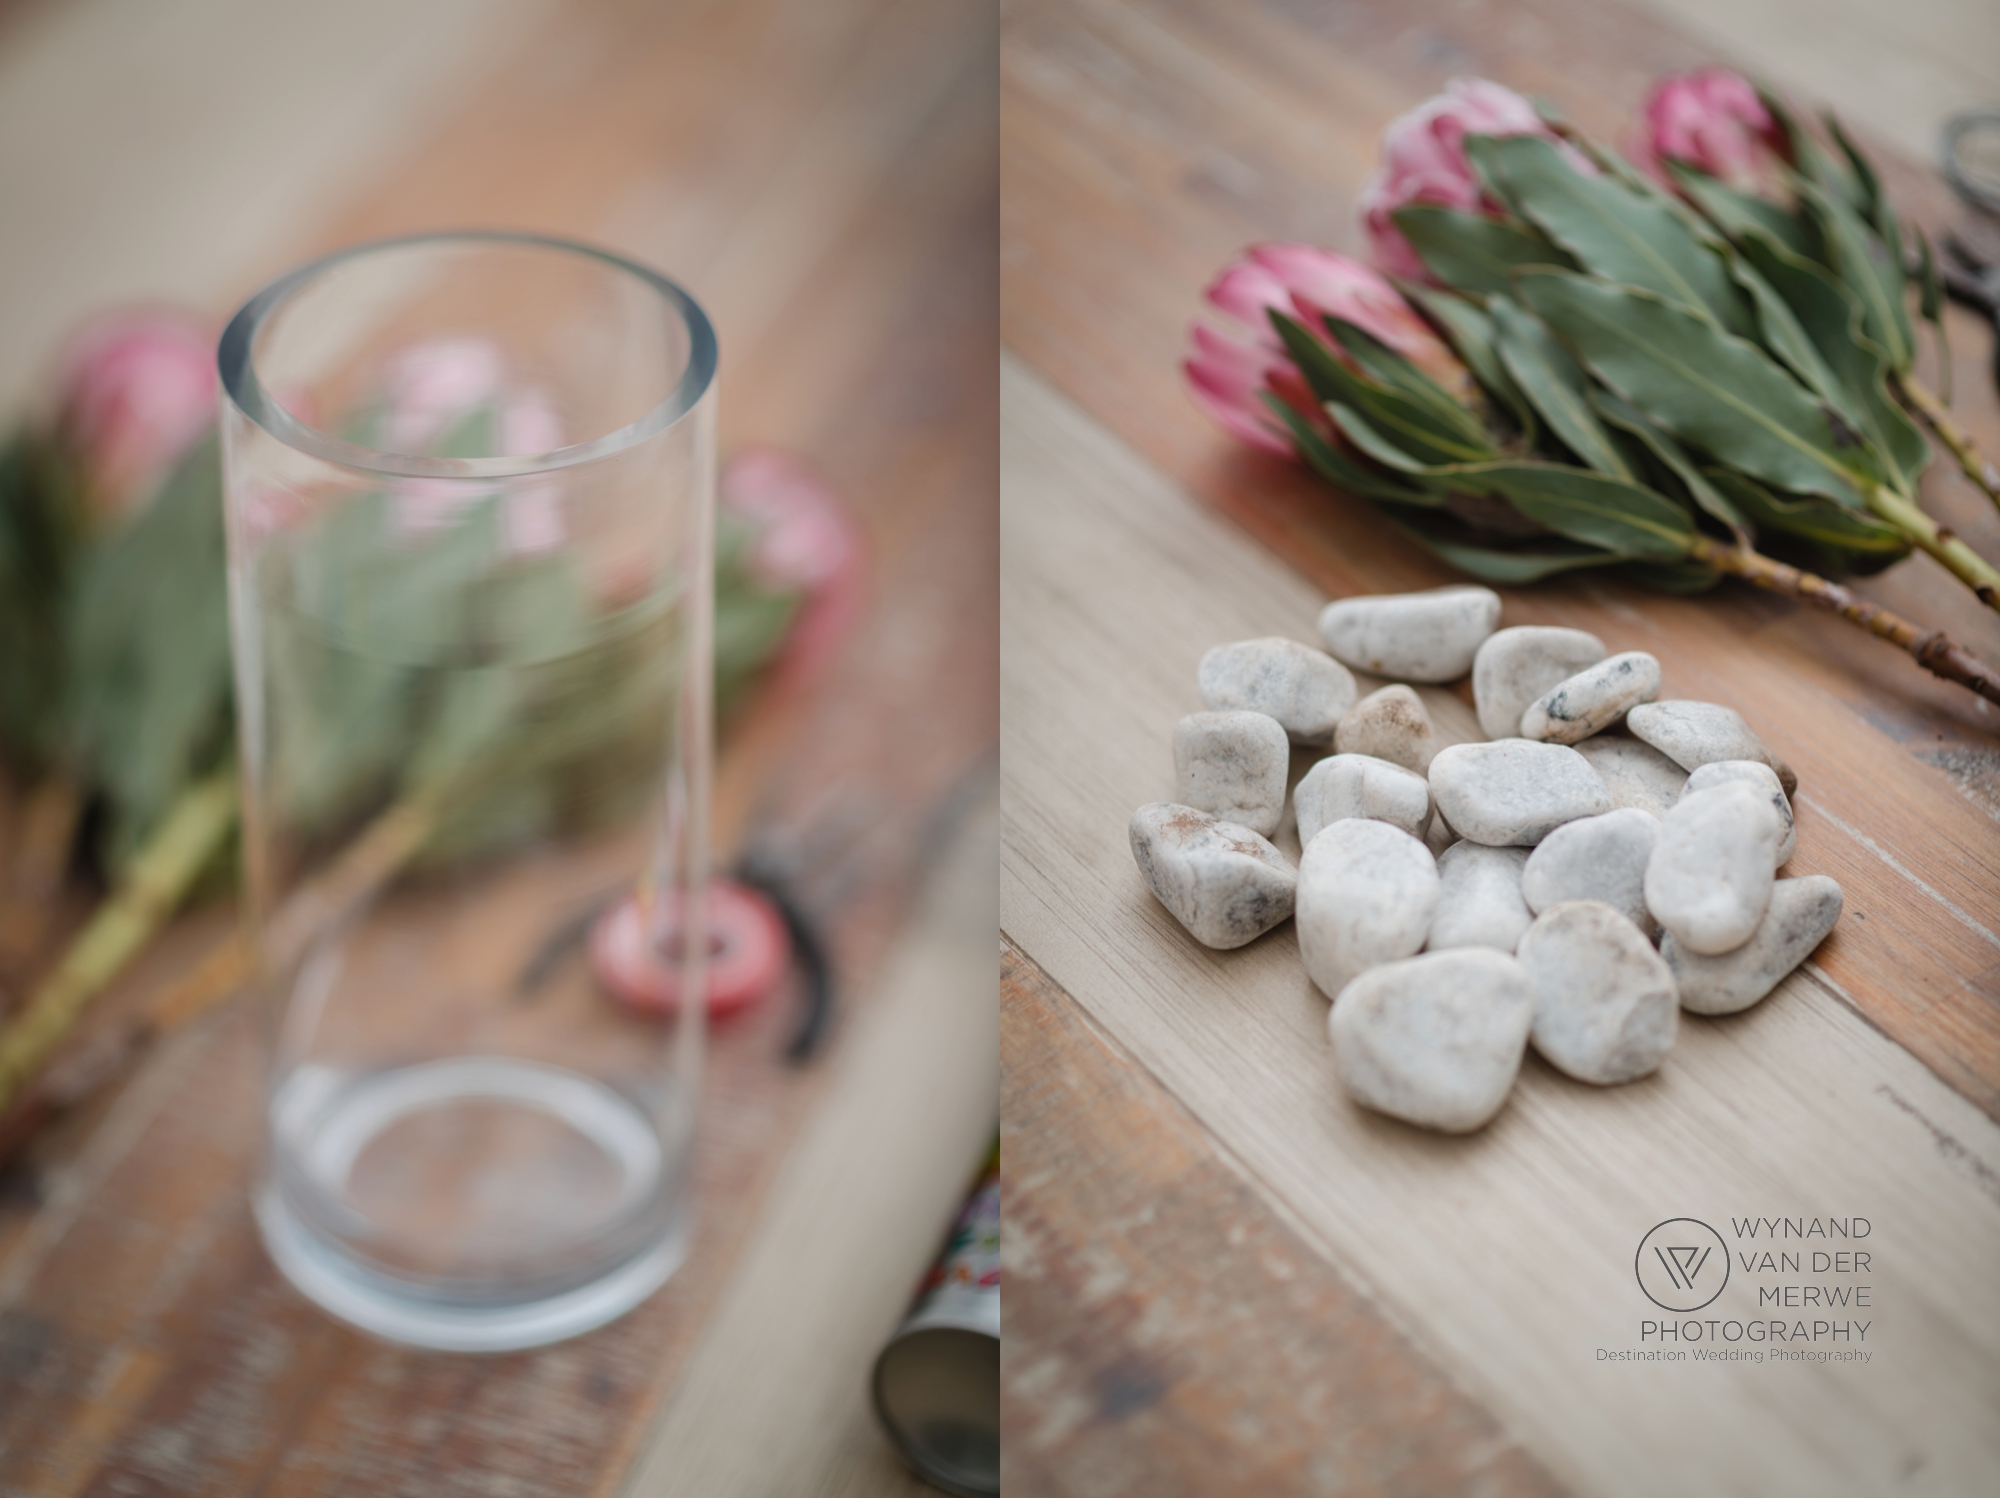
- a few pebbles
- 2x Cardinal Proteas and 1x King Protea
- pliers and a piece of wire
- creative pink tape (I got it from Melissa from Anthos Design Studio)
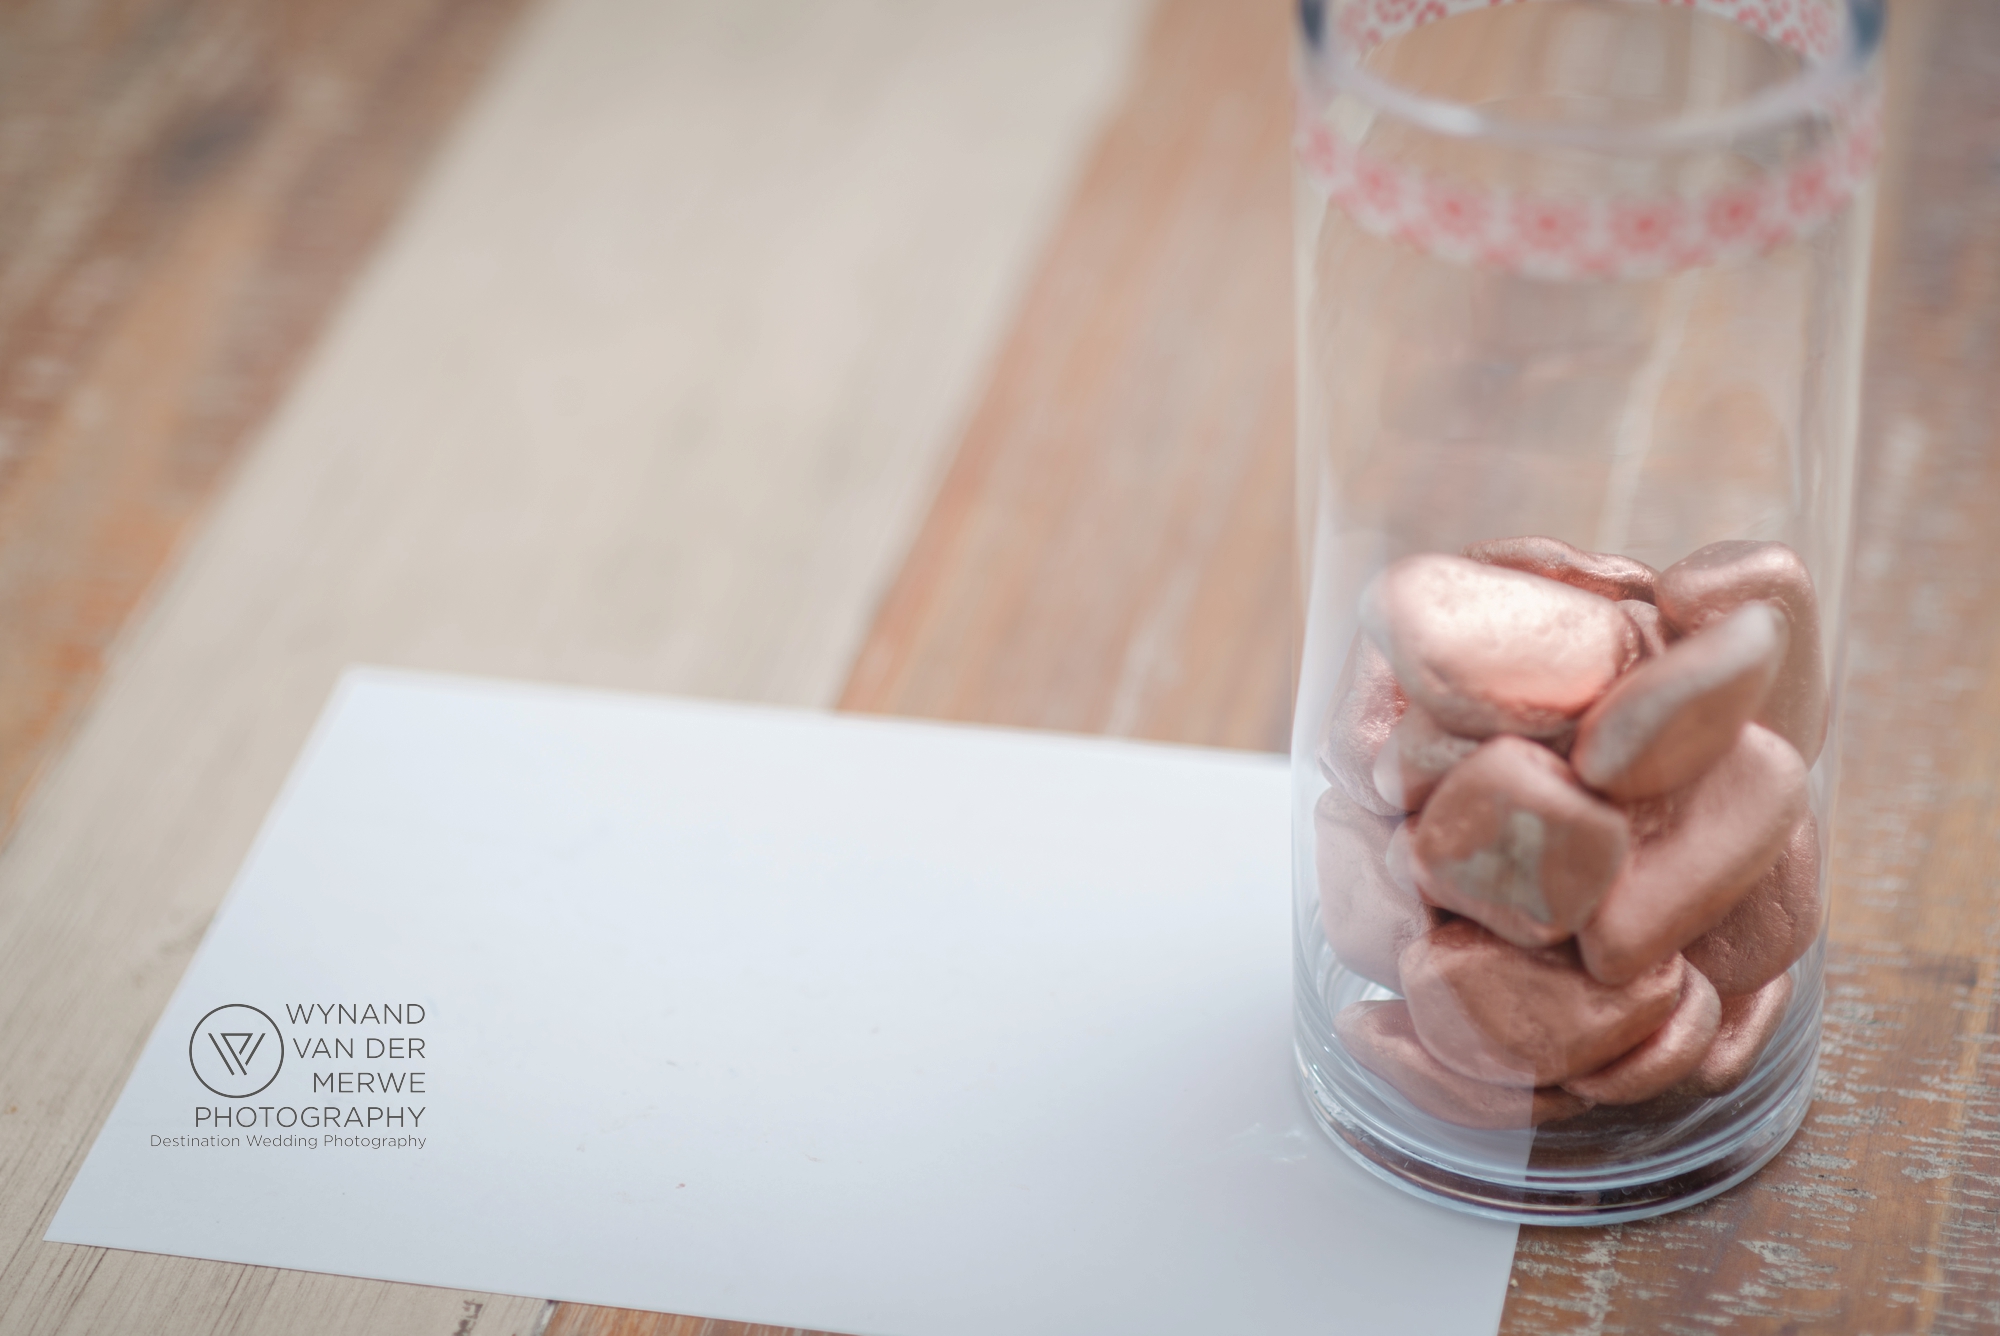
- a vase
- Spray Mate Metallic spray paint, rose gold color
- news papers

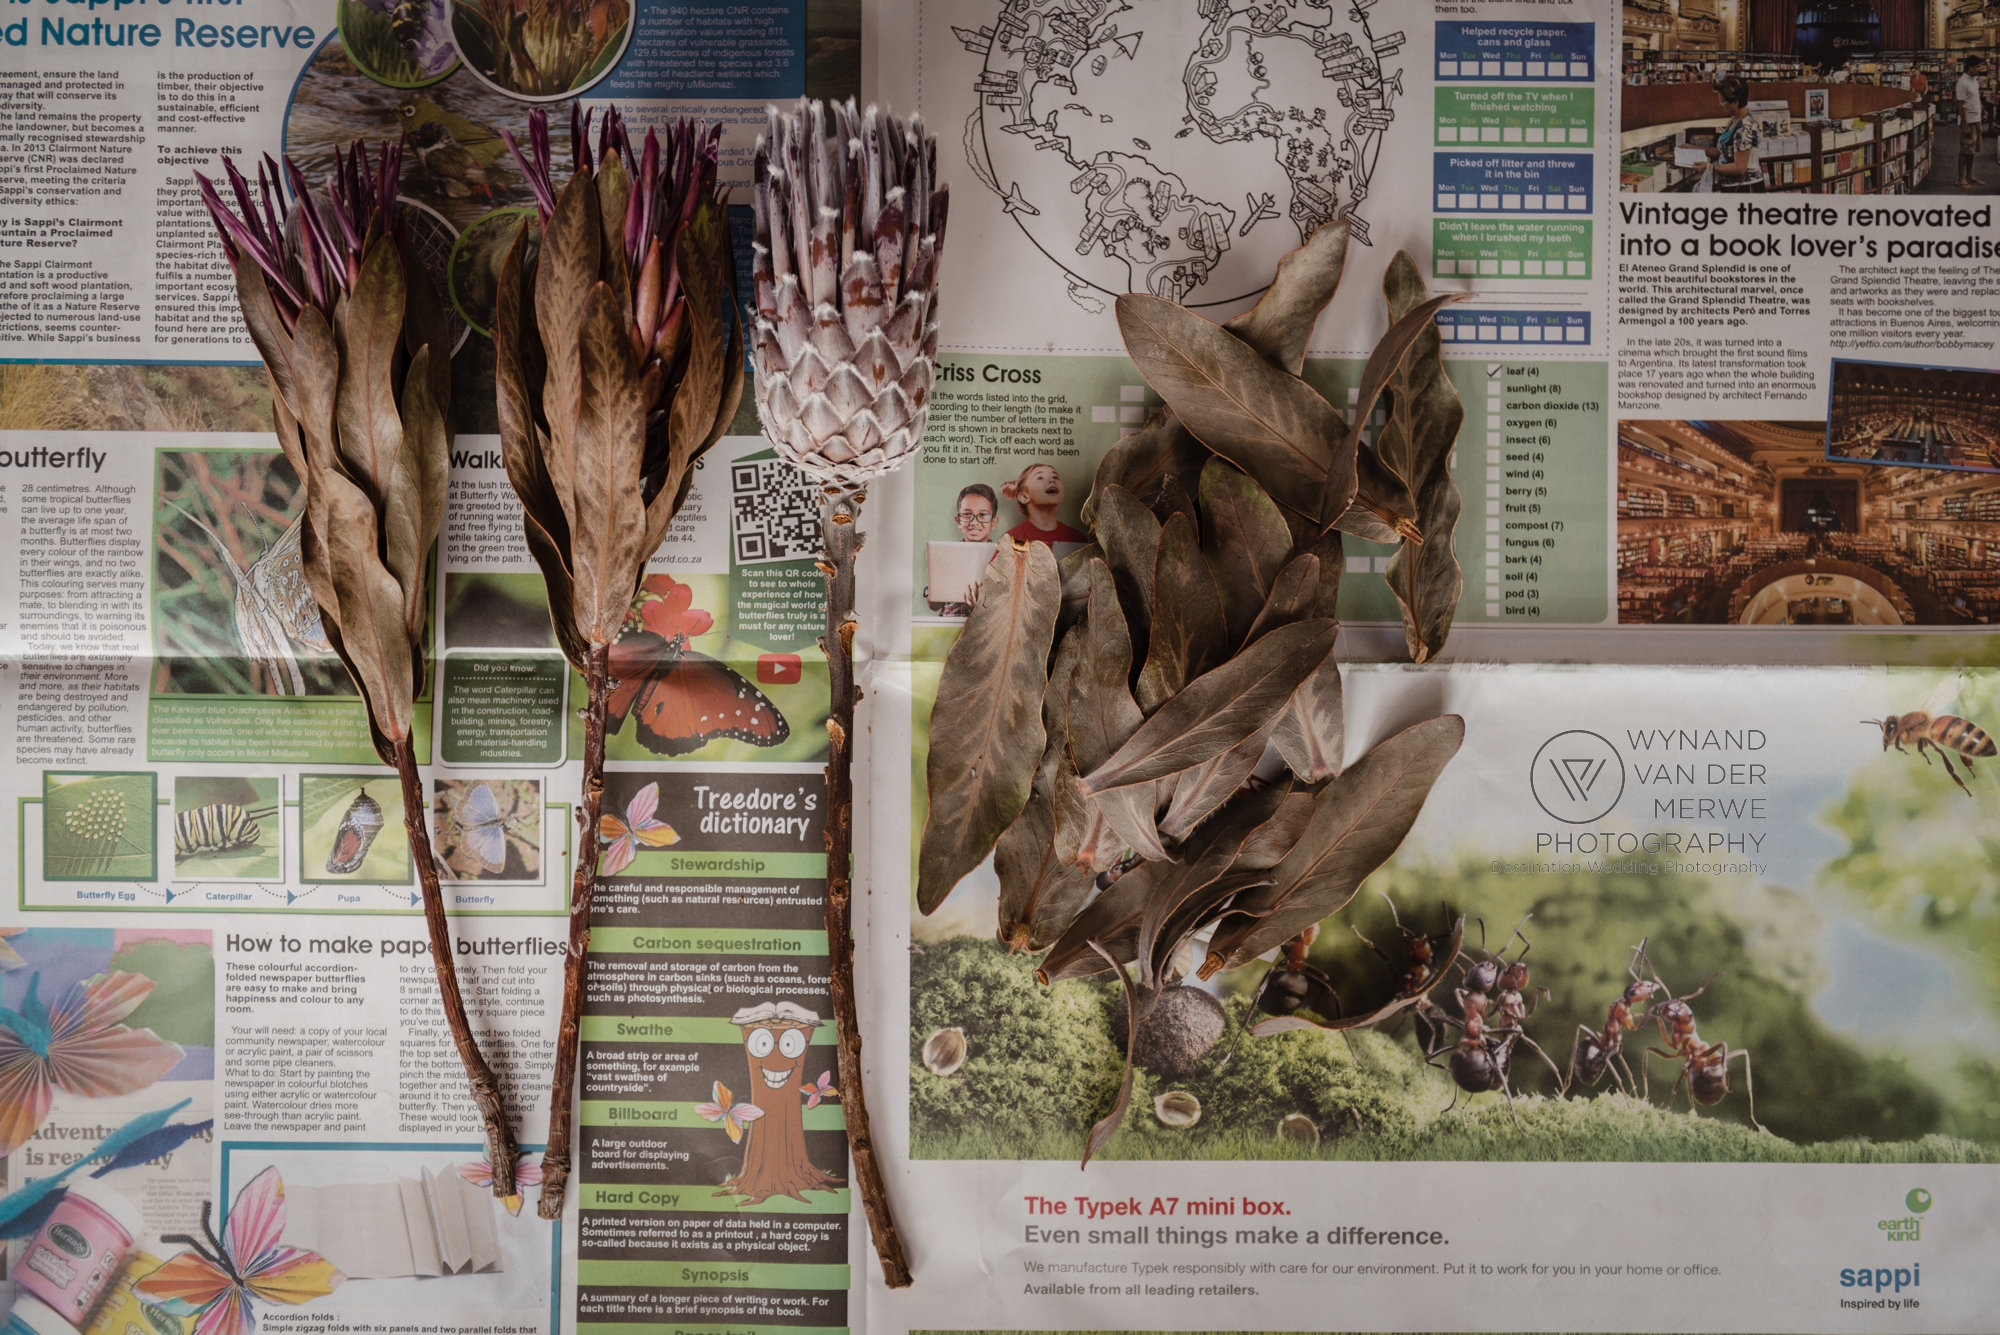
Step 1. Dry the Proteas
Take some of the wire and tie it to the stems of the flowers.


Step 2. Hang the flowers to dry.
I hanged the flowers on our wall and went on holiday for 10 days. So I assume 2 weeks is sufficient to dry the flowers. It might take less time to dry.

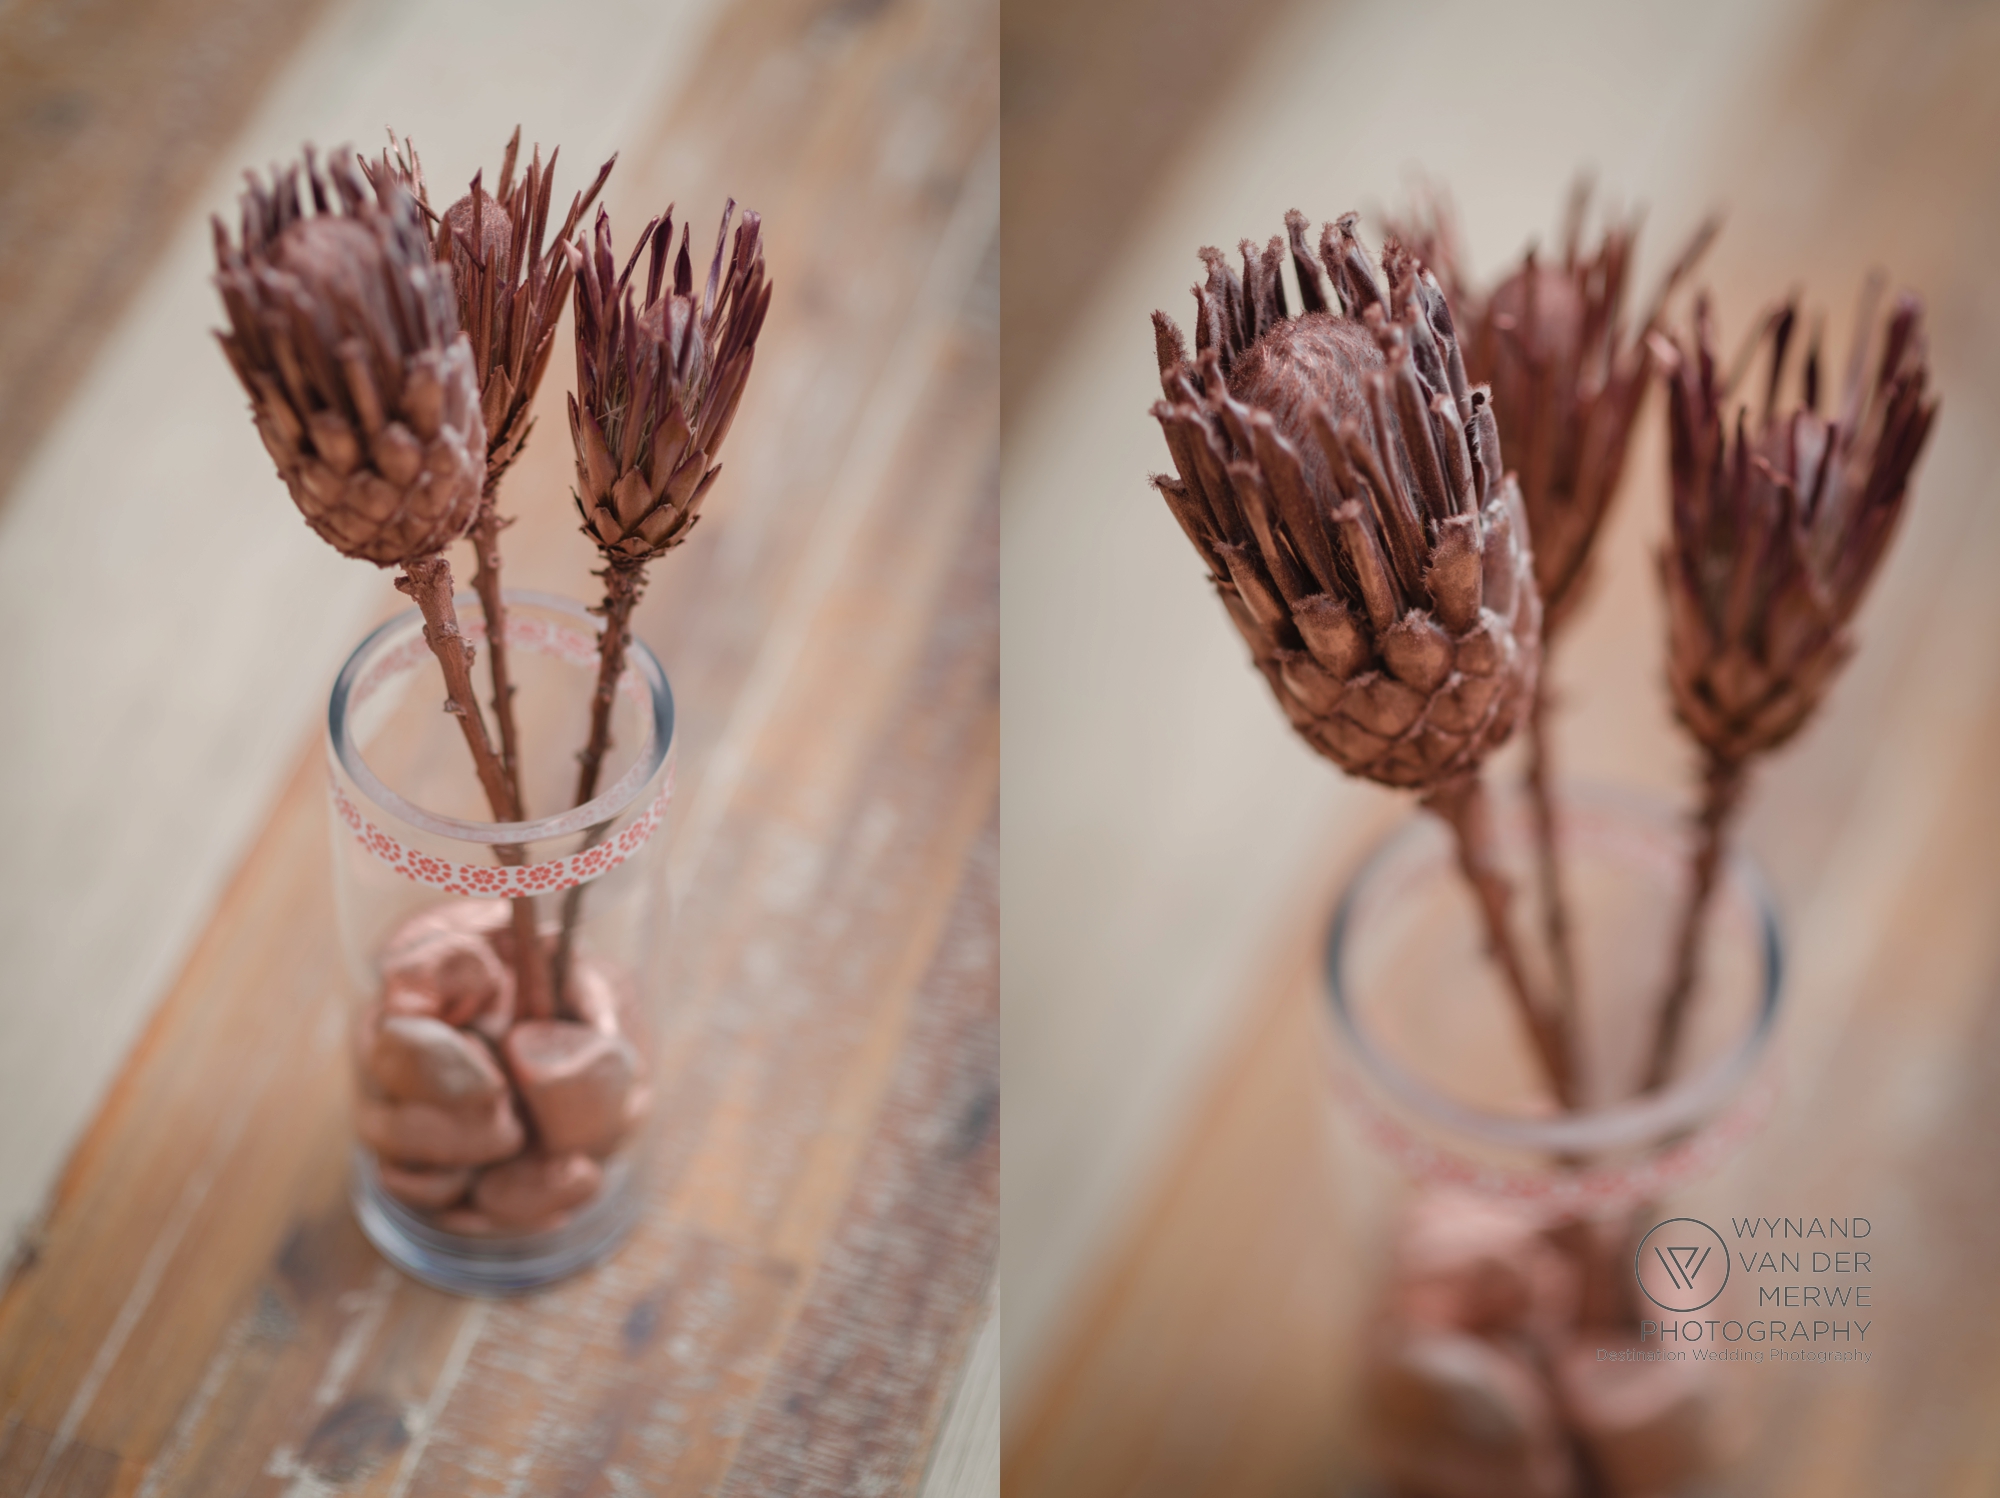
I chose to use one King Protea and a few Cardinal Proteas for a styled shoot and the reason for doing this was the cost. The King Protea was roughly R30 each and the smaller proteas ranged between R15-20 each. And I made a bouquet of ons King Protea and 5 Cardinal Proteas, so you would understand that to use only King Proteas would have been costly. These costs are obviously seasonal, and very cheap at the moment. I actually didn't know how they would dry for this project, so I used the King Protea and only two of the Cardinal Proteas. I like how the King Protea dried out, and not so much the smaller proteas.
Step 3. Paint.
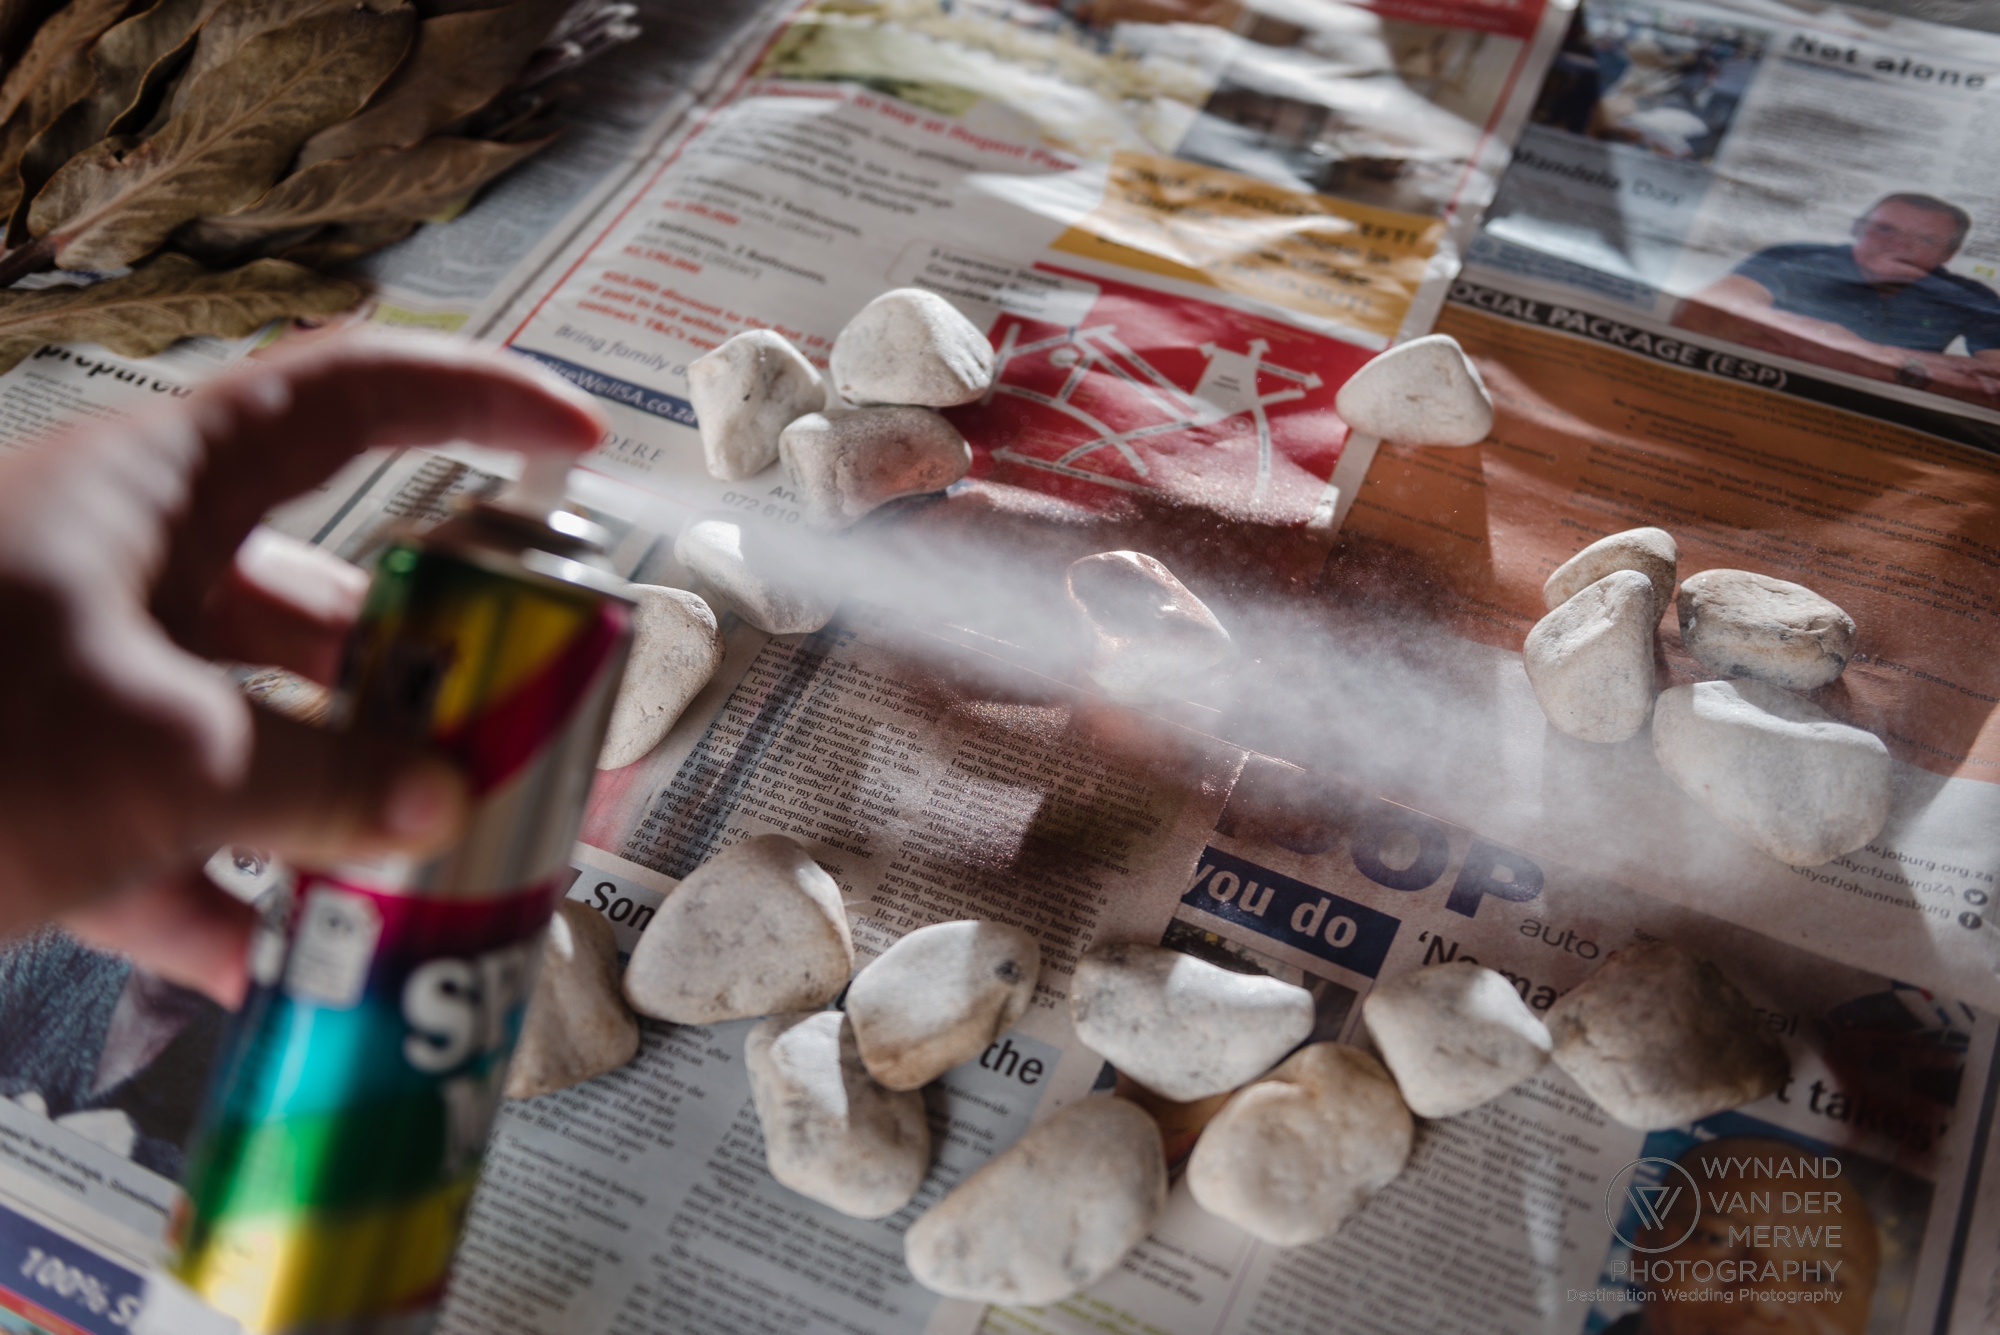
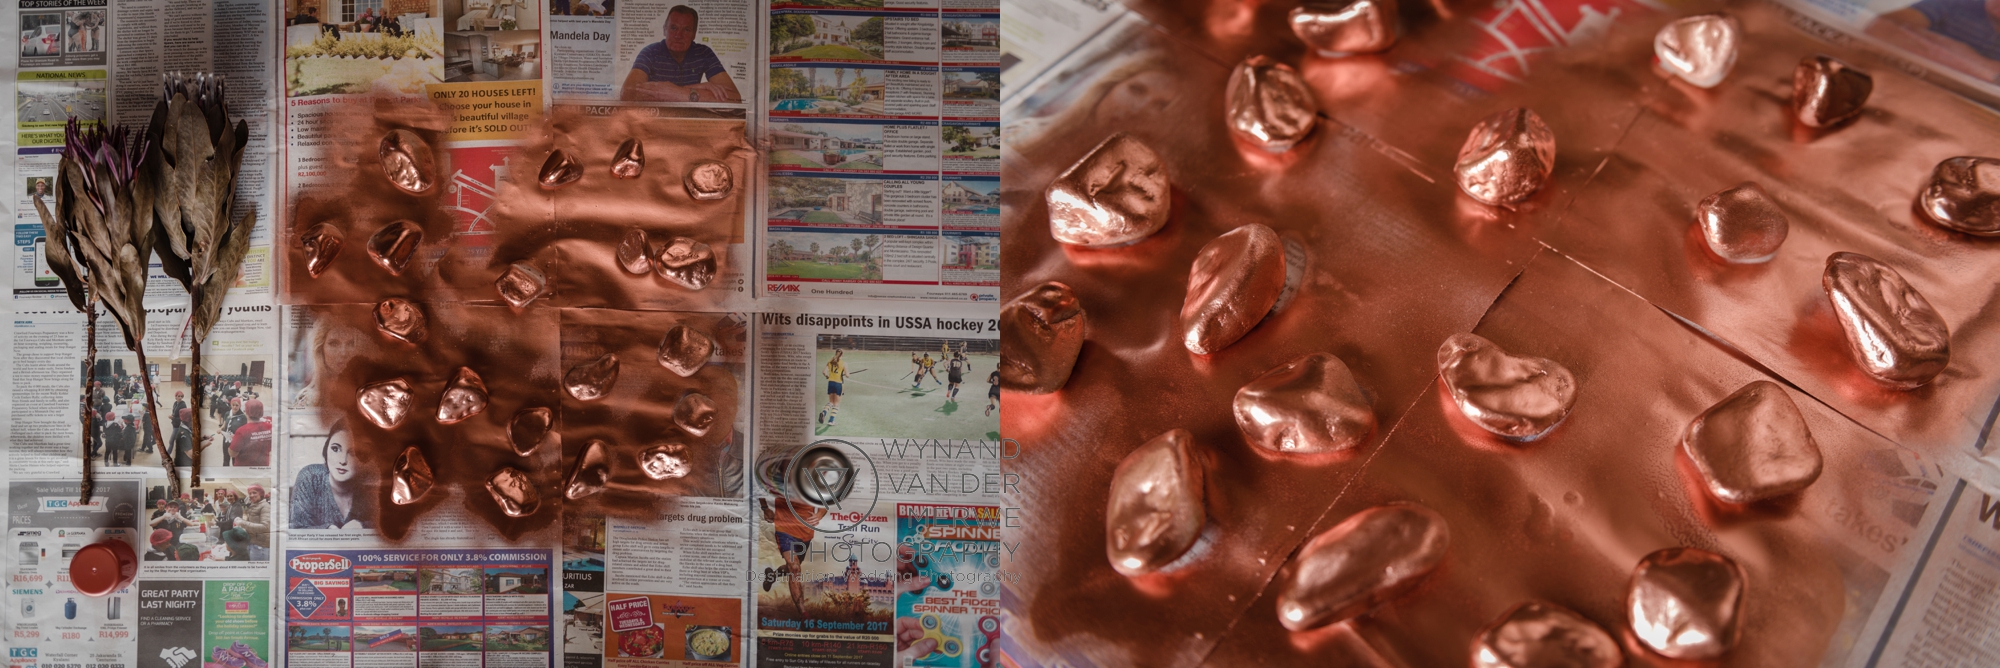
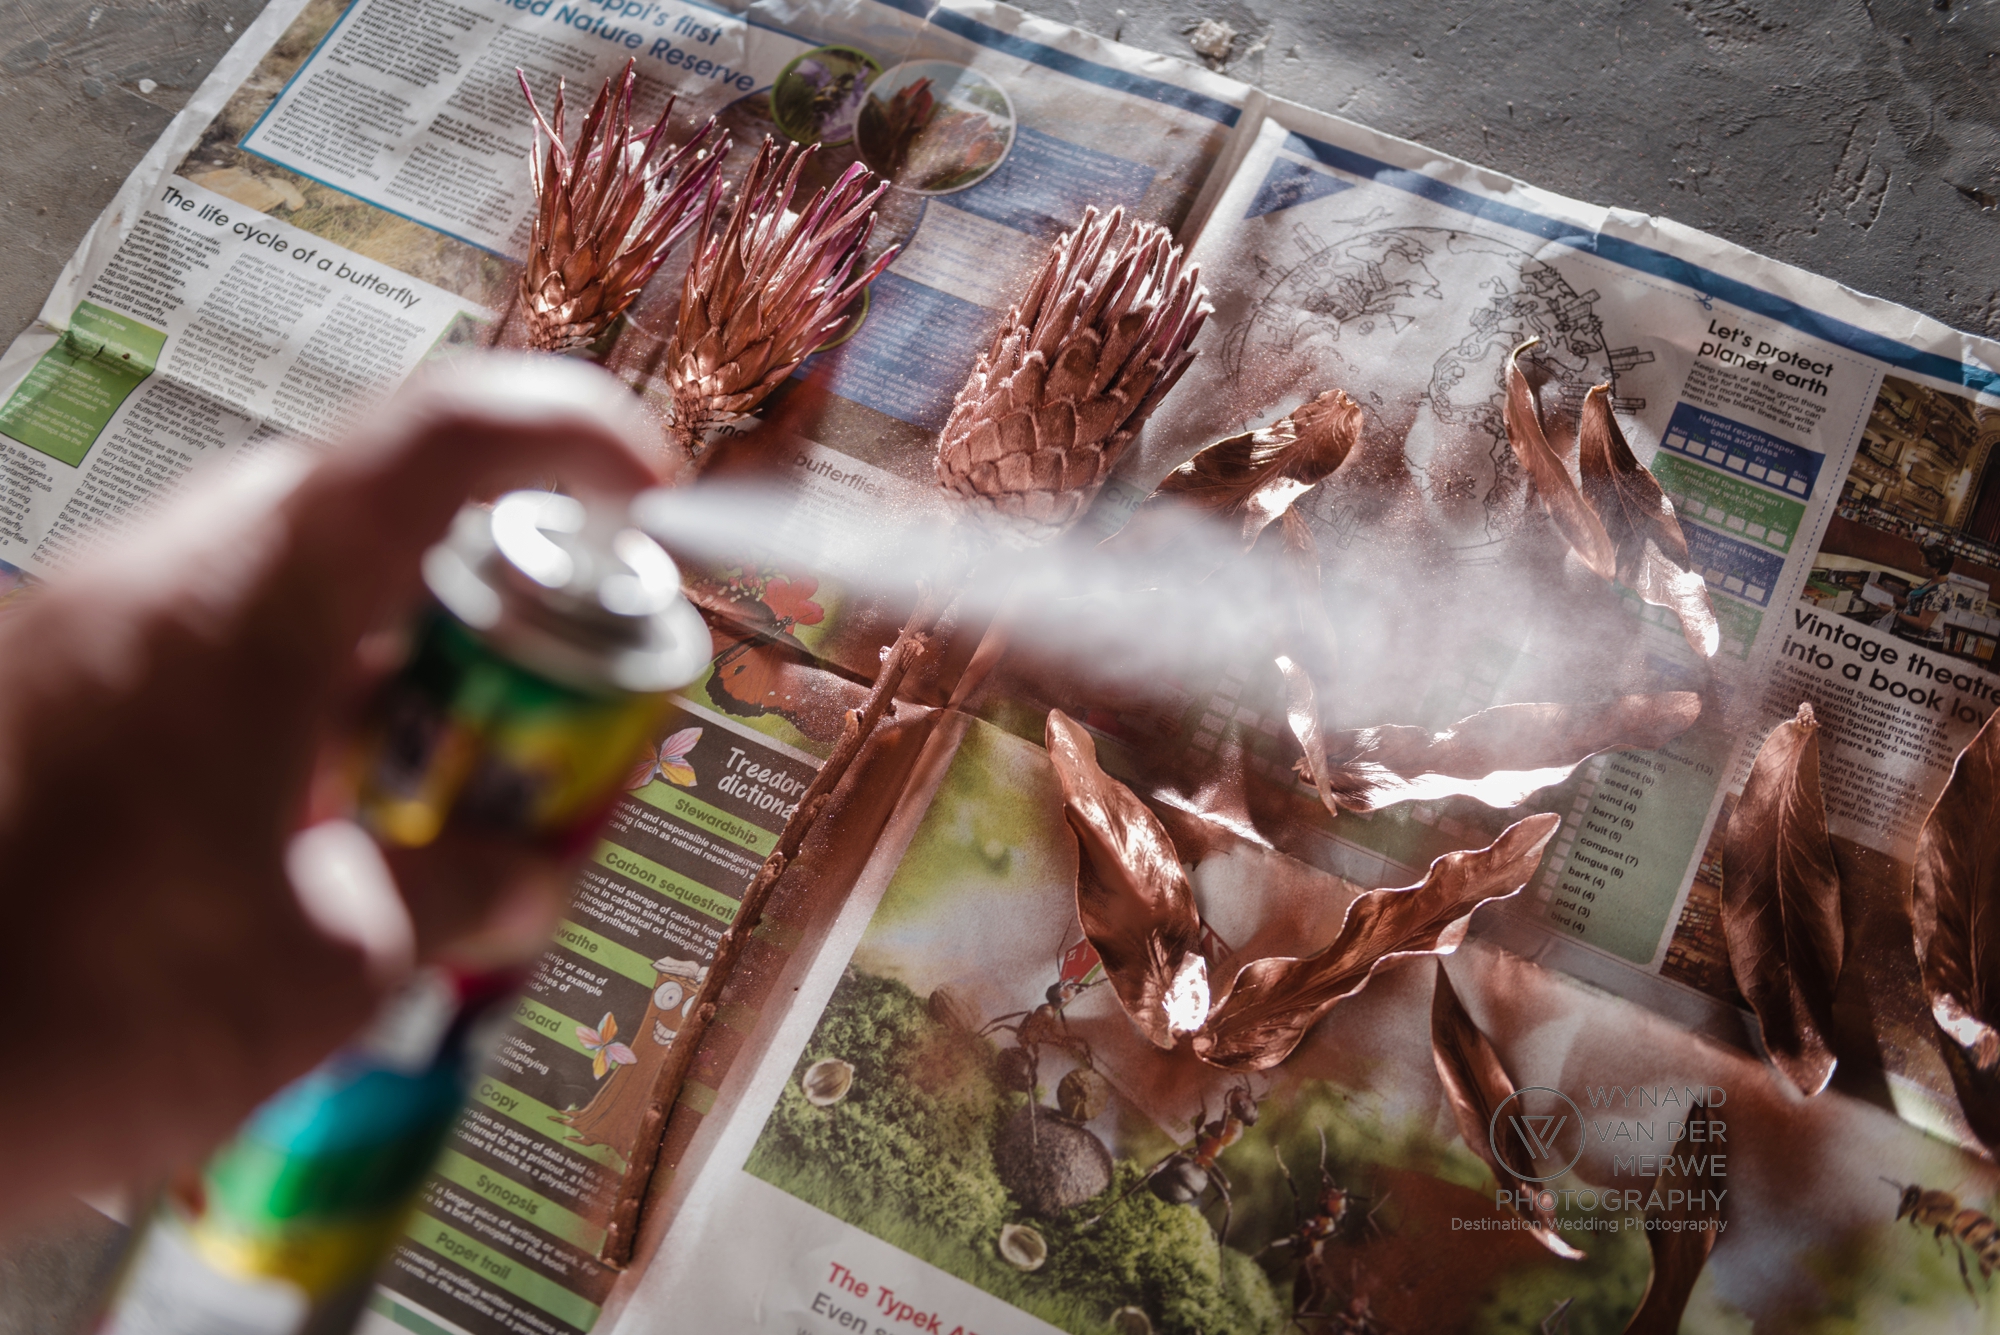
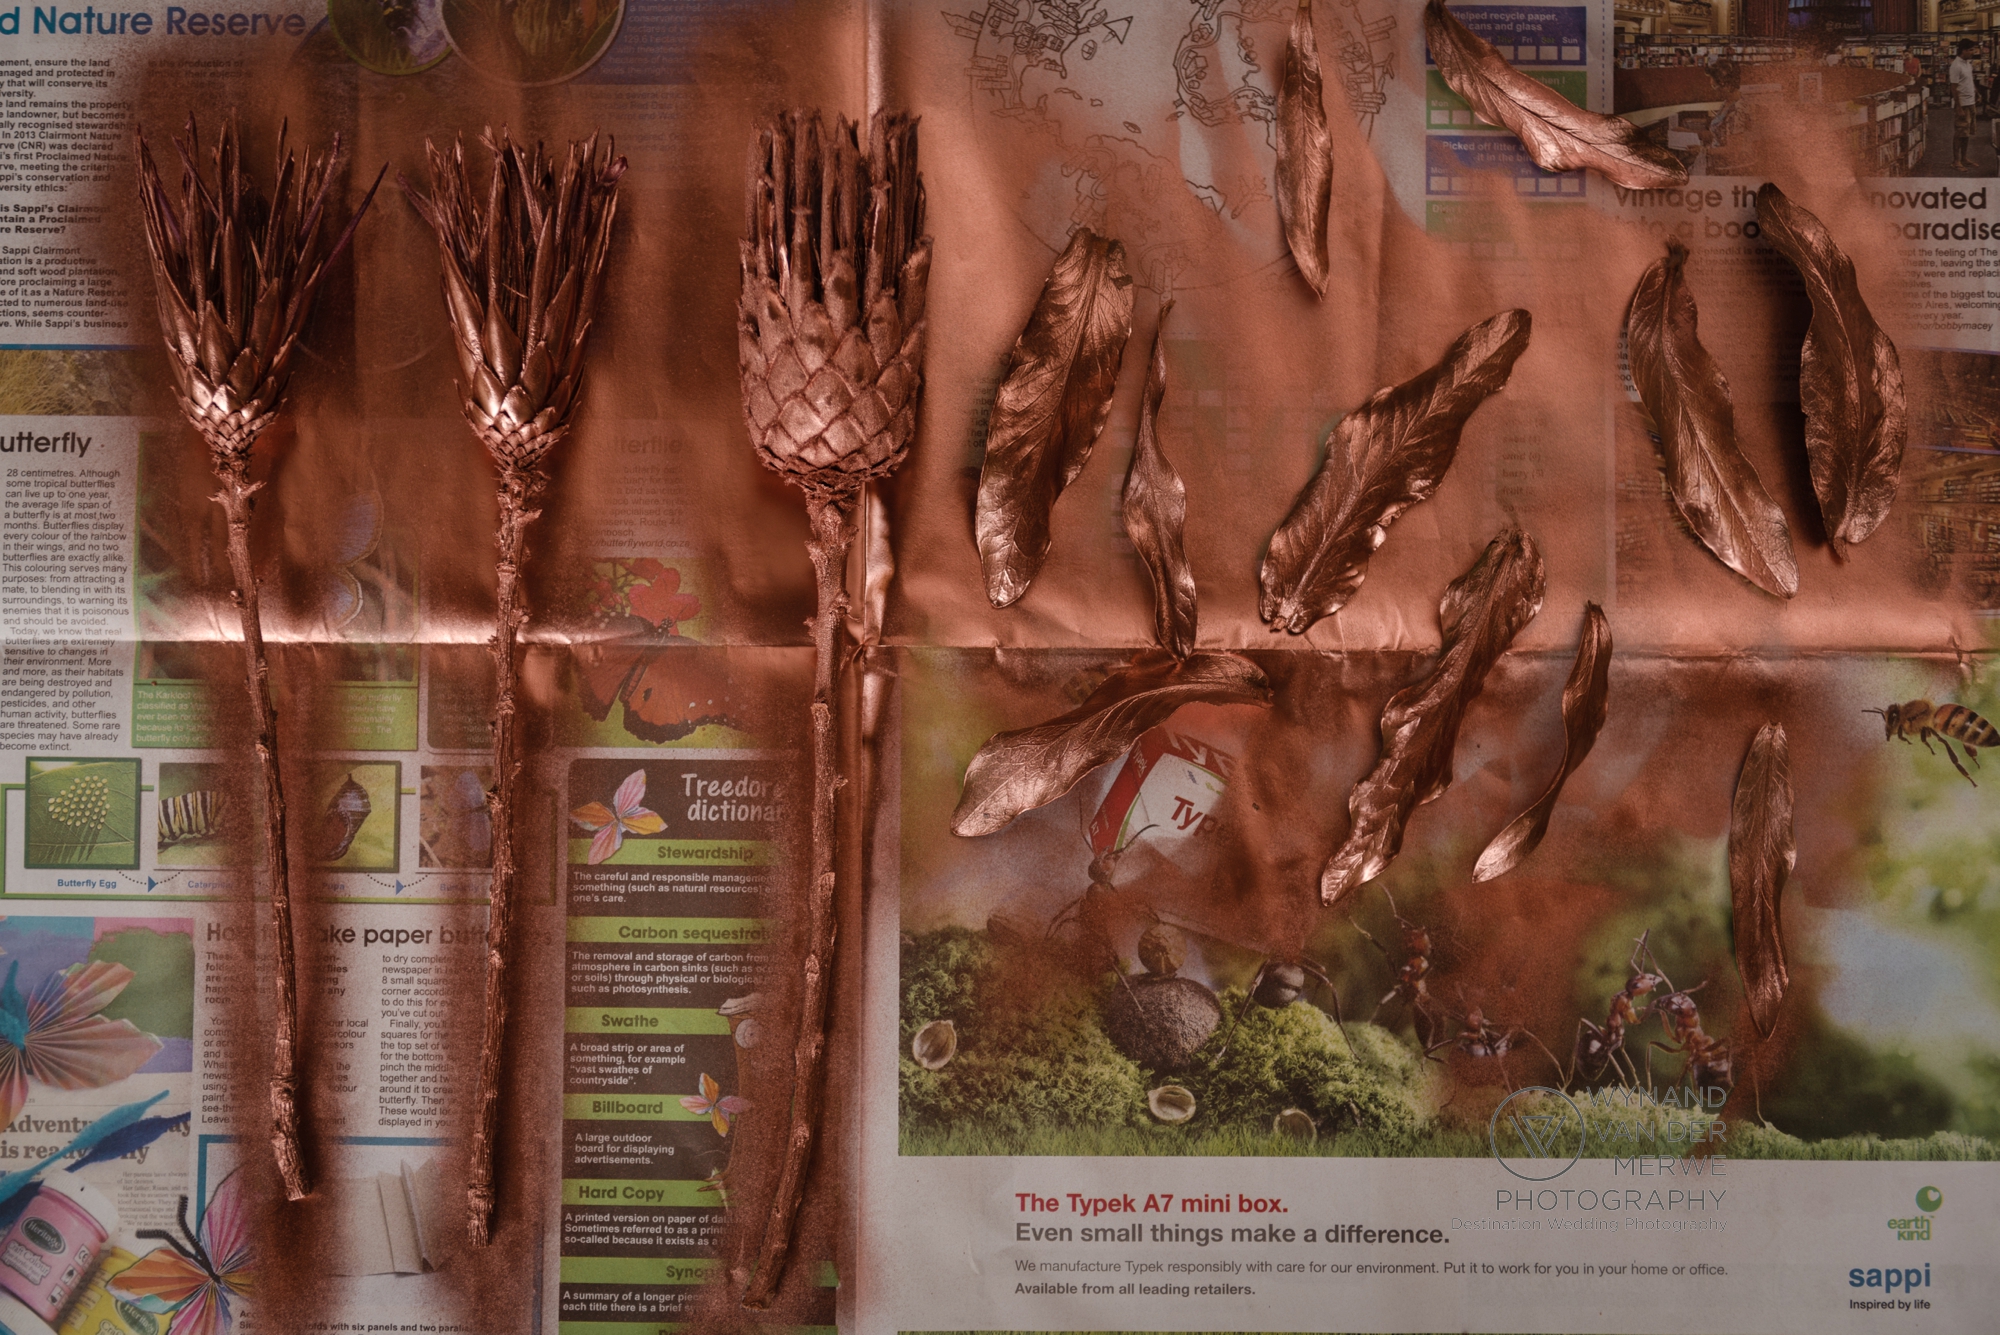
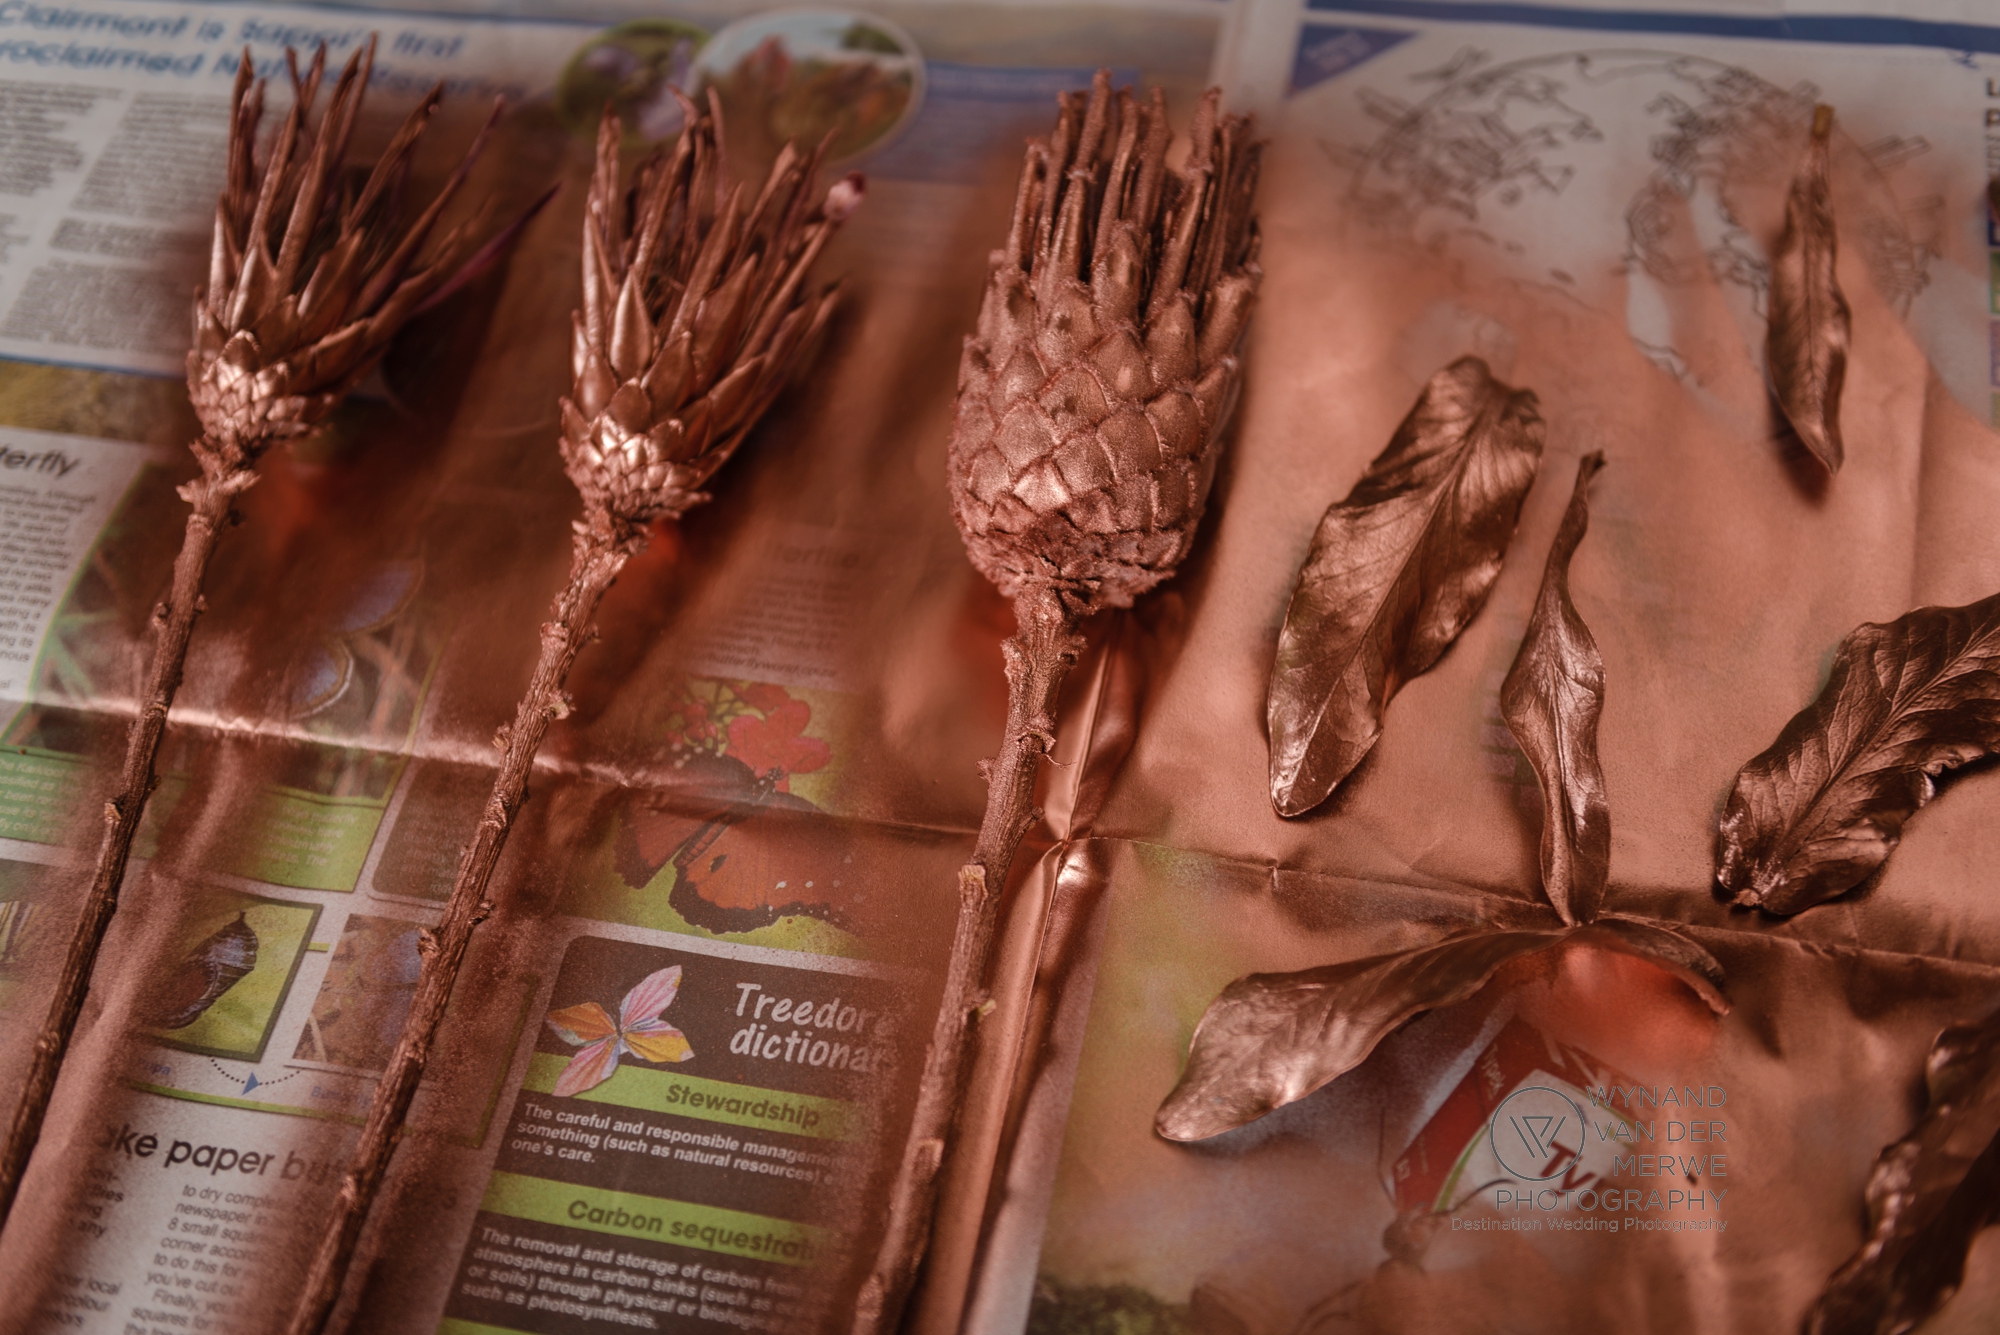
I laid out some newspapers in our garage, to paint the pebbles and proteas. The newspaper just help to keep my garage from getting sprayed.

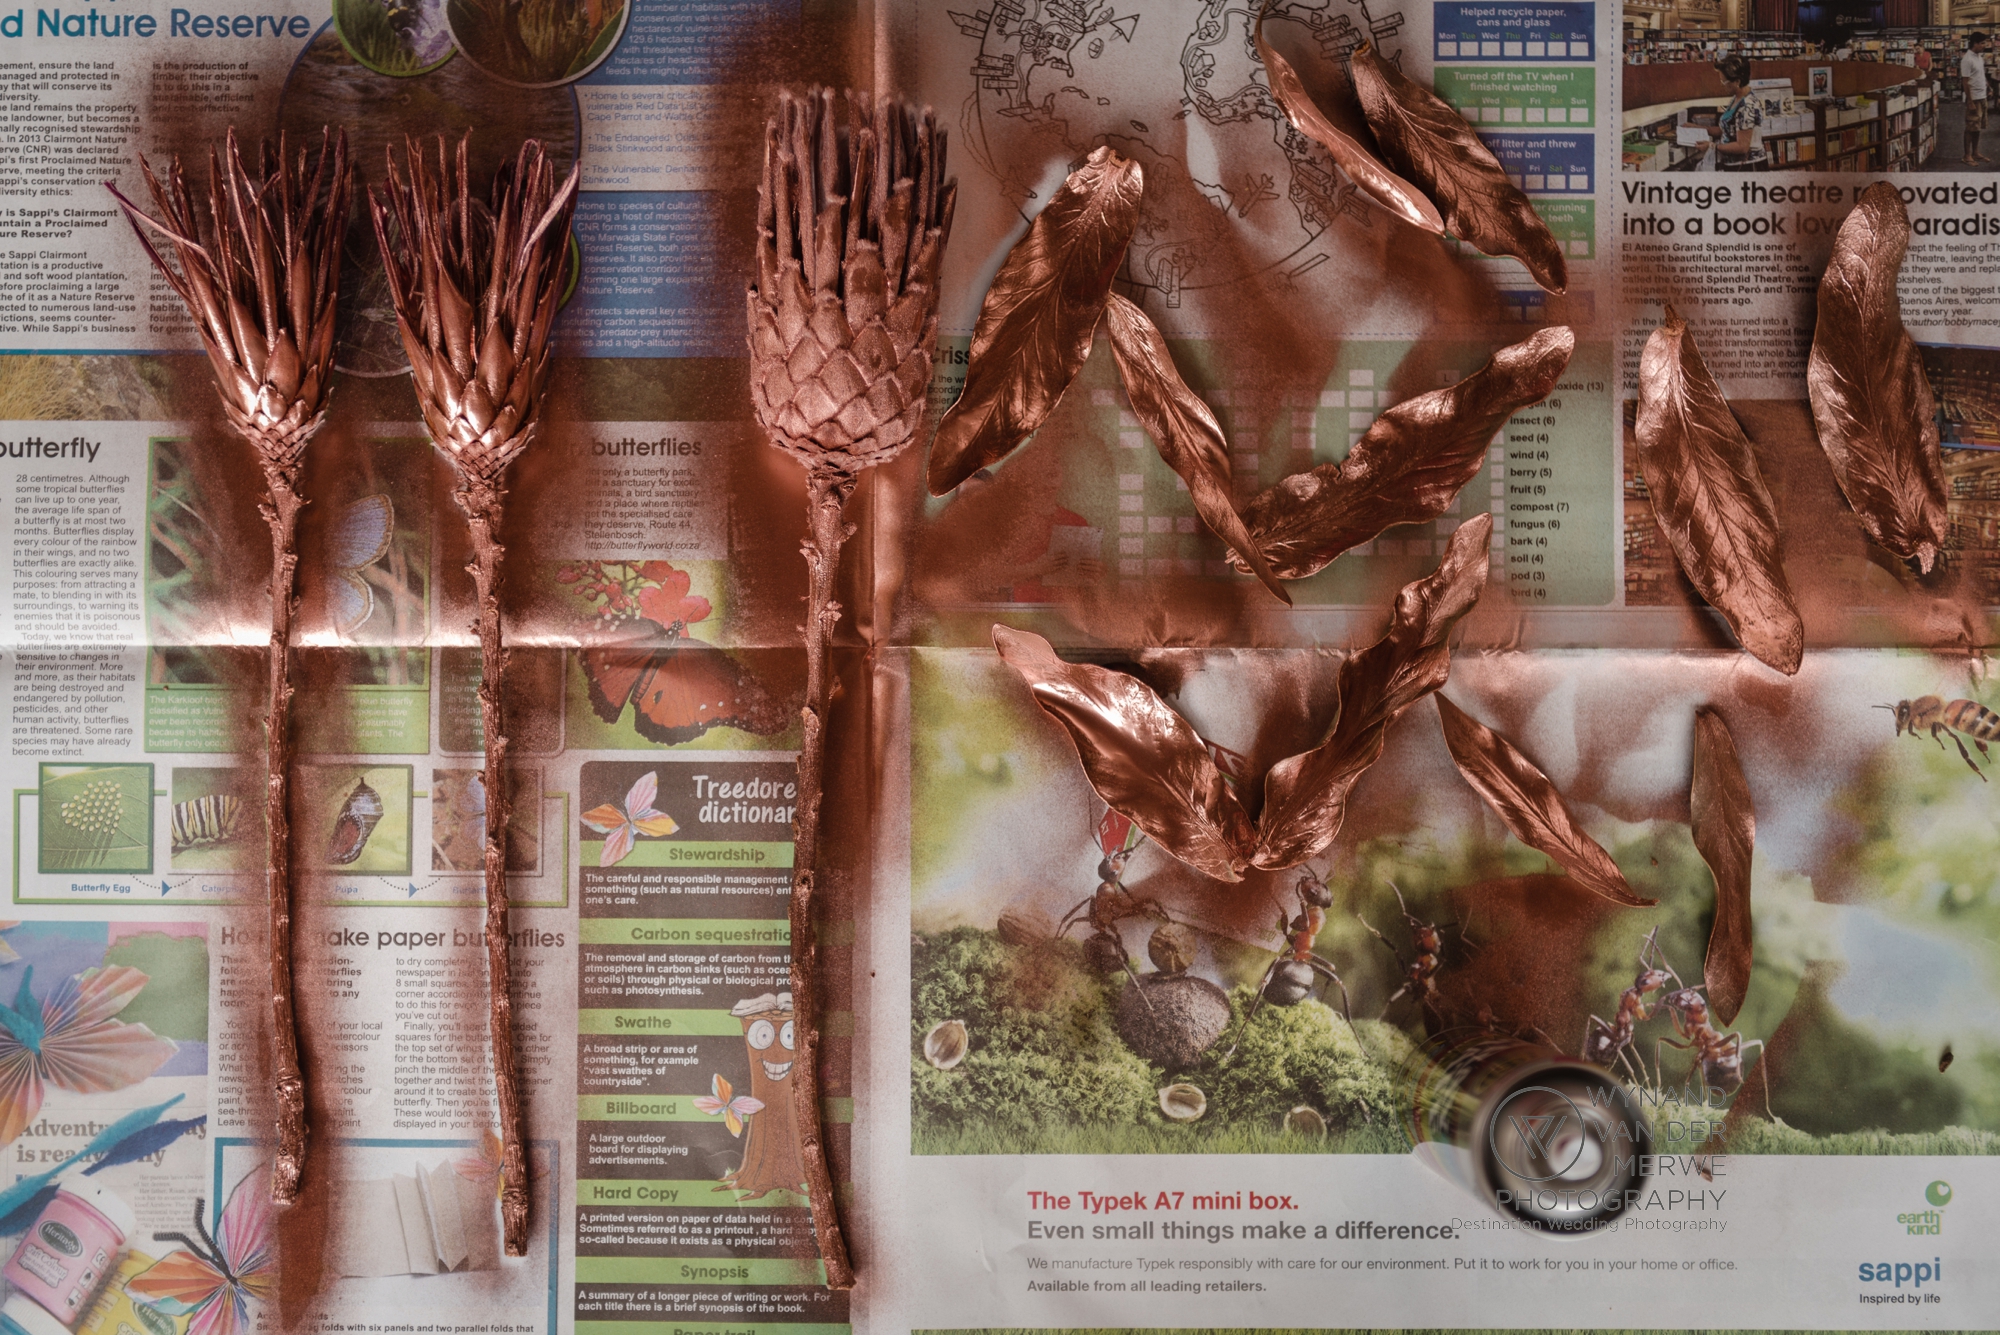
I sprayed the pebbles first, and then followed with the proteas. I didn't plan on removing the leaves from the proteas, but found the flower was much easier to spray, but also much prettier underneath the leaves than anticipated. I also didn't plan to use the leaves seperately, but they turned out so beautiful when sprayed with the rose gold color.
Step 4. Prepare the vase.
I decided to spice up a vase which we used at our home with some creative tape I got from Anthos Design Studio during the Admired Africa #BeInspired Conference 2017.


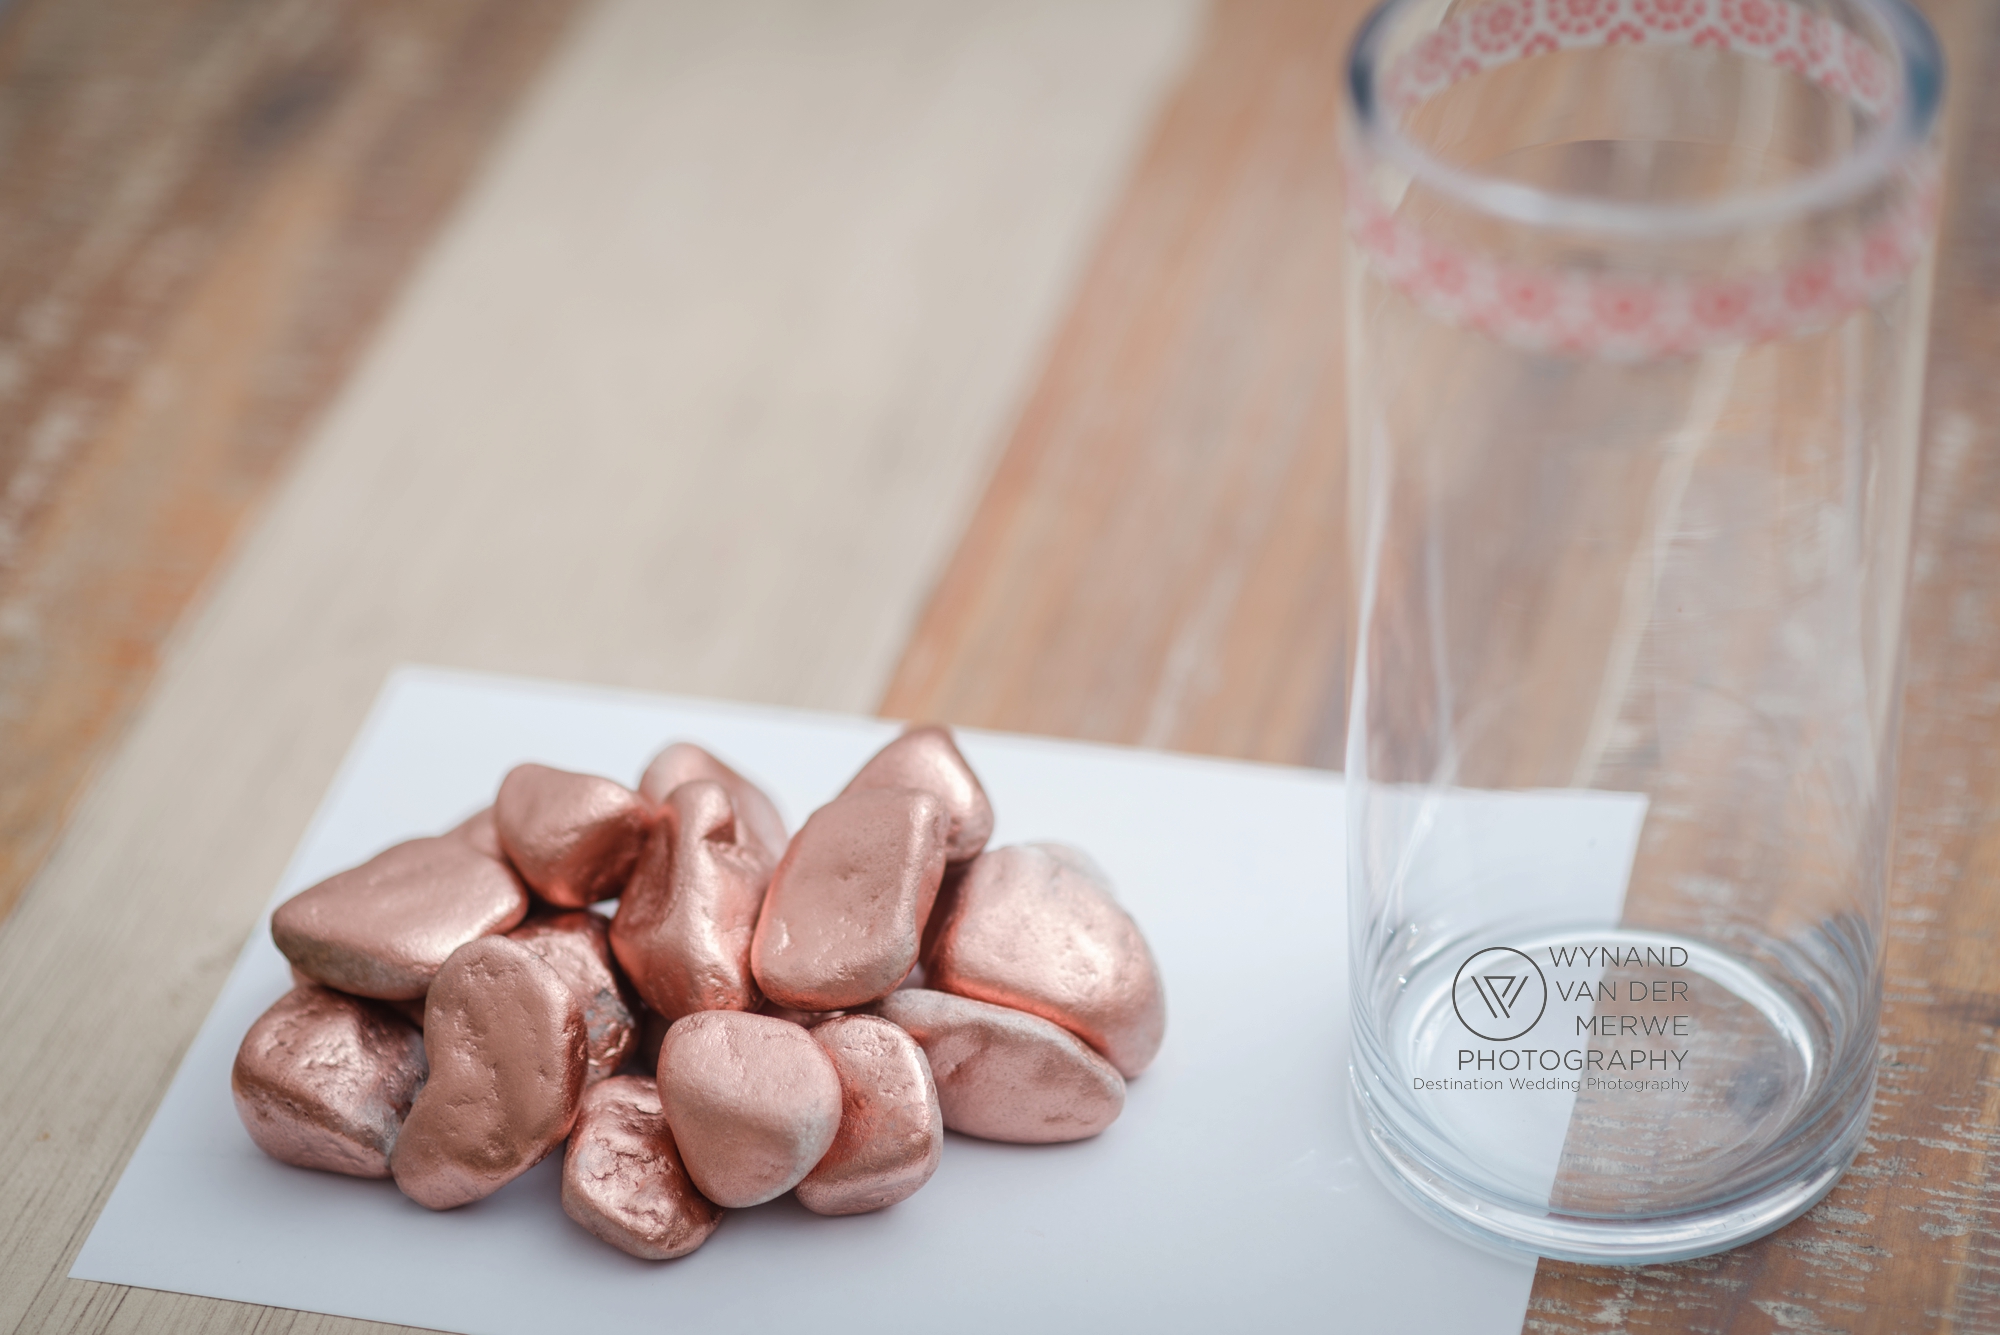
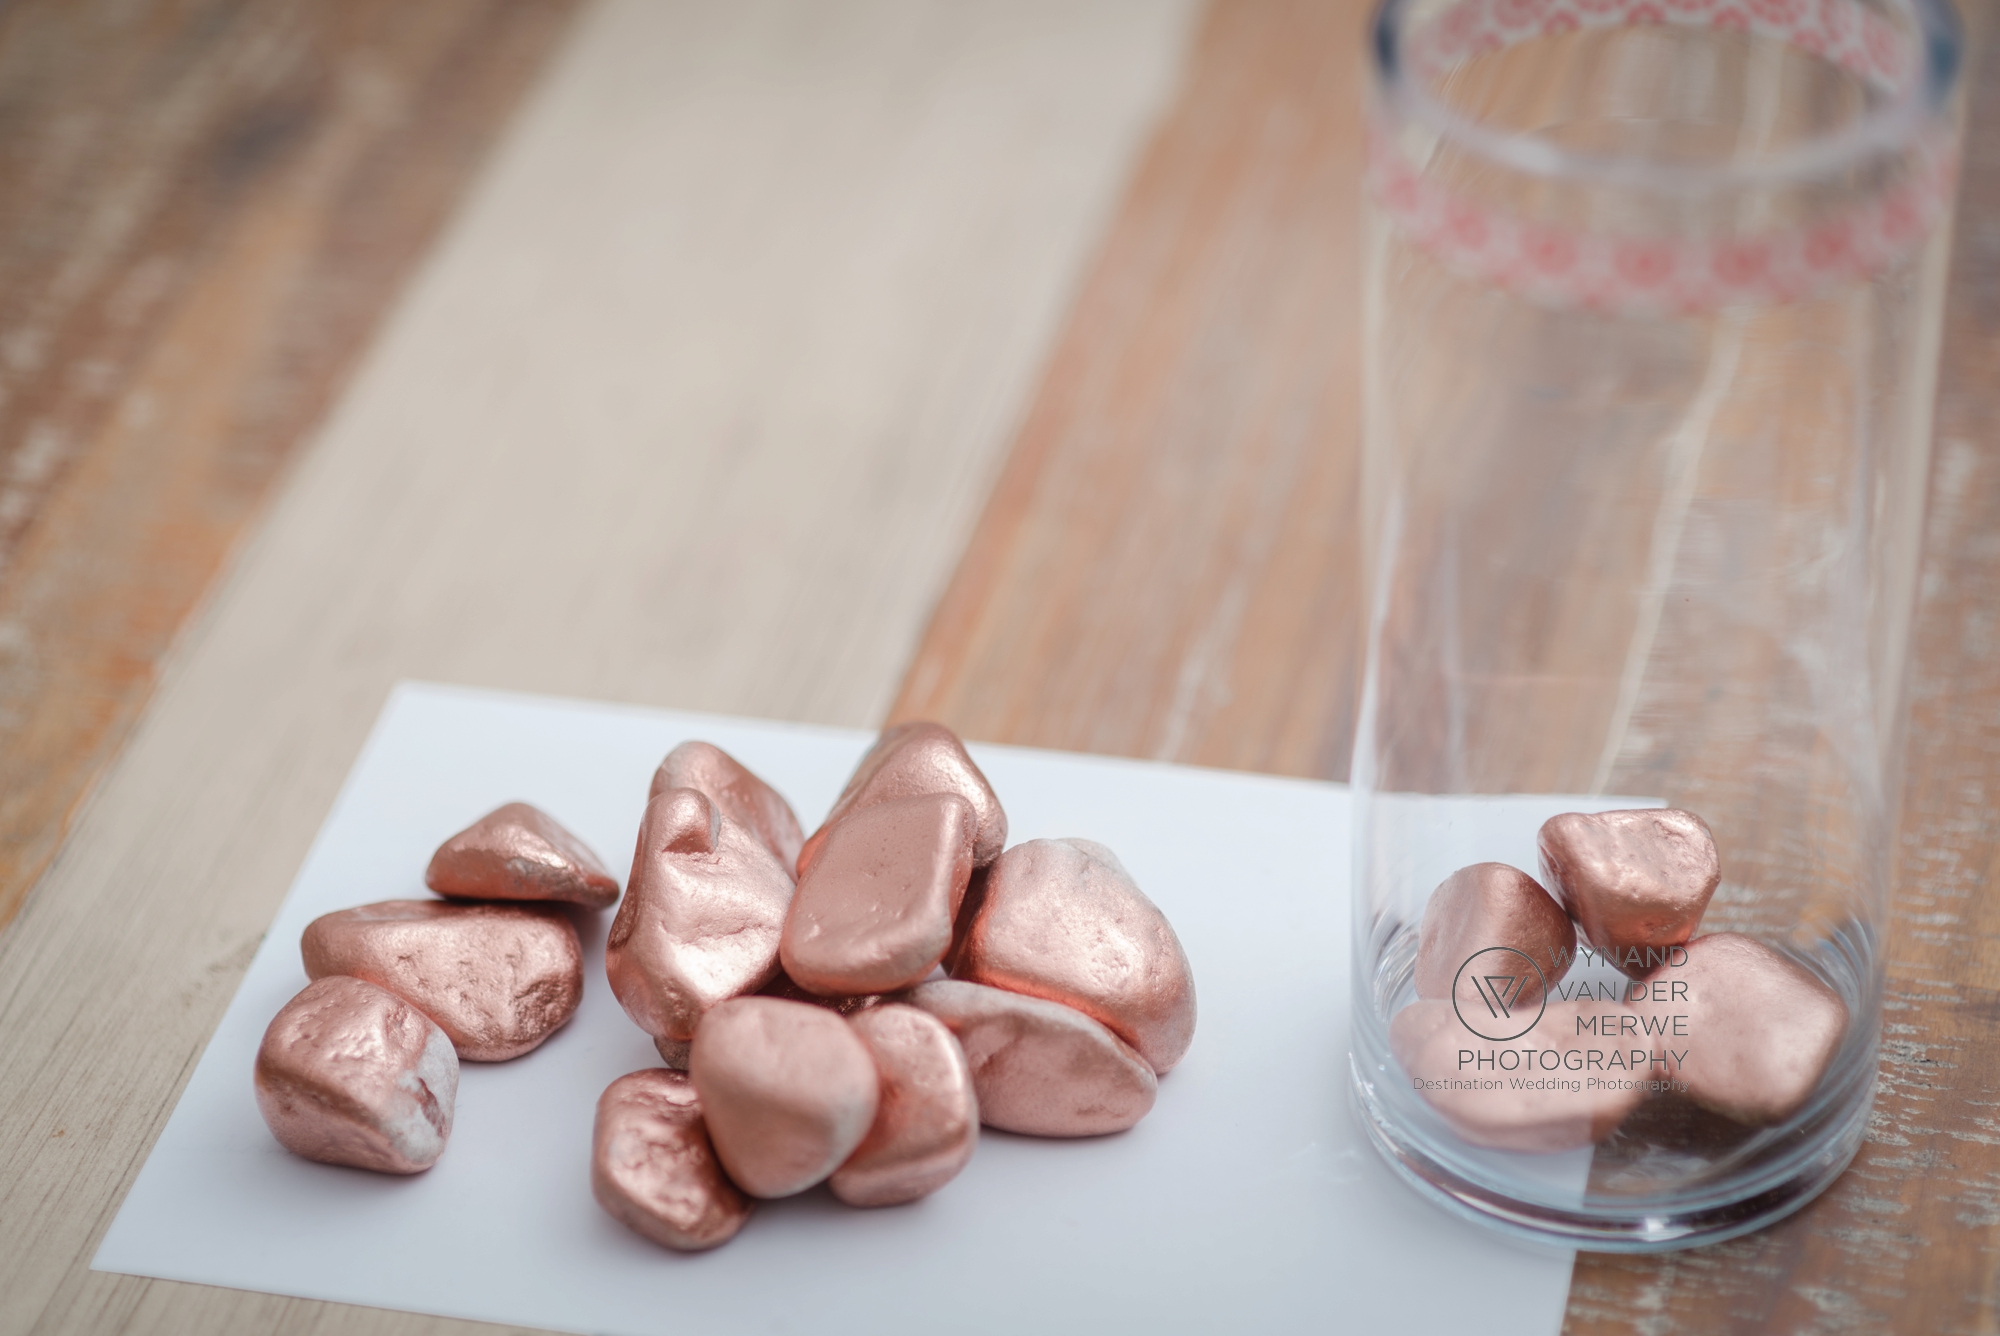
Step 5. Fill the Vase with stones
Just be careful not to break the vase. If you are scared you will break the vase put the flowers in the vase before you fill it with the stones.
Step 6. Put the flowers in.
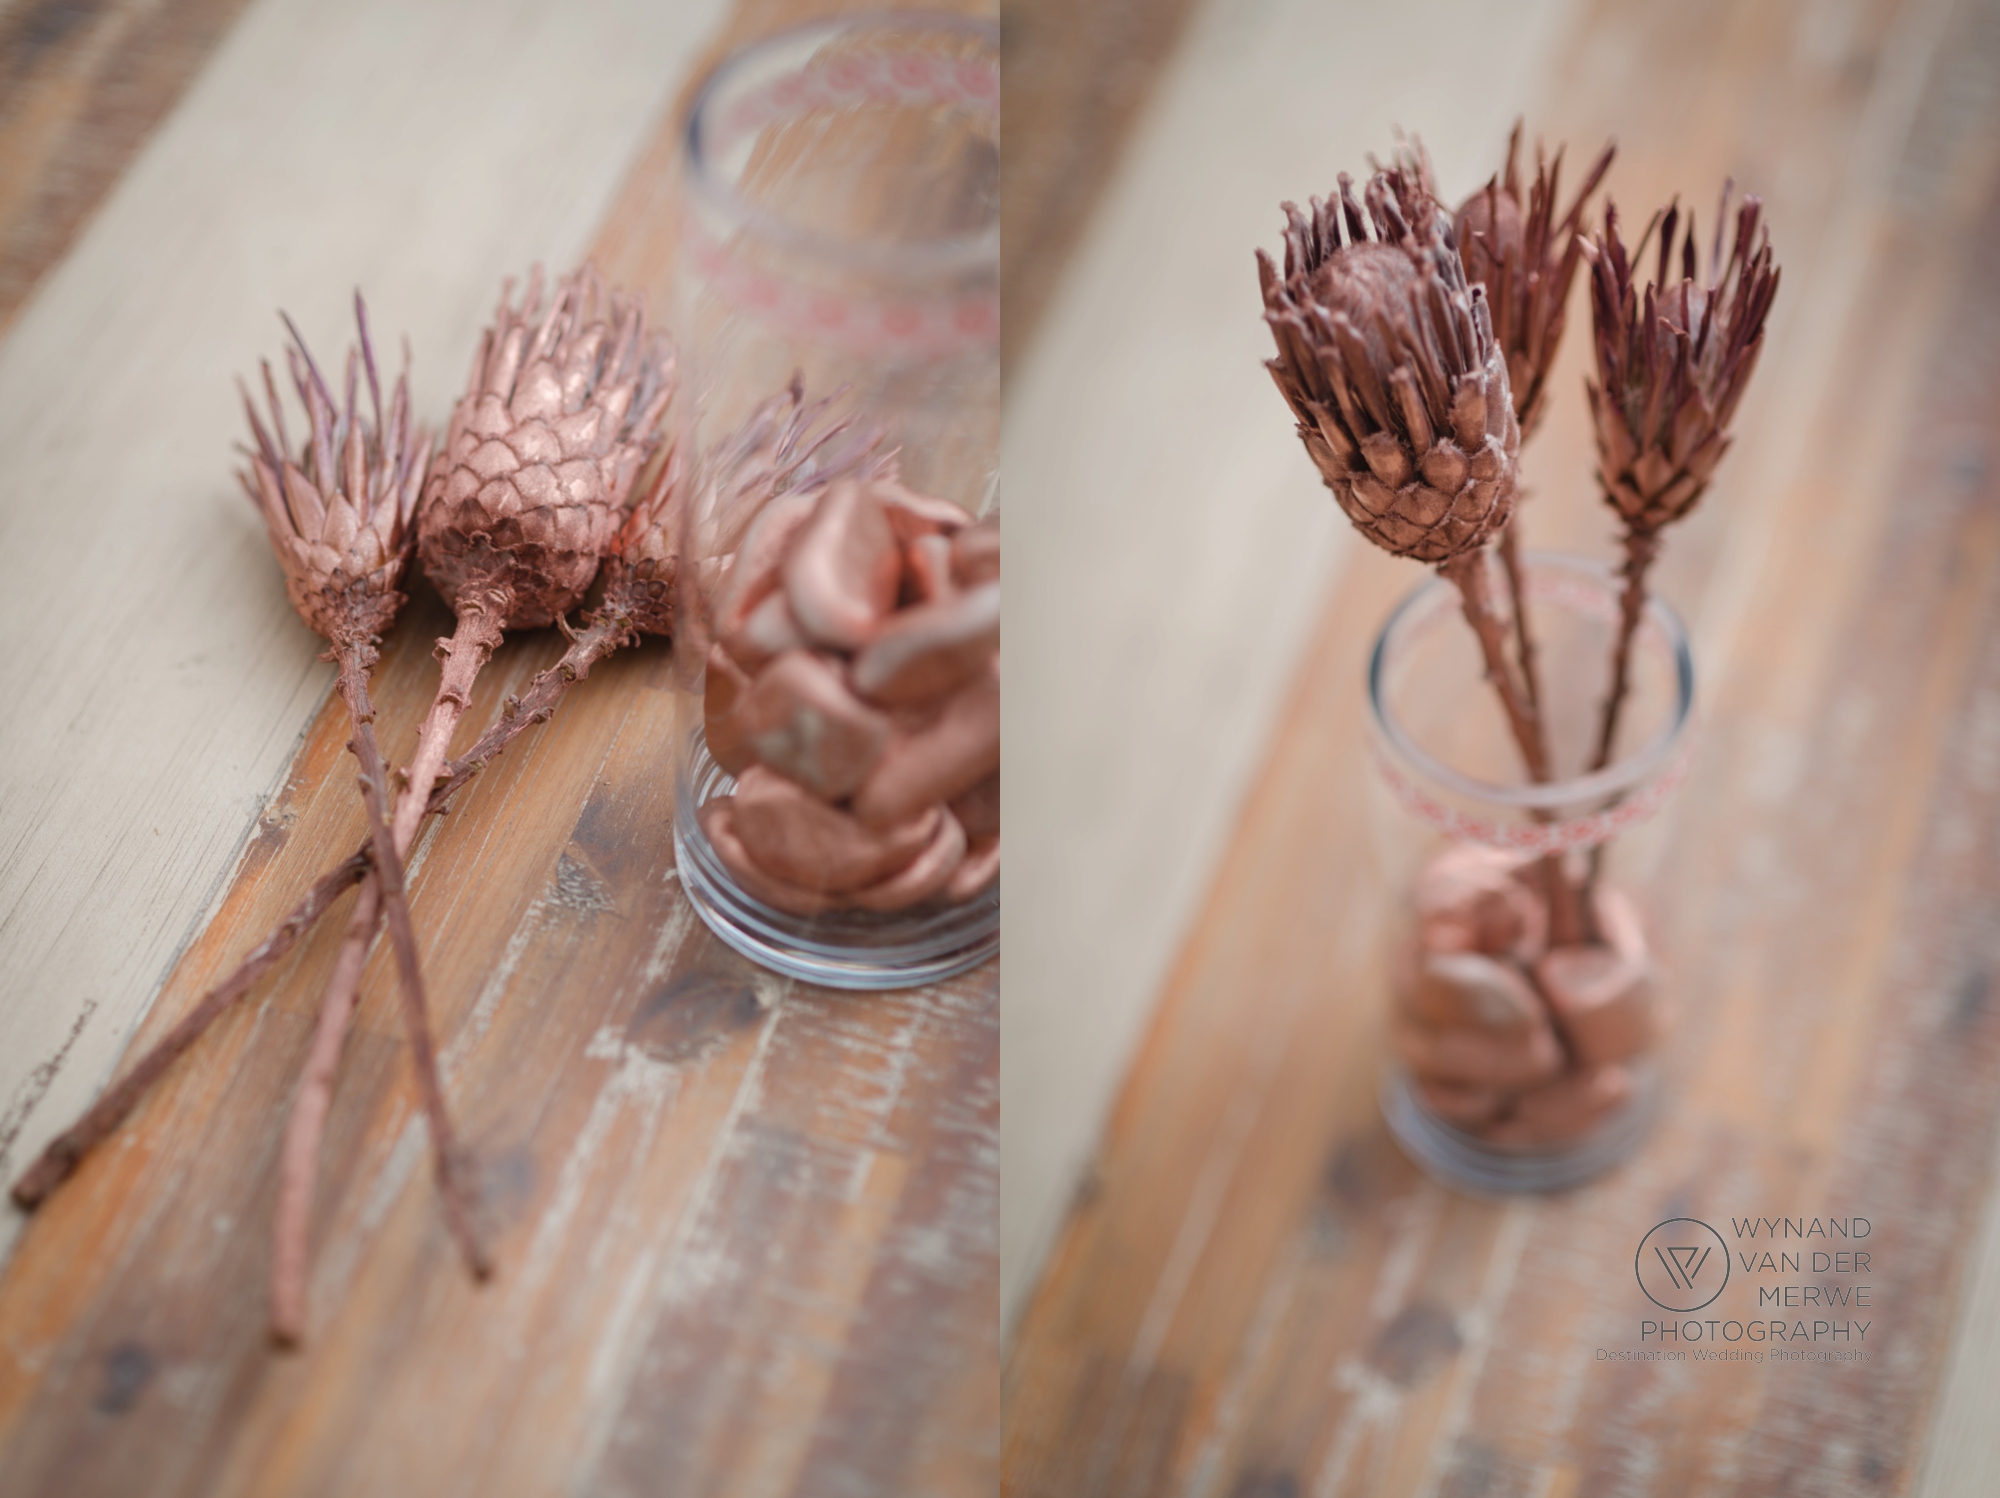
Step 8. Put the gold leaves in the vase, placing it next to the proteas' stems.
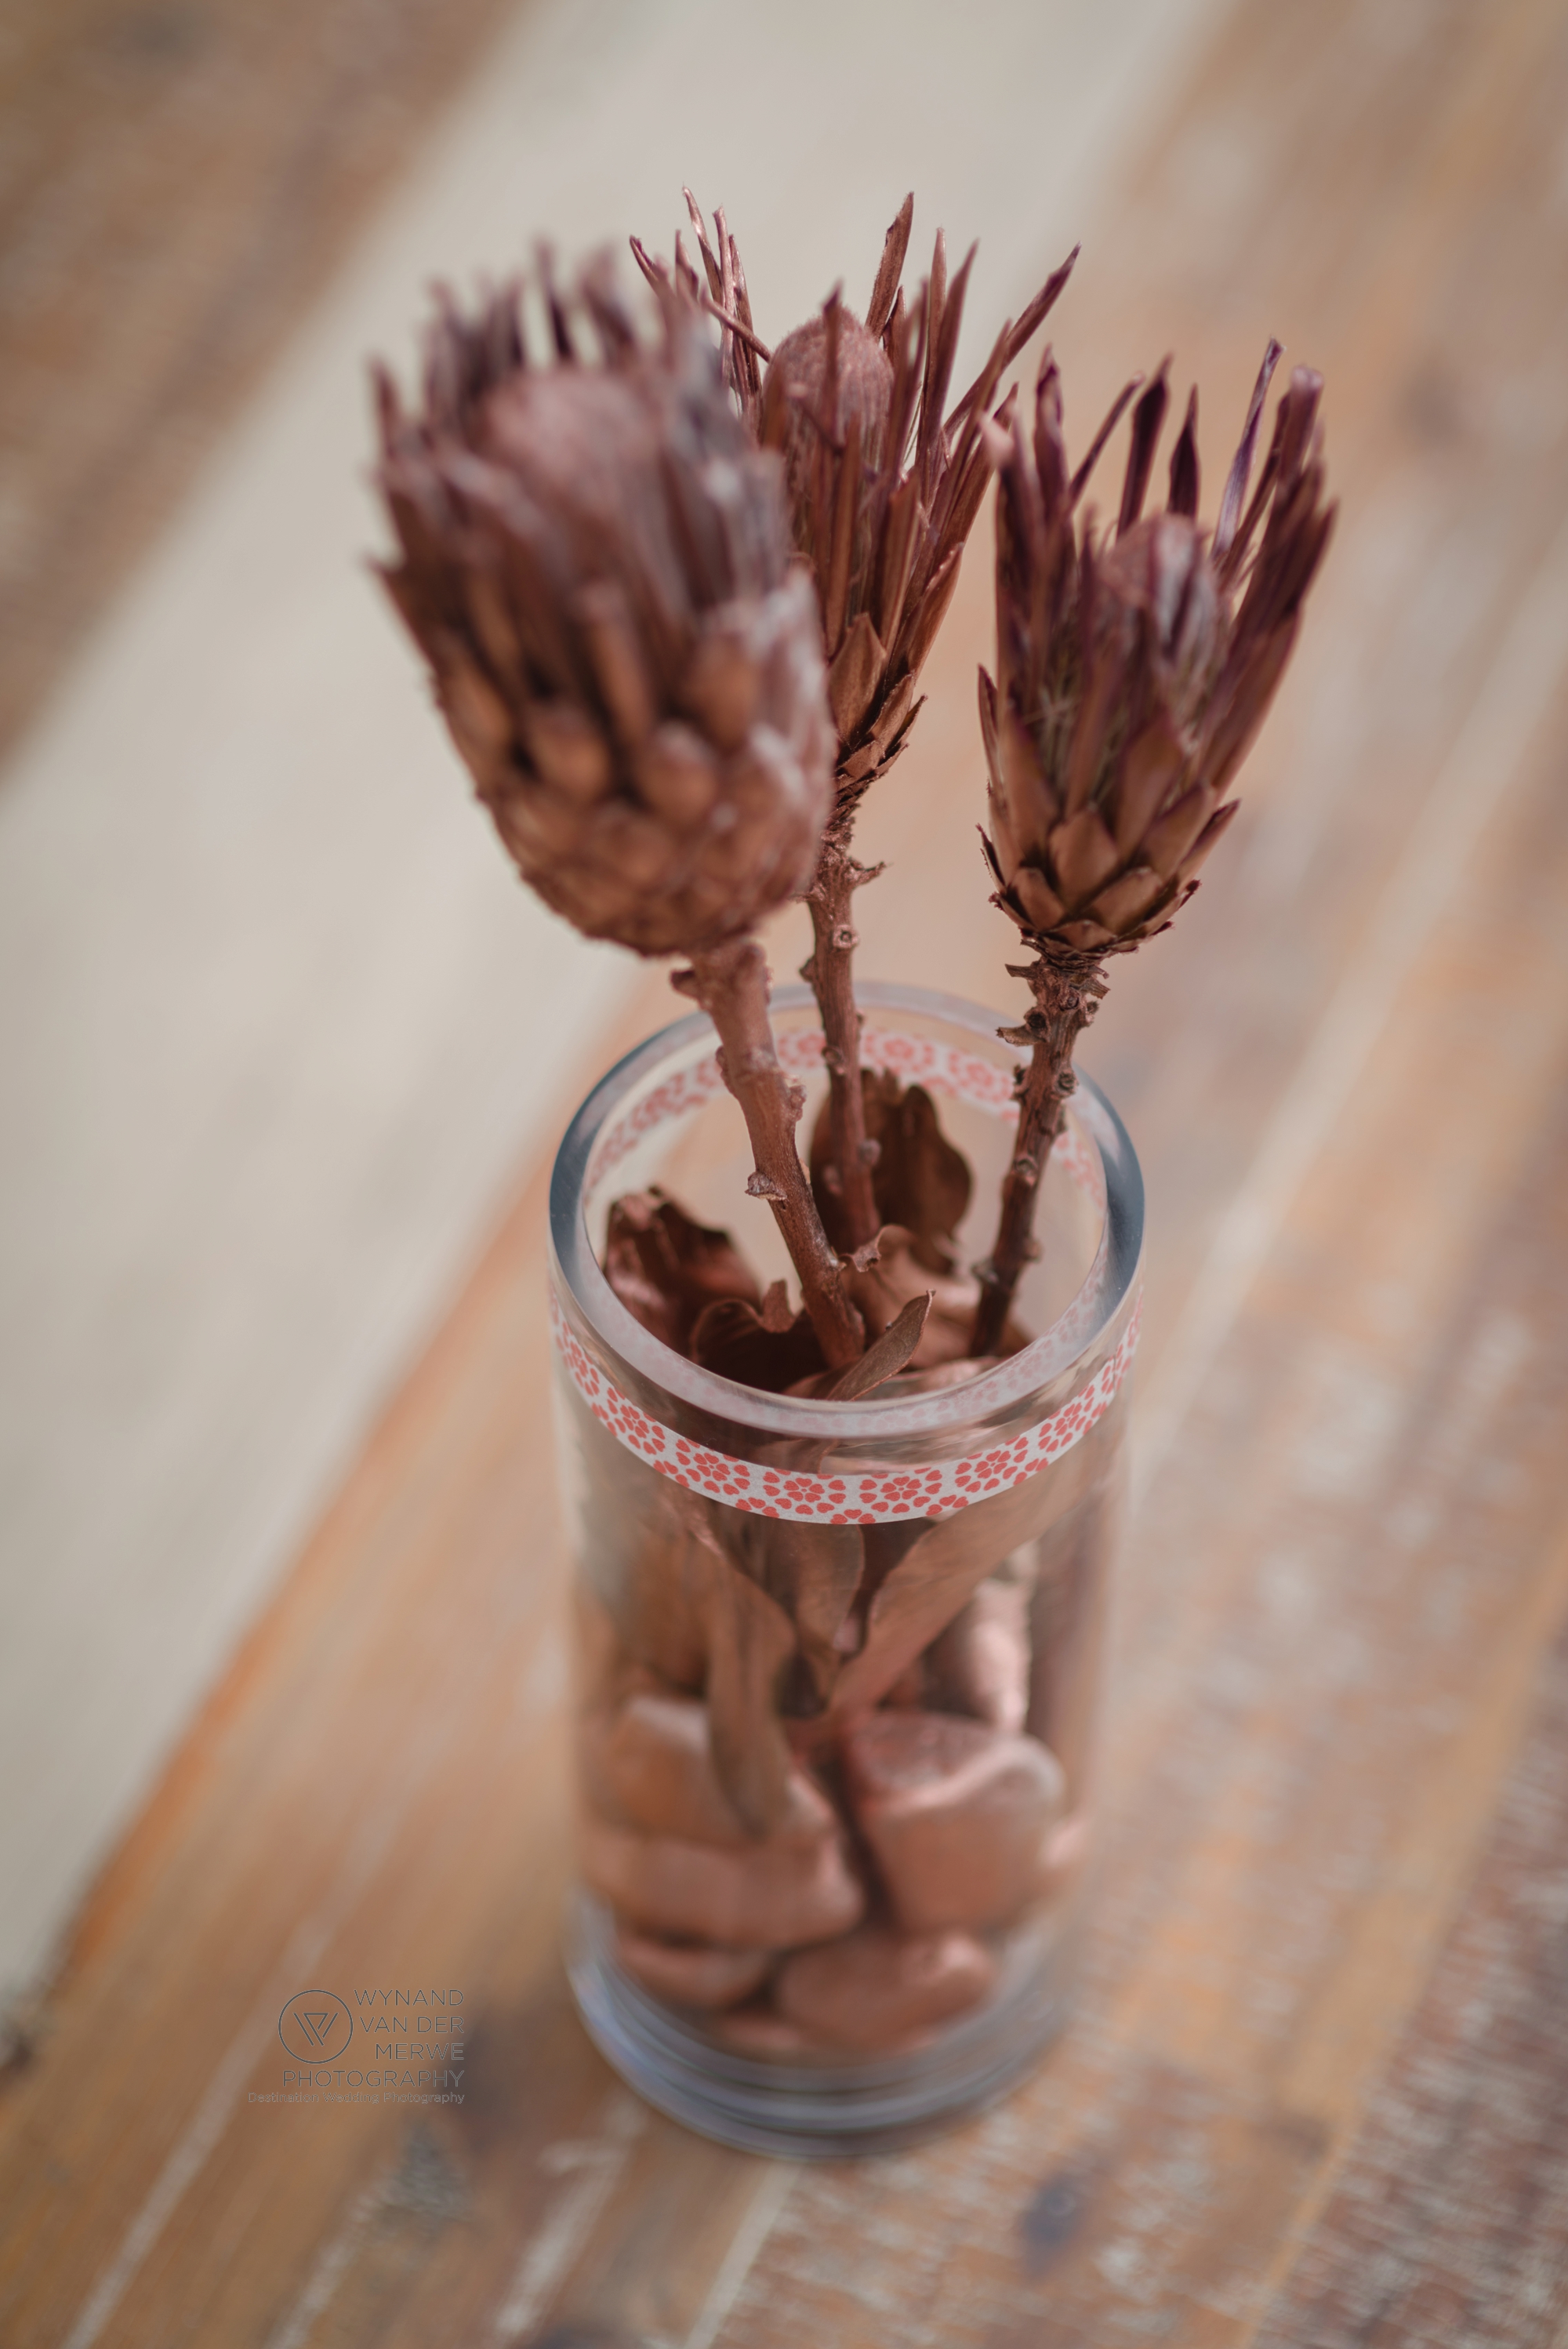
Final Product! You can style the vase as you want but I liked how it complimented the turquoise colors of our home!


My first personal post | Food Photography | Home
My first personal blog. And we made some bread and pizza! yum yum!
Love begins at home, and it is not how much we do... but how much love we put in that action. Mother Teresa
This will be my first official personal blog post and I must say I am very excited while writing this. I have been doing photography for close to 10 years, and I have done many personal projects before, but I havent shared much of it and I have been reluctant to do personal projects ever since doing wedding photography full-time. I have been busy. But I have realised that I need to make time for personal projects, because if I do not put myself in the work that I do, then I will lose interest in photography.
I love FOOD, TRAVEL and PEOPLE (and their stories), and I have found that weddings have elements of those themes but not a focus of those themes...and weddings pay well and the other themes...not so much. Honestly it does. So I have been focussing on weddings because I really enjoy weddings, but it was those underlying elements that has been pushing me to do what I do. The street photography from traveling the globe, the people that I meet and whom I get to capture while traveling...and the stories I get to tell from the streets...that is what has fueled my passion for wedding photography. I am also a passionate follower of Jesus, so weddings are very important to me, because weddings were important to Him. I love the food from weddings, and with some weddings we get to eat super fancy meals. And obviously weddings are about people, so I get to photograph people...which I love doing.
Here's my bucket list:
- I have always wanted to work for National Geographic as a photographer (not sure if I want that lifestyle, but I have envied those photographers for many years for the work they do, but they seldom share the effort they go through in achieving some of those amazing photographs)
- I want to do commercial Food Photography one day, and also photography for Lodges and Hotels, which will allow me to travel more.
So enough about me for now.
Here is my first attempt at Food Photography. Today I went to buy some groceries at the store, and I walked past the bread bakery area and when I saw the bread dough I thought my son would enjoy to make food together with my wife Juanita. And he did.
We ended up making bread rolls and a pizza, and my son played with the left-over dough, rolling it and slamming it with his fists. What fun!
Recipe for the bread rolls:
We used ready-made bread dough from the grocer. Roll out 50g balls and put it in a pan. Season the bread rolls with a dash of salt. Oven bake at 200C for 10-12 min.

Simple setup. I held my Nikon 750D with Sigma 35mm f1.4 ART in my hand, with my Nikon SB-910 flash firing using Phottix Strato II trigger and receiver set. 1/200s f2.2
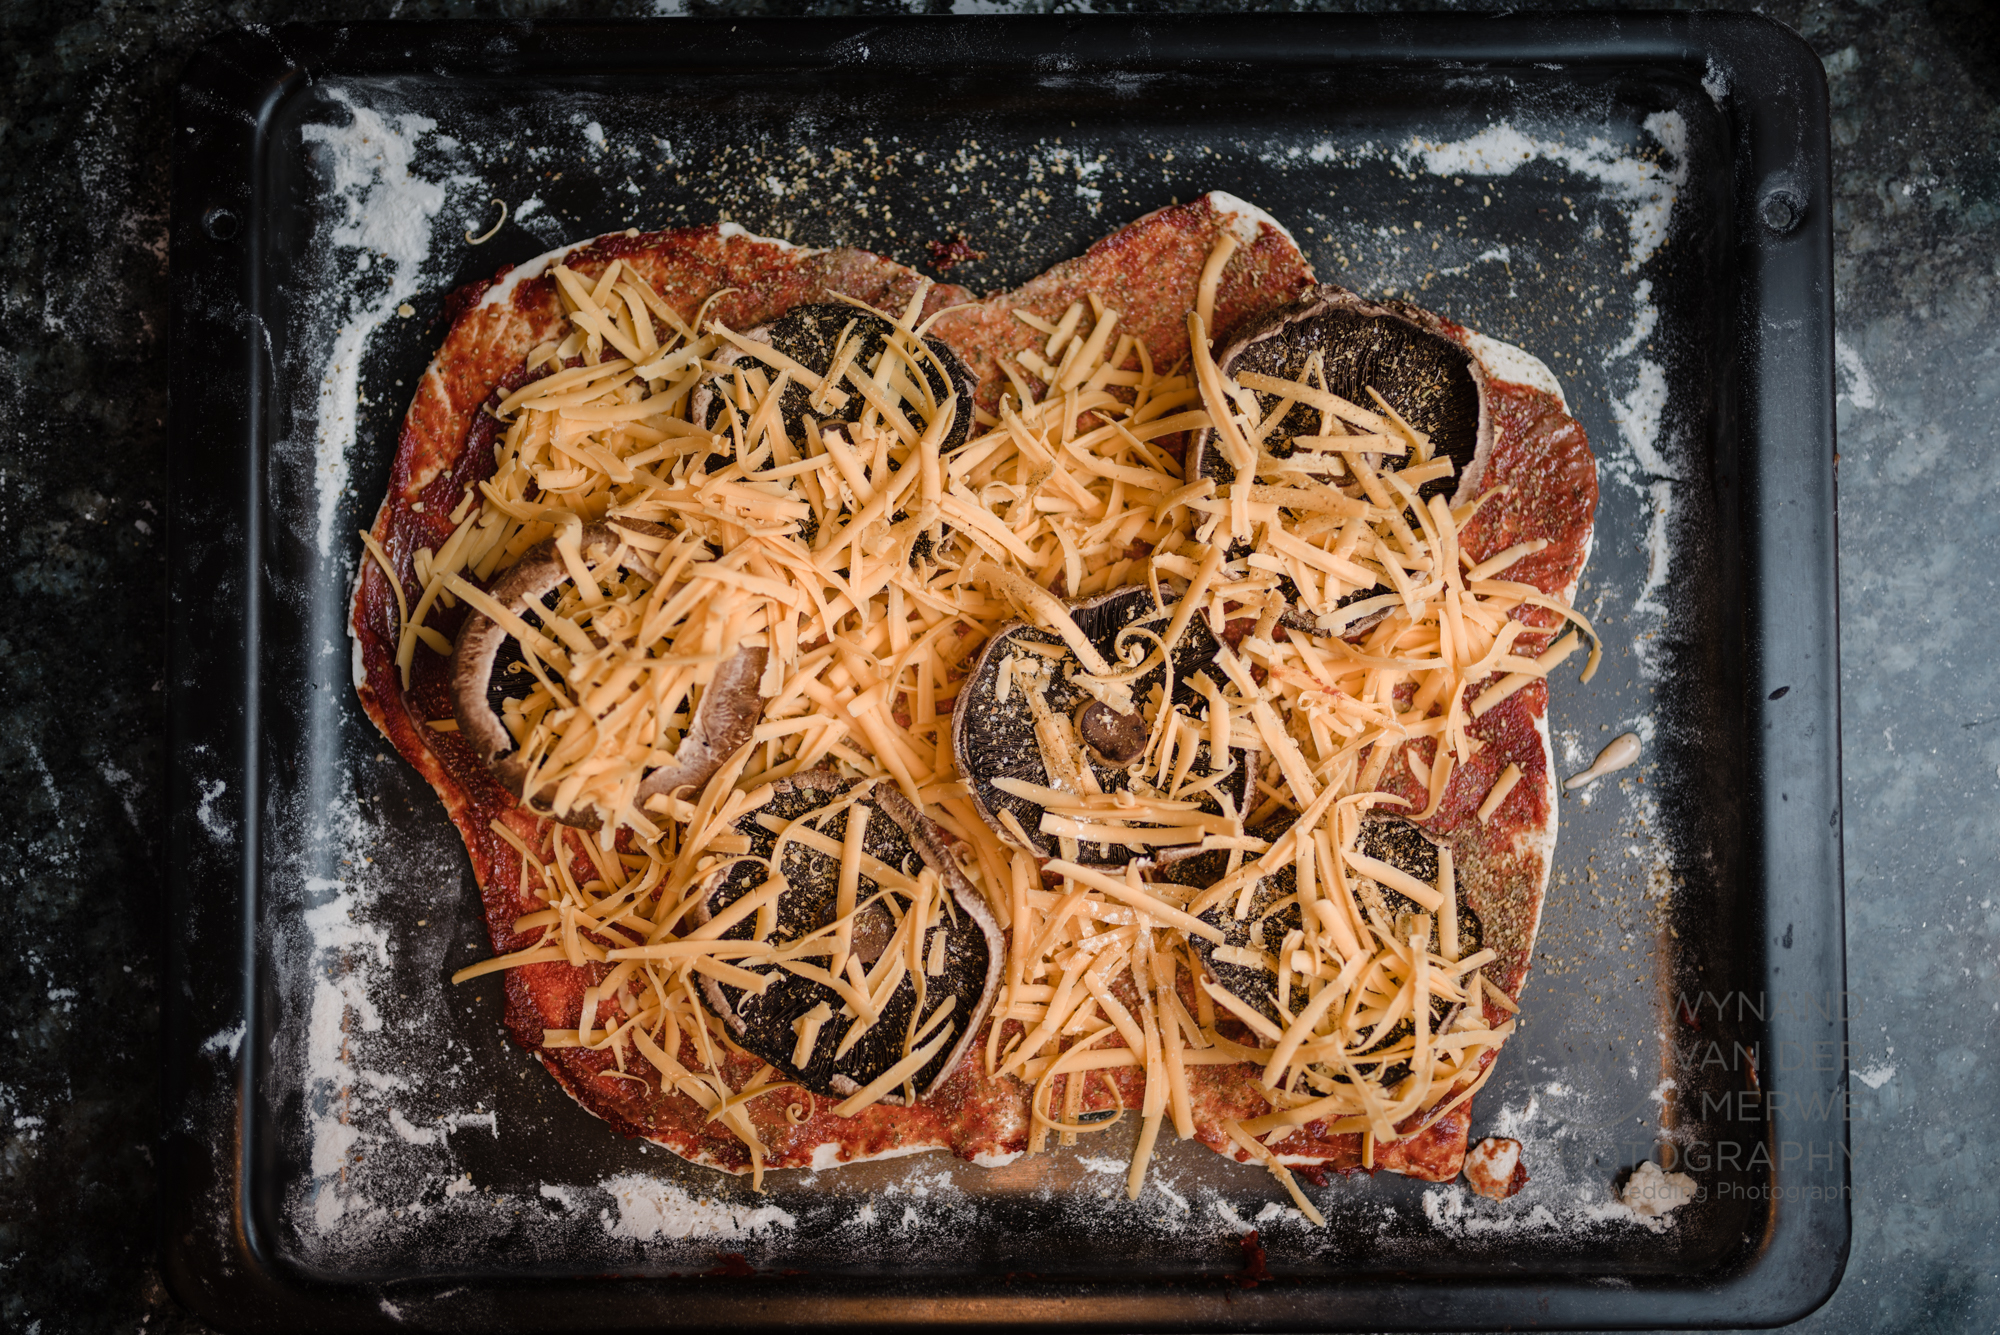
Recipe for home-made pizza:
Ready-made bread dough: 100g (I used some of the bread dough my son played with)
Raw flour: 50g
Tomato paste: 5g packet
Large Black Mushrooms
Ina Paarman's Garlic and Herb spices
Cheddar cheese: 50g
How to?
Preheat the oven to 220C.
Pour some flour on the kitchen top on the kitchen top to prevent the dough to stick to your hands and to the rolling pin.
Prepare the pizza base by taking the ready-made dough, knead it a bit with your hands and eventually rolling it as thin as possible on the kitchen top.
Then, take the tomato paste and spread it evenly with a spoon on the base until all of the base has been covered.
Put the large mushrooms on the base and spice the pizza with some of Ina Paarman's spices and cover with cheese.
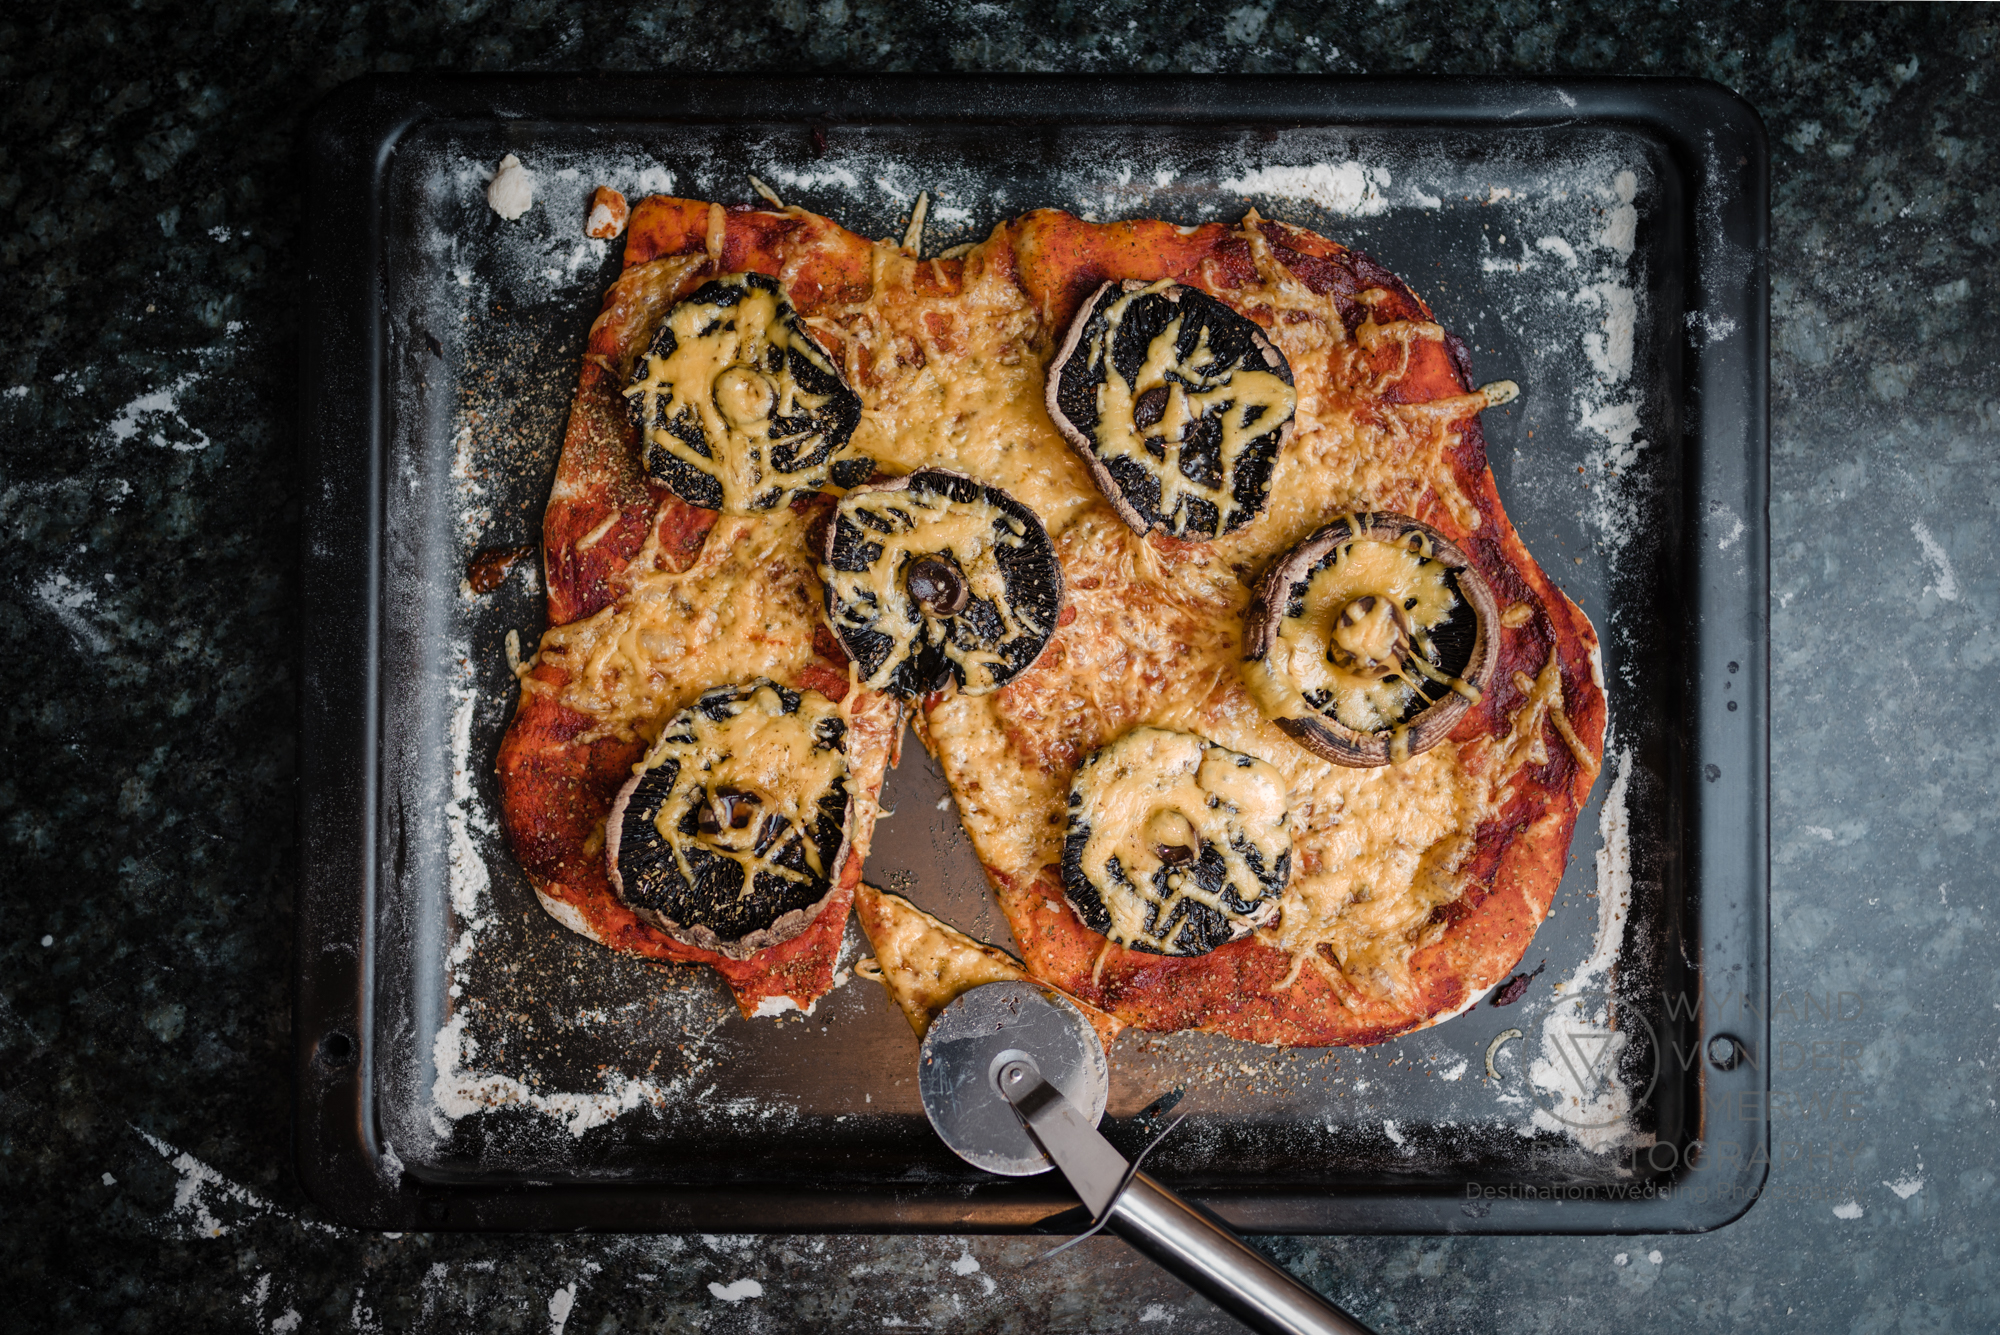
Put in the oven at 220C for 10-15min until the base has firmed up, and the mushroom and the base has been cooked.
Cut into bite pieces and enjoy!